Add your feed to SetSticker.com! Promote your sites and attract more customers. It costs only 100 EUROS per YEAR.
Pleasant surprises on every page! Discover new articles, displayed randomly throughout the site. Interesting content, always a click away
Flavor Bible
Flavors from around the globeThai Curry Chicken Soup – Great Way To Use Leftover Rotisserie! 9 Nov 2024, 4:28 am
Jump to RecipeLet’s take a minute to acknowledge something – we’ve been away for a minute. Life comes hard and fast sometimes and between a few life circumstances, Google making some changes that slashed our traffic for awhile, and some other factors, we took a break. It’s not something we ever see ourselves abandoning, but sometimes a hiatus is necessary. Now, with all that boring stuff out of the way… holy crap this is a good soup… Thai Chicken Curry Soup.
Like plenty of other recipes on our site this was a complete riff. There was a craving for something Thai curry-ish/coconut-y (yes, we make up words here), in the form of a soup, and likely to involve chicken. Challenge accepted. Challenge defeated.
Saddle up, because we’re going to take you for a delicious ride. Without further adieu, let’s get to it!
Preparation: Thai Curry Chicken Soup
As always, get those ingredients together, get them prepped, and life becomes much simpler as we layer in flavor and goodness. We’re going to build this Thai Curry Chicken Soup in five easy steps: building a base, cooking the noodles (separately, you’ll see), first wave, second wave, and serve/garnish. It’s going to be relatively simple, yet wonderful. Trust us.
Start the Soup Base
- Saute the “soup base” ingredients in coconut oil for 7 – 10 minutes, or until softening, stirring occasionally
- Stir in the garlic, and saute for another 1 – 2 minutes, stirring occasionally (avoid burning the garlic)
Make the Rice Noodles
- While the soup base is cooking, boil enough water to cover a couple of cups worth of rice noodles (desired amount doesn’t need to be precise to the recipe). Cook to about 2/3 of what the package instructions direct (see recipe notes).
- Drain in a colander and rinse with cold water (to stop cooking). Set aside until the end.
Add in the First Wave
- Add in the “First Wave of Add-Ins”, cook another 6 – 7 minutes, stirring occasionally
Build the Rest of the Soup (Second Wave)
- Add the remaining ingredients in the order listed under “Building the Soup”. Turn the heat up to medium-high. Cook for another 4 – 5 minutes, stirring occasionally.
- Taste and adjust. See note on salt. If more curry paste is required to suit your needs, add it now.

Garnish and Serve
- In each soup bowl, layer your desired amount of noodles along with some fresh cilantro. Ladle in soup over the noodles. Garnish with sliced jalapenos and additional fresh cilantro, if desired. Serve immediately.

Equipment: Thai Curry Chicken Soup
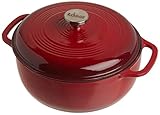
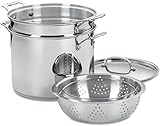
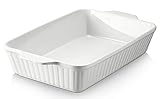
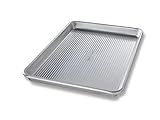
For Thai Curry Chicken Soup you’ll need some basic culinary staples (affiliate linked images below): A sauce pan (for the rice noodles), a Dutch oven (for the soup), a chef knife, cutting board, a colander, and a good wooden spoon or two.


If you liked that, try this…
- Poached Thai Coconut Curry Lingcod
- Poached Thai Coconut Curry Swordfish
- Thai Curry Beet and Carrot Soup
- Thai Coconut Red Curry Chicken
- Asian Fusion Peanut Chicken Stir Fry
- Chicken and Risoni Soup
- Easy Rotisserie Chicken Tikka Masala
- Shortcut Chicken and Dumplings
Help Us Grow!
Once you finish basking in the glory of another incredible dish we would love for you to rate and comment below. Tell us how you added your own spin to this recipe. Maybe even give us a share on social media with #flavorbible. You can also follow us on our social pages by clicking the links at the bottom of the page. Be sure to check back regularly as we continue on our global culinary journey!

Thai Curry Chicken Soup
Equipment
- Dutch Oven or pot
Ingredients
Soup Base
- 2 – 3 tbsp. Coconut Oil
- 1 Carrot, Med/Lg, diced fine
- ½ Medium Sweet Onion, diced fine
- ⅓ Red Bell Pepper, diced fine
- ½ Jalapeno Pepper, diced fine
- 2 tbsp. Garlic, diced or minced
- 3 Green Onions, sliced, white parts White parts for base, green parts for garnish
Rice Noodles (Cooked Separately – See Notes)
- 2 cups Rice Noodles
- Water To boil
First Wave of Add-Ins
- 1 Carrot Can slice into coins, julienne, rough chop etc. User's choice.
- ¾ cup Red Bell Pepper, chopped The rest of the bell pepper from the base.
- 4 oz. Mushrooms, chopped We used medley, including shiitake, baby bella, and oyster. User's choice.
- ¾ cup Sugar Snaps
Building the Soup – Remaining Ingredients
- 4 cups Stock, Chicken or Vegetable We used "Better than Bouillon", half and half mixture
- ¼ cup Sliced Water Chestnuts, Halved
- 4 – 5 tbsp. Red Curry Paste Adjust to taste
- 2 cups Rotisserie Chicken Meat, pulled We used two breasts
- 2 cans Coconut Milk, approx 13.5 oz. each Can do 1 can, if desired. See notes.
- 3 cups Fresh Spinach
Garnishes
- ⅓ cup Fresh Cilantro, chopped Half for soup, half for garnishes
- ½ – 1 Jalapeno, Thinly Sliced
- 3 Green Onions, sliced Green parts from the soup base onions
Instructions
Start the Soup Base
- Saute the "soup base" ingredients in coconut oil for 7 – 10 minutes, or until softening, stirring occasionally
- Stir in the garlic, and saute for another 1 – 2 minutes, stirring occasionally (avoid burning the garlic)
Cook the Rice Noodles
- While the soup base is cooking, boil enough water to cover a couple of cups worth of rice noodles (desired amount doesn't need to be precise to the recipe). Cook to about 2/3 of what the package instructions direct (see notes).
- Drain in a colander and rinse with cold water (to stop cooking). Set aside until the end.
Add in First Wave
- Add in the "First Wave of Add-Ins", cook another 6 – 7 minutes, stirring occasionally

Build the Rest of the Soup
- Add the remaining ingredients in the order listed under "Building the Soup". Turn the heat up to medium-high. Cook for another 4 – 5 minutes, stirring occasionally.

- Taste and adjust. See note on salt. If more curry paste is required to suit your needs, add it now.
Garnish and Serve
- In each soup bowl, layer your desired amount of noodles along with some fresh cilantro. Ladle in soup over the noodles. Garnish with sliced jalapenos and additional fresh cilantro, if desired. Serve immediately.
Notes
The post Thai Curry Chicken Soup – Great Way To Use Leftover Rotisserie! appeared first on Flavor Bible.
Cajun Shrimp and Grits (New Orleans Style) 22 Mar 2024, 3:51 pm
Jump to RecipeShrimp and grits seem to be popping up on brunch menus all across the country. This classic Southern dish combines the flavors of the coast (Atlantic or Gulf) with the quintessential Southern food staple – grits. There are countless ways in which you might find this dish prepared, the OG recipe is typically credited to South Carolina/Georgia with some of the best coming from the food Mecca that is Charleston. But, another common version that many folks seem to be pining for is the New Orleans style Cajun Shrimp and Grits – and that’s exactly what we’re bringing you today.
Well… kind of. Ours is a bit on the hybrid side with some elements of the classic Lowcountry but featuring Cajun spices and a Holy Trinity base. Follow along because this one is worth savoring every bite.
One more note before we show you how the magic happens – we used Bradley Country Store grits. We highly recommend for the ultimate experience. However, if you’re short on time you can sub readily available instant grits in a pinch.
Preparation: Cajun Shrimp and Grits
Disclosure: This post contains affiliate links. Flavor Bible is a participant in the Amazon Services LLC Associates Program, an affiliate advertising program designed to provide a means for us to earn fees by linking to Amazon.com and affiliated sites at no cost to you. Thanks for your support.
As always, gather up your ingredients out front to make your life easier in the kitchen. There are two sets of ingredients for – the “magic” (as we’ll call it) and the ingredients to prepare the grits themselves. Both are pictured below.


If using a coarse grit such as our Bradley Country Store grits that we so highly recommend, then you’ll want to get those started right away as they’ll take 45 minutes to an hour to reach the desired texture. If using a shortcut like Instant Grits then you can wait until the end to prepare according to the package directions.
Start by seasoning the shrimp generously. In this recipe we use a blend of Old Bay and Slap Ya Mama (affiliate links). Set aside.
In a large saute pan, cook the bacon over low/medium heat for 5 – 7 minutes or until desired crispness.

Add the seasoned shrimp and cook for another 1 – 3 minutes, flipping shrimp halfway through. Remove contents to a bowl but do not clean the pan.

Add the remaining oil or butter to the same pan. Add the onion, bell peppers, celery, and white parts of the green onion to the pan. Saute 4 – 5 minutes, or until mixture begins to soften. Add the garlic and cook for just 1 – 2 minutes more.

Slowly mix in the flour and stir for approximately 1 minute. Mix in the seafood stock, Worcestershire sauce, and hot sauce. Simmer uncovered for 5 – 7 minutes.

Add the shrimp and bacon (along with any drippings from the bowl) back to the pan. Let simmer for another 2 – 3 minutes as shrimp come up to temperature.

Serve over the finished grits and top with the remaining tops of the scallions. Congratulations, you just made a delightful version of New Orleans Style Cajun Shrimp and Grits!

Equipment: Cajun Shrimp and Grits
For Cajun Shrimp and Grits you’ll need some basic culinary staples (affiliate links below): A sauce pan (for the grits), a Saute pan (for “the magic”), a chef knife, cutting board, and a good wooden spoon or two.


If you liked that, try this…
- Cajun 16-Bean Soup
- Seafood Gumbo (w/ Trader Joe’s Seafood Blend)
- Shrimp and Sausage Jambalaya
- Huevos Rancheros 2.0
- Southern Lox Toast
- Simple Mexican Frittata
- Grilled Breakfast Pizza
Help Us Grow!
Once you finish basking in the glory of another incredible dish we would love for you to rate and comment below. Tell us how you added your own spin to this recipe. Maybe even give us a share on social media with #flavorbible. You can also follow us on our social pages by clicking the links at the bottom of the page. Be sure to check back regularly as we continue on our global culinary journey!

Cajun Shrimp and Grits
Equipment
- Saute Pan
- Sauce Pan
Ingredients
The Grits
- 2 cups Seafood Stock See recipe note 1.
- 4 cups Whole Milk
- 1½ cups Stone Ground Grits See recipe note 2.
- 1 cup Sharp Cheddar Cheese, freshly grated
The Shrimp and the Rest of the Good Stuff
- ¼ lb. Bacon, diced 4 – 6 slices, depending on thickness
- 3 – 4 tbsp. Extra Virgin Olive Oil or Butter, divided Half to toss the shrimp before seasoning and half for the pan when sauteeing
- 2 lbs. XL Shrimp We used in the neighborhood of 16/20 count. See recipe notes 3.
- 2 tsp. Old Bay Seasoning, or similar
- 4 tsp. Slap Ya Mama Seasoning, or similar
- 1 Sweet Onion, diced Small to Medium
- ½ Green Bell Pepper, diced Small to Medium
- ½ Red Bell Pepper, diced Small to Medium
- 2 – 3 Celery Stalks, diced
- 2 – 3 Green Onions, diced Tops saved for garnish
- 3 cloves Garlic, minced
- ¼ cup All-Purpose Flour
- 2 cups Seafood Stock See recipe note 1
- 1 tbsp. Worcestershire Sauce
- Hot Sauce, Salt, and Pepper to taste
Instructions
Season the Shrimp
- In a mixing bowl, toss the shrimp in olive oil, season with the Old Bay/Slap Ya Mama blend and mix well. Set aside.
Get the Grits On
- If using stone ground grits, follow this step. If using quick grits see recipe note 2. Rinse grits and remove any foreign particles before proceeding.
- Bring the liquid to a gentle boil, add the grits, reduce burner temperature to low and simmer 45 minutes to 1 hour until desired texture is reached. Mix in cheese when the grits are finished.

Make the Magic Happen
- In a large saute pan, cook the bacon over low/medium heat for 5 – 7 minutes or until desired crispness.

- Add the seasoned shrimp and cook for another 1 – 3 minutes, flipping shrimp halfway through. Remove contents to a bowl but do not clean the pan.

- Add remaining oil or butter to the same pan. Add the onion, bell peppers, celery, and white parts of the green onion to the pan. Saute 4 – 5 minutes, or until mixture begins to soften. Add the garlic and cook for just 1 – 2 minutes more.

- Slowly mix in the flour and stir for approximately 1 minute. Mix in the seafood stock, Worcestershire sauce, and hot sauce. Simmer uncovered for 5 – 7 minutes.

- Add the shrimp and bacon (along with any drippings from the bowl) back to the pan. Let simmer for another 2 – 3 minutes as shrimp come up to temperature.

- Serve over grits, top with the remaining tops of scallions.

Notes
The post Cajun Shrimp and Grits (New Orleans Style) appeared first on Flavor Bible.
Classic French Onion Soup 14 Dec 2023, 6:29 pm
Jump to RecipeWe absolutely love a Classic French Onion Soup. We’re just coming out of the gates with that statement. This one has been in the queue for quite some time. We always keep a supply of onions on hand since they end up in nearly everything we make. But, the moment had to be right. Every once in awhile you get a few onions from the grocery store and they don’t have quite the shelf life you typically see. So, the moment we were waiting for was exactly that – a bunch of onions starting to turn and an urgent need to use before they went bad. When life (or the market) gives you onions (that turn quickly), make this Classic French Onion Soup. We’re pretty certain that’s how the expression goes 
One special note about this version, it’s classic in all the ways you might expect but we did add meat to it instead of just a beef stock. This is completely optional but it definitely takes it up a notch in our opinion. Once upon a time yours truly worked at a restaurant that used short rib meat in their French Onion Soup and since then we’ve never turned back. We encourage you to give it a shot!
How to Make Classic French Onion Soup
Since we’re making Classic French Onion Soup we’ll do what we always do and encourage you to gather up your ingredients out front and prep away – or as the French say, “mise en place”.

First we’ll brown the beef. Heat the oil in a Dutch oven over medium heat. When the pan is hot brown the beef on all sides, 4 – 5 minutes. Remove and set aside in a bowl.

Deglaze the pan with a small amount of broth or red wine, scraping any browned bits from the bottom. Melt the butter and get the onions cooking, stirring occasionally, for 4 – 6 minutes, or until beginning to slightly soften.

Add the sugar and cook, stirring occasionally, for 25 – 30 minutes. This should be enough time for the onions to sufficiently caramelize which gives the soup its character.

Deglaze the pot once again with the remaining wine, scraping any bits from the bottom. When the wine evaporates add the thyme, stock, return the stew beef, and season with salt and pepper to taste. Bring to a boil and simmer covered for 45 minutes to 1 hour, or until beef is tender. Ladle into soup crocks.

Top the soup crocks with baguette slices and cheese. Place in the oven on broil until cheese is melted. Carefully remove and serve.

You may want to let it cool for a few minutes before diving right in. Burning your tastebuds will really detract from the amazing flavors you’ve been waiting to experience since you started slicing that first onion. The flavors in this Classic French Onion Soup are to die for and we think you’ll be adding this one to your rotation!
Equipment: Classic French Onion Soup
Disclosure: This post contains affiliate links. Flavor Bible is a participant in the Amazon Services LLC Associates Program, an affiliate advertising program designed to provide a means for us to earn fees by linking to Amazon.com and affiliated sites at no cost to you. Thanks for your support.
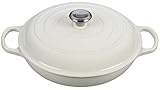
Basic kitchen essentials are all that are required for this Classic French Onion Soup. Our favorite cooking vessel – our trust Dutch Oven – is used in this one. Our Dutch Oven and this French Onion Soup feel like they were made for one another. If you’re in the market for some new kitchen items here are some recommendations from your friends at Flavor Bible (affiliate links):


If you liked that, try this…
- Cabbage Soup #4 (w/ Stew Beef)
- Split Pea Soup w/ Ham Bone
- Cabbage Soup #3 (w/ Pork Shoulder and Bacon)
- Cajun 16-Bean Soup (w/ Smoked Sausage)
- Kinda Sorta Hungarian Mushroom Soup
- Shiitake Miso Soup
- Ham and White Bean Soup
Help Us Grow!
Once you finish basking in the glory of another incredible dish we would love for you to rate and comment below. Tell us how you added your own spin to this recipe. Maybe even give us a share on social media with #flavorbible. You can also follow us on our social pages by clicking the links at the bottom of the page. Be sure to check back regularly as we continue on our global culinary journey!

Classic French Onion Soup
Equipment
- Dutch Oven
Ingredients
The Beef
- 1 – 2 tbsp. Extra Virgin Olive Oil
- 1 – 1.5 lbs. Stew Beef, cubed We used a beef shank that we trimmed down. We also threw the bone in the soup.
- Salt and Pepper To season the beef
The Main Part of the Soup
- 2 tbsp. Unsalted Butter
- 4 Sweet Onions, sliced Medium to Large. Sliced ⅓" or more thick.
- 2 tsp. White Sugar Not an exact science.
- ¼ cup Dry Red Wine Can use cooking wine
- 6 – 8 cups Beef Stock or Broth We used Better than Bouillon. Adjust liquid to desired broth to onion ratio.
- 1 tsp. Dried Thyme
- 2 tsp. Worcestershire Sauce
- 1 – 2 Bay Leaves
- Salt and Pepper, to taste We didn't add salt b/c the Better than Bouillon has a lot in it already.
The Topping
- 1 Baguette, sliced ½" thick or so Depending on diameter of baguette you may need more than one slice per bowl.
- 2 cups Gruyere or Gruyere/Swiss Blend, grated or shredded We used a Swiss/Gruyere blend.
Instructions
- Heat the oil in a Dutch oven over medium heat. When the pan is hot brown the beef on all sides, 4 – 5 minutes. Remove and set aside in a bowl.

- Deglaze the pan with a small amount of broth or red wine, scraping any browned bits from the bottom. Melt the butter and get the onions cooking, stirring occasionally, for 4 – 6 minutes, or until beginning to slightly soften.

- Add the sugar and cook, stirring occasionally, for 25 – 30 minutes.

- Deglaze the pot once again with the remaining wine scraping any bits from the bottom. When the wine evaporates add the thyme, stock, return the beef, and season with salt and pepper to taste. Bring to a boil and simmer covered for 45 minutes to 1 hour, or until beef is tender. Ladle into soup crocks.

- Place in the oven on broil until cheese is melted. Carefully remove and serve.

The post Classic French Onion Soup appeared first on Flavor Bible.
Rigatoni alla Puttanesca 6 Dec 2023, 6:50 pm
Jump to RecipeWe’ve been waiting to make this one for quite some time. Pasta alla Puttanesca – or Rigatoni alla Puttanesca in our case – is the classic Southern Italian dish with a questionable (if not offensive to some) name. Learn more about that here. Whether the history is rooted in fact or folklore doesn’t matter to us and neither does the pasta that you choose. We chose rigatoni because we love the way it eats up sauce and makes it easy to gather all of the flavors in one bite. Penne, bucatini, linguini, or spaghetti make great alternatives so use whatever you have on hand or whatever your heart desires. The bottom line is that this is an umami packed dish where the tomatoes tend to counteract the flavors brought in by the anchovies, capers, and olives.
Speaking of olives, we used Castelvetrano olives because we love their meatiness and they play well in this preparation. Gaeta, Kalamata, or other similar olives are probably a bit more traditional but alas we take creative liberties at times. Such is the beauty of cooking. If you’re looking for a different flavor profile than what you typically see – particularly in Italian restaurants in America – then we think this is a great one to try! Let’s get to it.
How to Make Rigatoni alla Puttanesca
This dish is quick enough for a weeknight meal as it only takes 25 minutes from prep to serving. With that said you’ll want to gather up the ingredients out front and have them prepped according to the recipe card below.

The first thing you’ll want to do after prepping is to get the pasta water seasoned with a generous amount of salt and onto the stove. Cook the pasta according to the instructions while preparing the sauce, reserving a cup of the salted pasta water for the end.
Meanwhile, heat the olive oil in a saute pan over low/medium heat. Add the garlic, anchovies, and red pepper flakes, stirring occasionally until the garlic begins to take on color and the anchovies are melting, about 5 minutes. Avoid burning the garlic.

Add the capers, ¼ of the parsley, and the olives. Stir to combine and cook for another minute.

Add the tomatoes and bring to a gentle simmer, stirring occasionally.

When the pasta is just under al dente add to the saute pan. Add a few tablespoons of water and adjust heat to medium. Cook for another 2 – 3 minutes, stirring occasionally, until pasta is al dente.

Season with a small amount of black pepper and ½ of the remaining parsley, stirring to combine. Serve in bowls, garnishing with the remaining parsley. How easy, quick, and delicious was that? Throw this one into your “I’m looking for something different” rotation.

Equipment: Rigatoni alla Puttanesca
Disclosure: This post contains affiliate links. Flavor Bible is a participant in the Amazon Services LLC Associates Program, an affiliate advertising program designed to provide a means for us to earn fees by linking to Amazon.com and affiliated sites at no cost to you. Thanks for your support.
For this Rigatoni alla Puttanesca recipe you will need just the basics: a saute pan, a pot for the pasta, and basic kitchen handhelds for cutting, stirring, and serving. If you’re in the market for some fresh cooking supplies check these recommendations out from your friends at FB (affiliate links):

If you liked that, try this…
- Lamb and Turnip Ragu (another “something different”)
- Fettuccini Bolognese (classic hearty sauce)
- Pizza Margherita (For the pizza lover)
- Beet Green Pesto Gnocchi (another “something different”)
- Scallops Florentine over Pappardelle (for the seafood lover)
- Rigatoni San Giorgio (one of our favorites!)
- Zucchini Lasagna (for those looking for an alternative to pasta)
- Asparagus Mushroom Risotto (rich, decadent risotto)
- Homemade Pomodoro Sauce (your choice of pasta)
- Easy Homemade Vodka Sauce (your choice of pasta)
- Ragu Stuffed Portabello Mushrooms (hearty decadence without the pasta)
- Spaghetti Squash Cacio e Pepe (another pasta alternative dish)
Help Us Grow!
Once you finish basking in the glory of another incredible dish we would love for you to rate and comment below. Tell us how you added your own spin to this recipe. Maybe even give us a share on social media with #flavorbible. You can also follow us on our social pages by clicking the links at the bottom of the page. Be sure to check back regularly as we continue on our global culinary journey!

Rigatoni Alla Puttanesca
Equipment
- Saute Pan
Ingredients
- 1 lb. Rigatoni, or other pasta Can use long pasta such as spaghetti as well. We used dried pasta.
- 3 – 4 tbsp. Extra Virgin Olive Oil
- 4 cloves Garlic, sliced very thin
- 1½ oz. Anchovies, drained and diced fine We used anchovies in oil from a tin. It was about ¾ of the tin.
- 1 tsp. Peperoncino flakes Or use crushed red pepper as available.
- 1 tbsp. Capers, drained and chopped
- 15 – 20 Castelvetrano Olives, pitted and halved
- 28 oz. San Marzano Tomatoes, chopped We used the full large size can.
- 1 handful Fresh Parsley, chopped
- Salt and Pepper, to taste We only used salt in the pasta water as many of the ingredients are salty and impart plenty of salt flavor to the dish.
Instructions
Prep the Ingredients
- Prep the ingredients out front.

Get the Pasta Going
- Generously salt a pot of water and heat to a boil. Cook pasta according to the package instructions but remove a minute or so before fully cooked. Reserve a cup of salted pasta water.
Make the Sauce
- Heat olive oil in a saute pan over low/medium heat. Add the garlic, anchovies, and red pepper flakes, stirring occasionally until the garlic begins to take on color and the anchovies are melting, about 5 minutes. Avoid burning the garlic.

- Add the capers, ¼ of the parsley, and the olives. Stir to combine and cook for another minute.

- Add the tomatoes and bring to a gentle simmer, stirring occasionally.

Combine the Pasta and Sauce
- When the pasta is just under al dente add to the saute pan. Add a few tablespoons of water and adjust heat to medium. Cook for another 2 – 3 minutes, stirring occasionally, until pasta is al dente.

- Season with a small amount of black pepper and ½ of the remaining parsley, stirring to combine. Serve in bowls, garnishing with the remaining parsley.

The post Rigatoni alla Puttanesca appeared first on Flavor Bible.
Asian Fusion Peanut Chicken Stir Fry 9 Nov 2023, 4:21 pm
Jump to RecipeWe’re certain most of you, if not all of you, have been through a move. We relocated back to our home state of Florida recently. Besides the packing, purging, and getting the house ready to sell one often overlooked item on the “to do list” is using up as much food as possible to avoid waste or having to transport to your new place of residence. Well, if you’ve been around this blog before then you know we love the challenge of searching the pantry, spice cabinet, fridge and freezer for the perfect way to use up ingredients – and that’s exactly what we did with this Asian Fusion Peanut Chicken Stir Fry.
Three things we like about this recipe: it makes use of readily available ingredients, it comes together in just over a half an hour making it a perfect weeknight meal solution, and it’s so tasty you will want to add it to your regular rotation. Follow along and we’ll show you how to make this delightful creation in less time than you can get a Door Dash delivery!
How to Make Asian Fusion Peanut Chicken Stir Fry
As always, gather up and prep the ingredients out front for maximum efficiency in the kitchen. The image below has the sauce already made. Simply take the ingredients from the recipe card below, place in a food processor and combine until smooth.

Once the sauce is prepared and the other ingredients are prepped, heat the oil over medium-high heat. When the oil is hot add in the bell peppers and white parts of the green onions. Stir frequently and cook for 3 – 4 minutes.
Add the mushrooms and cook for another 3 – 4 minutes, again stirring frequently.
Reduce the heat to medium and add the pulled chicken. Cook for another 2 – 3 minutes, stirring frequently. Since we used rotisserie chicken the chicken is already cooked and therefore this step is continuing to combine the flavors while bringing the chicken up to temperature with the rest of the pan.

Mix in the sauce. Gently bring to a boil, stirring occasionally. Add in the noodles and water chestnuts. Simmer for another 7 – 8 minutes. Check noodles and stir. If soft, remove from heat. If not, add another couple of minutes. If sauce needs thickening stir in some corn starch. Alternatively, you can cook the noodles separately and add them in at the end.
Garnish with sliced green onion tops and serve in bowls. 35 minutes start to finish and you have this wonderful Peanut Chicken Stir Fry! Time for your curtain call and victory lap.

Equipment: Asian Fusion Peanut Chicken Stir Fry
Disclosure: This post contains affiliate links. Flavor Bible is a participant in the Amazon Services LLC Associates Program, an affiliate advertising program designed to provide a means for us to earn fees by linking to Amazon.com and affiliated sites at no cost to you. Thanks for your support.
For starters you will need a quality food processor, which should be a staple in any kitchen. You’ll need the usual chef knife and cutting board. Finally you will want a wok, Dutch oven, or deep skillet for the main event. If you’re in the market, here are some recommendations from your friends at Flavor Bible (affiliate links):

If you liked that, try this…
- Asian Tuna Lettuce Wraps
- Asian Fusion Butternut Squash Soup
- Miso Glazed Salmon (with Bok Choy)
- Thai Coconut Red Curry Chicken
- Easy Rotisserie Chicken Tikka Masala
- Thai Curry Beet and Carrot Soup
Help Us Grow!
Once you finish basking in the glory of another incredible dish we would love for you to rate and comment below. Tell us how you added your own spin to this recipe. Maybe even give us a share on social media with #flavorbible. You can also follow us on our social pages by clicking the links at the bottom of the page. Be sure to check back regularly as we continue on our global culinary journey!

Asian Fusion Peanut Chicken Stir Fry
Equipment
- Food Processor
- Dutch Oven, Deep Skillet, or Wok
Ingredients
The Sauce
- 1 tbsp. Gochujang Chili Paste
- 1 tbsp. Chili Garlic Sauce
- 3 tbsp. Soy Sauce
- ¼ cup Peanut Butter
- 2 tbsp. Maple Syrup
- 2 tsp. White Miso Paste
- 1 tbsp. Rice Vinegar
- ½ tsp. Ground Ginger
- 2 cloves Garlic, peeled
- ½ cup Water
The Stir Fry
- 1 tbsp. Canola Oil, or other flavorless oil
- 1 tbsp. Sesame Oil
- ½ cup Green Onion, sliced and divided Divide green and white parts
- ½ Yellow Bell Pepper, sliced
- ½ Orange Bell Pepper, sliced
- 5 oz. Sliced Shiitake Mushrooms
- 2 – 3 cups Pulled Rotisserie Chicken or other leftover chicken
- 1 handful Stir Fry Noodles No exact measurement. Can use more or less than a "handful" to meet desired amount of noodles.
- 1 can Sliced Water Chestnuts 8 oz. can
- 2 tsp. Corn Starch (optional) to thicken, if desired
Instructions
The Sauce
- Combine all ingredients in the sauce section in a food processor. Blend until smooth.
The Stir Fry
- Heat the oil over medium-high heat. When oil is hot add in the bell peppers and white parts of the green onions. Stir frequently and cook for 3 – 4 minutes.
- Add the mushrooms and cook for another 3 – 4 minutes, again stirring frequently.
- Reduce heat to medium and add the pulled chicken. Cook for another 2 – 3 minutes, stirring frequently.
- Mix in the sauce. Gently bring to a boil, stirring occasionally. Add in the noodles and water chestnuts. Simmer for another 7 – 8 minutes. Check noodles and stir. If soft, remove from heat. If not, add another couple of minutes. If sauce needs thickening stir in some corn starch.
- Garnish with sliced green onion tops and serve in bowls.

Notes
The post Asian Fusion Peanut Chicken Stir Fry appeared first on Flavor Bible.
The Perfect Pot Roast 18 Oct 2023, 5:18 pm
Jump to RecipeI think we mention this every year about this time but we’ll say it again – we love Fall! We absolutely love when the weather starts to cool off around the country (USA). Many of our favorite recipes across Flavor Bible are hearty meals that fit just perfectly in a meal rotation during the Fall and eventually the Winter months. We don’t throw around the word “perfect” in our recipe titles simply for clicks. In fact this is the first time we’ve ever used it as part of a blog post title. That should hold some weight. Most of us have had a pot roast at some point in life. We’ve made it plenty of times over the years and it’s always good – but never perfect. Ladies and gentlemen we welcome you to THE PERFECT POT ROAST. Wait until you get a load of this…
For this recipe we used a 7-bone chuck roast. You can read more about what that is and how it compares to a regular bone-in or boneless chuck roast at the link above. Either will do for this recipe but this is what we were able to get from our local Angus farm and it couldn’t have turned out any better, hence the name Perfect Pot Roast! We want to get you straight to the good stuff so we won’t clog up this post with a bunch of meat science jargon. That’s another post for another day.
Preparation: The Perfect Pot Roast
As always gather up your ingredients out front and prep away as it makes life so much easier in the kitchen and you won’t forget that one ingredient that makes you utter a swear word

Prepare the Meat for Your Perfect Pot Roast
- Pat the meat dry. Use half the oil to coat the meat and season generously with salt and pepper on all sides. Drizzle the oil in a pan and heat on medium heat. When the pan is hot, brown the meat (see our notes) 2 – 3 minutes on each side. Remove and set aside (or in our case into the cooking vessel that will ultimately end up in the oven).
- Add the onions and cook 4 – 5 minutes, stirring occasionally, or until becoming translucent. Stir in the garlic and cook another 1 – 2 minutes, or until aromatic (don’t burn the garlic!).
- Meanwhile, preheat an oven to 275°F.
Our 7-bone chuck roast was very large, too large in fact to fit in the pan or our Dutch oven, so we had to trim it down and eventually transfer it to another vessel. If doing so, toss all of the remnants, veggies, and meat into your final cooking vessel. If able to fit in a Dutch Oven, or other similar vessel, then carry on and ignore this step.
Cook the Perfect Pot Roast
Cover the mixture and cook for two hours.

Remove from the oven. Add the carrots, celery, potatoes, and mushrooms. Cover and cook for one more hour.

Remove from the oven and ensure vegetables and meat are tender (see notes). Portion and serve.

Well, what do you think? Is this the perfect pot roast? Let us know in the comments!
Equipment: The Perfect Pot Roast
Disclosure: This post contains affiliate links. Flavor Bible is a participant in the Amazon Services LLC Associates Program, an affiliate advertising program designed to provide a means for us to earn fees by linking to Amazon.com and affiliated sites at no cost to you. Thanks for your support.
Mostly kitchen basics were used in this recipe. As noted above we ended up using to cooking vessels as opposed to one that could go from stovetop to oven due to the size and shape of our particular chuck roast. If you’re in the market for some of the items needed in this recipe here are some recommendations below (affiliate links, we also included the Dutch Oven we would have used had it fit!):

If you liked that, try this…
- Pumpkin Spiced Braised Short Ribs
- Wine Braised Lamb Shanks
- Wine Braised Veal Riblets
- Jamaican Oxtail Stew
- Classic Beef Stew
- Instant Pot Irish Osso Buco
- Cherry Apple Braised Short Ribs
- Instant Pot Short Rib Ragu
Help Us Grow!
Once you finish basking in the glory of another incredible dish we would love for you to rate and comment below. Tell us how you added your own spin to this recipe. Maybe even give us a share on social media with #flavorbible. You can also follow us on our social pages by clicking the links at the bottom of the page. Be sure to check back regularly as we continue on our global culinary journey!

The Perfect Pot Roast
Equipment
- Cast Iron Skillet See post copy

- Casserole Dish See post copy
Ingredients
The Meat and Aromatics
- 3 – 4 lbs. Bone-in Chuck Roast
- 4 tbsp. Extra Virgin Olive Oil, divided in half See recipe instructions
- Salt and Pepper, to season meat generously
- 1 Sweet Onion, roughly chopped
- 4 cloves Garlic, diced or minced
The Rest (Pre-Oven)
- 2 cups Beef Broth or Stock We used Better than Bouillon
- 2 tbsp. Tomato Paste
- ½ cup Dry Red Wine or Red Cooking Wine (which we ended up using).
- 2 – 3 sprigs Fresh Thyme
- 2 – 3 sprigs Fresh Rosemary
- 2 – 3 sprigs Fresh Sage
- 2 – 3 Dried Bay Leaves
Truly the Rest 
- 4 Carrots, roughly chopped
- 3 Celery stalks, roughly chopped
- 1.5 lbs. Potatoes, chopped to relatively uniform size We used Private Selection petite medley from Kroger. Nice variation on type and color.
- 8 oz. Cremini Mushrooms, sliced Aka Baby Bellas
Instructions
Prepare the Meat
- Pat the meat dry. Use half the oil to coat the meat and season generously with salt and pepper on all sides. Drizzle the oil in a pan and heat on medium heat. When the pan is hot, brown the meat (see our notes) 2 – 3 minutes on each side. Remove and set aside (or in our case into the cooking vessel that will ultimately end up in the oven).
- Add the onions and cook 4 – 5 minutes, stirring occasionally, or until becoming translucent. Stir in the garlic and cook another 1 – 2 minutes, or until aromatic (don't burn the garlic!).
- Meanwhile, preheat an oven to 275°F.
ONLY FOLLOW IF MOVING TO NEW VESSEL
- IF CHANGING COOKING VESSEL, toss all remnants, veggies, and meat into final cooking vessel. If using a Dutch Oven, or other similar vessel, then carry on.
Cook the Perfect Pot Roast
- Cover the mixture and cook for two hours.

- Remove. Add the carrots, celery, potatoes, and mushrooms. Cover and cook for one more hour.

- Remove from the oven and ensure vegetables and meat are tender (see notes). Portion and serve.

Notes
The post The Perfect Pot Roast appeared first on Flavor Bible.
Homemade Chicken Stock (From Leftover Rotisserie Chicken) 9 Oct 2023, 7:37 pm
Jump to RecipeI’m sure most of you out there have bought a rotisserie chicken or two at some point. They are convenient, relatively inexpensive, and make for an easy meal paired with sides or used in a recipe. In fact, we have quite a few of those recipes here on our site! But, what happens when you get to the end after using up all that tender, juicy chicken? There’s only one right answer… you make homemade chicken stock
Chicken stock is used in sauces, gravies, as the backbone for soups, and so much more. Homemade chicken stock is also so much more flavorful than the store bought stuff. It freezes and thaws incredibly well so you can make a batch and have it ready at all times instead of having to make that emergency trip to the local supermarket. If you’ve ever wondered how to make a homemade chicken stock then you’ve come to the right place.
We have one last tip before we get started. We love to employ what we call “zero waste cooking”. Well, it’s not quite zero waste as there will almost always be something that isn’t used. What we like to do is keep a “scrap bag” in the freezer. In this bag goes all of our garlic peels, onion peels, carrot tops and/or shavings, celery tops, and any other fun stuff we decide to toss in there. Then, when we get to the end of our chicken (or two) we save the bones and everything get tossed into our stock. It gives a second life to scraps that normally end up in the garbage or compost. Now, let’s show you how it’s done!
Preparation: Homemade Chicken Stock
Disclosure: This post contains affiliate links. Flavor Bible is a participant in the Amazon Services LLC Associates Program, an affiliate advertising program designed to provide a means for us to earn fees by linking to Amazon.com and affiliated sites at no cost to you. Thanks for your support.
The beauty of this recipe is the fact there’s very little “exact science” to it unlike a lot of recipes. The chopping can be inexact and even the ingredient amounts can be shifted to your own liking. We encourage experimentation on this one. However, we do think this recipe is a fantastic starting point. So, as always, gather up your ingredients and follow along!
We have an extremely helpful tool in this process that we want to share with you – a little something called a soup sock. This wonderful hack allows you to cook everything down in a self-contained “sock” and when the stock is finished you simply remove the soup sock from the pot and discard it. User’s choice if you still want to strain or run through a cheese cloth for a more clarified end product. We didn’t take that extra step because for most of our homemade chicken stock applications a more clarified end product isn’t really necessary. You can purchase soup socks or learn more about them here (affiliate link):

Begin heating water on high heat to bring to a boil. While water is heating fill soup sock(s) with the ingredients. Place the full soup socks in the water. When the water starts to boil, reduce heat to low and simmer for 4 hours. Remove the soup sock(s) and discard. Use any needed stock while storing any unused stock in mason jars. Refrigerate for up to a week or freeze. That’s literally it. So simple and you’ll thank yourself every time you have this stuff on hand.
Equipment: Homemade Chicken Stock
Here are the items we recommend for making homemade chicken stock in addition to the aforementioned soup socks (affiliate links):

If you liked that, try this…
- Simple Seafood Stock
- Chicken and Risoni (Orzo) Soup
- Easy Rotisserie Chicken Tikka Masala
- Shortcut Chicken and Dumplings
Help Us Grow!
Once you finish basking in the glory of another incredible dish we would love for you to rate and comment below. Tell us how you added your own spin to this recipe. Maybe even give us a share on social media with #flavorbible. You can also follow us on our social pages by clicking the links at the bottom of the page. Be sure to check back regularly as we continue on our global culinary journey!

Homemade Chicken Stock from Leftover Rotisserie Chicken
Equipment
- Stock Pot
- Soup Sock(s) Buy some here: https://amzn.to/46bkQmu
Ingredients
- Rotisserie Chicken Carcass/Bones
- 3 Carrots, very rough chop Not an exact science
- 3 Celery Stalks, very rough chop Not an exact science
- 1 Yellow or Sweet Onion, quartered
- ½ – 1 Head of Garlic
- Poultry (or Roasting) Herb Blend Found in most produce sections
- 2 tsp. Salt Can adjust to taste
- 1 tsp. Pepper Can adjust to taste
- 12 – 16 cups Water
Instructions
- Begin heating water on high heat to bring to a boil. While water is heating fill soup sock(s) (See note 1) with ingredients. Place full soup socks in water. When the water starts to boil, reduce heat to low and simmer for 4 hours.

- Remove soup socks and discard. Use any needed stock while storing any unused stock in mason jars. Refrigerate for up to a week or freeze.

Notes
The post Homemade Chicken Stock (From Leftover Rotisserie Chicken) appeared first on Flavor Bible.
Easy Beef Enchiladas 1 Aug 2023, 5:14 pm
Jump to RecipeIf you’re a consumer of meat then there’s probably at least a package of ground beef sitting in your freezer. It’s both a blessing and a curse. On the one hand it’s very versatile, so much so the recipe options are pretty much endless. On the other hand it’s easy to get sucked into the same old routine and the same old recipes. We can remember a time when it was either “dirty tacos” (the hard yellow shell tacos with the basic fixings and a packet of spices) or spaghetti (essentially a box of pasta, a jar of store bought sauce, and maybe a couple of attempts to doctor it to make you feel like you made a real dinner ). Well, our Easy Beef Enchiladas recipe may resemble the former more than the latter but hopefully it gives you something new to add to the rotation.
This is one of our simplest recipes. It’s not a ton of homemade this or that. There’s not a lot of prep time and it’s of minimal complexity. We try to go up and down the chain of complexity from basic to gourmet. But, sometimes it’s a Tuesday and you have mouths to feed and time is of the essence. If this sounds like you, then read on.
Preparation: Easy Beef Enchiladas
Most of this recipe involves items that are staples in many kitchens and pantries. Gather them up and you’ll have this popped in the oven in no time. The kids will love it, too.

Heat the oil on medium heat. Meanwhile, preheat an oven to 375℉. Saute the onions for 4 – 5 minutes. Add the garlic and cook for another 1 – 2 minutes, stirring occasionally.
Add the ground beef, breaking it apart with the side of wood spoon and mixing the ingredients together well. Cook for 5 – 7 more minutes or until beef is browned.

Spoon a layer of enchilada sauce on the bottom of a casserole dish. In each tortilla place a line of beef, green chiles and shredded cheese in the bottom third of each tortilla. Roll the tortillas by folding in the left and right sides in and then roll from the bottom up.

Place the burritos in the casserole dish then top with the remaining enchilada sauce and cheese.

Place in the oven at 375℉ for 20 – 25 minutes. Remove, let rest for 3 – 5 minutes, plate, and serve. Top with fresh cilantro, Mexican crema, or your favorite condiment.

How easy was that? If you made a larger batch these will reheat well as leftover. They can also be frozen for later use.
Equipment: Easy Beef Enchiladas
Disclosure: This post contains affiliate links. Flavor Bible is a participant in the Amazon Services LLC Associates Program, an affiliate advertising program designed to provide a means for us to earn fees by linking to Amazon.com and affiliated sites at no cost to you. Thanks for your support.
For this Easy Beef Enchiladas recipe the main pieces of equipment are a simple skillet or saute pan and a casserole dish. If you’re in the market for these items here are some we recommend (affiliate links):

If you liked that, try this…
- “Cheater” Black Beans – Pictured in the plated shot. A great side item for Easy Beef Enchiladas
- Pico de Gallo – A popular Mexican condiment
- Hatch Green Chile Salsa – A wonderful accompaniment during green chile season and one of our many salsas
- Grilled Mexican Street Corn – A street food favorite and great side item
- Pan Roasted Mexican Street Corn – A one pan “off the cob” version of the famous street food
- Grilled Stuffed Mexican Peppers – Another fun recipe with a similar flavor profile
- Huevos Rancheros 2.0 – For your brunch or breakfast anytime of day lovers (also see our original version)
- Instant Pot Pulled Pork Tacos – A delicious and easy recipe for street tacos
- Ground Beef Pot Pie – in case you want more fun ways to use up ground beef
- Ragu Stuffed Portabello Mushrooms – A pasta free Italian delight
- Fettuccini Bolognese – For classic, meaty Italian that includes pasta
- Three Bean Jamaican Chili – Tantalizing Caribbean flavors to use up even more ground beef
Help Us Grow!
Once you finish basking in the glory of another incredible dish we would love for you to rate and comment below. Tell us how you added your own spin to this recipe. Maybe even give us a share on social media with #flavorbible. You can also follow us on our social pages by clicking the links at the bottom of the page. Be sure to check back regularly as we continue on our global culinary journey!

Easy Beef Enchiladas
Equipment
- Skillet
- Casserole Dish
Ingredients
- 2 tbsp. Extra Virgin Olive Oil
- ½ Sweet Onion, diced
- 2 cloves Garlic, diced
- 1 lb. Ground Beef
- 1 tsp. Chili Powder
- 1 tsp. Ground Cumin
- Salt, to taste A few cranks of a salt grinder will do, maybe ½ tsp.
- 1 can Enchilada Sauce Be selective. The brand in our photo seemed better than others we've tried. 10 oz. can.
- 1 can Green Chiles 7 oz. can
- 1.5 – 2 cups Shredded Mexican Cheese Blend A rare recipe where we don't shred off the block (for convenience).
- 4 Tortillas Large soft taco size
Instructions
- Heat the oil on medium heat. Meanwhile, preheat an oven to 375℉. Saute the onions for 4 – 5 minutes. Add the garlic and cook for another 1 – 2 minutes, stirring occasionally.
- Add the ground beef, breaking it apart with the side of wood spoon and mixing the ingredients together well. Cook for 5 – 7 more minutes or until beef is browned.

- Spoon a layer of enchilada sauce on the bottom of a casserole dish. In each tortilla place a line of beef, green chiles and shredded cheese in the bottom third of each tortilla. Roll the tortillas by folding in the left and right sides in and then roll from the bottom up.

- Place the burritos in the casserole dish then top with the remaining enchilada sauce and cheese.

- Place in the oven at 375℉ for 20 – 25 minutes. Remove, let rest for 3 – 5 minutes, plate, and serve. Top with fresh cilantro, Mexican crema, or your favorite condiment.

The post Easy Beef Enchiladas appeared first on Flavor Bible.
Spaghetti Squash Cacio e Pepe 11 Jul 2023, 5:58 pm
Jump to RecipeCalling all Italian food lovers! Also, shout out to our gluten free friends along with our vegetarian friends who still allow some cheese into their diets. Everyone is welcome to this delicious, guilt-free version of traditional Italian Cacio e Pepe – except we swapped the pasta for a spaghetti squash and, of course, we called it Spaghetti Squash Cacio e Pepe. We have quite a few simple recipes on this site but this one ranks up there as one of the easiest to prepare.
Is it traditional Italian? Not really, as spaghetti squash isn’t part of traditional Italian cuisine.
Should you care? Nope. Enjoy this Italian treatment of a very underrated vegetable, save the carbs, and be on your merry way
Do you want to learn how easy this is to make? Of course you do, that’s why you’re here!
Preparation: Spaghetti Squash Cacio e Pepe
The first thing you’ll want to do is preheat the oven to 425 degrees F. While the oven is warming CAREFULLY cut the squash lengthwise down the center (see notes below in recipe card). Scoop out the seeds and discard or save for later to roast separately if you’re feeling adventurous.

Brush the squash with oil and season generously with salt and pepper.

Place the squash face down and cook for 30 – 40 minutes (see note 2). Flip the squash and let it rest for several minutes until its able to be handled safely (will be hot!). At this point you’ve made Roasted Spaghetti Squash which can be the base of nearly endless preparations, whether with Italian style treatment or some other completely different cuisine.

Using a fork, scrape from the sides inward shredding and fluffing the squash. Add the melted butter and about ⅔ of the cheese and pepper you intend to use. Serve in bowls (pictured at top of page) or serve directly in the skin of the squash (pictured below). Top the dish with the remaining cheese and pepper. So good and so easy, we knew you’d love it. Now, instead of avoiding those oblong yellowish vegetables that used to be intimidating we think you’ll seek them out

Equipment: Spaghetti Squash Cacio e Pepe
Disclosure: This post contains affiliate links. Flavor Bible is a participant in the Amazon Services LLC Associates Program, an affiliate advertising program designed to provide a means for us to earn fees by linking to Amazon.com and affiliated sites at no cost to you. Thanks for your support.
A good chef knife, a sheet pan, some parchment paper, and a cheese grater should be all you need to make this very simple recipe. If you’re in the market for any of those items, here are some recommendations from your friends at Flavor Bible (affiliate links):


If you liked that, try this…
- Zucchini Lasagna
- Eggplant Lasagna
- Ragu Stuffed Portabello Mushrooms
- Middle Eastern Lamb Stuffed Eggplant
- Easy Homemade Vodka Sauce
- Homemade Pomodoro Sauce
Help Us Grow!
Once you finish basking in the glory of another incredible dish we would love for you to rate and comment below. Tell us how you added your own spin to this recipe. Maybe even give us a share on social media with #flavorbible. You can also follow us on our social pages by clicking the links at the bottom of the page. Be sure to check back regularly as we continue on our global culinary journey!

Spaghetti Squash Cacio e Pepe
Equipment
- Sheet Pan
Ingredients
The Squash
- 1 Spaghetti Squash, halved and seeds removed Cooking time may vary somewhat with size
- 1 – 2 tbsp. Olive OIl
- Salt and Pepper, to taste
The Cacio e Pepe
- ¼ cup Butter, unsalted and melted 4 tbsp.; can melt in microwave
- Fresh Ground Black Pepper, to taste We recommend fairly heavy pepper
- ½ cup Parmigiano-Reggiano, freshly grated Can adjust to taste
Instructions
- Preheat oven to 425℉. Halve the squash and scoop out the seeds with a spoon (see note 1).

- Brush the squash with oil and season with salt and pepper to taste.

- Place the squash face down and cook for 30 – 40 minutes (see note 2). Flip the squash and let it rest for several minutes until its able to be handled safely (will be hot!)

- Using a fork, scrape from the sides inward shredding and fluffing the squash. Add the melted butter and about ⅔ of the cheese and pepper you intend to use. Serve in bowls or serve directly in the skin of the squash. Top the dish with the remaining cheese and pepper.

Notes
The post Spaghetti Squash Cacio e Pepe appeared first on Flavor Bible.
Roasted Spaghetti Squash 13 Jun 2023, 5:30 pm
Jump to RecipeOh, the poor, often misunderstood spaghetti squash. Consider this an ode to an underrated, underappreciated vegetable found in nearly every produce section. We love spaghetti squash not only for its taste but it’s incredible versatility. On its own it’s a tasty, nutrition packed way to add some veg to your diet. But, it can also become the foundation for myriad of dishes. The spaghetti like strands that result after cooking – and whence it received its name – allow for unlimited creations. We have often found ourselves not even missing the pasta that we so often use it to replace. But, first we roast it. Once we have Roasted Spaghetti Squash the world is our oyster – or, maybe it’s our squash
Preparation: Roasted Spaghetti Squash
All you’re going to need here is the squash, oil, salt, and pepper. If you decide to do further work with the squash to turn it into something like an Italian inspired dish then there will be more but we’ll share those with you in further posts. For now, we’ll focus on getting the squash cooked and ready for whatever your heart desires, and it is a tasty treat on its own.
We must provide a word of caution when working with spaghetti squash, particularly the larger ones. Since they are round, and we intend to halve them, they can be a hazard if not handled carefully. Take extra caution in holding the squash steady and make sure your chef knife is adequately sharpened. You’ll want to get the knife in at about a 45 degree angle before applying pressure downward (while still keeping the squash very securely gripped) to halve the squash.
Once halved, you’ll want to remove the pulp and seeds like in the picture below. If you really like to practice “zero or near zero” waste cooking you can clean up the seeds and roast them for a snack or salad topper at another time. Meanwhile, preheat an oven to 425 degrees F.
Brush the squash with oil and season with salt and pepper to taste.
Place the squash face down and cook for 30 – 40 minutes. Flip the squash and let it rest for several minutes until it is able to be handled safely (will be hot!).
The cooking time will vary by size. The skin of the squash should easily pierce with a knife or fork. When flipped, the squash should be tender with some light caramelization as in the picture below. Shred with a fork and use in further dish preparation or serve as a side item.
As we mentioned, we will be sharing some recipes that use this roasted spaghetti squash as a foundation so stay tuned for those!
Equipment: Roasted Spaghetti Squash
Disclosure: This post contains affiliate links. Flavor Bible is a participant in the Amazon Services LLC Associates Program, an affiliate advertising program designed to provide a means for us to earn fees by linking to Amazon.com and affiliated sites at no cost to you. Thanks for your support.
The two key components you need for this recipe are a quality chef knife (important for almost anything in the kitchen) and sheet pan lined with parchment paper. If you’re in the market here are some good options below (affiliate links):

If you liked that, try this…
- Simple Roasted Asparagus
- Roasted Brussels Sprouts with Bacon
- Buffalo Roasted Cauliflower
- Oven Roasted Hatch Chiles
- Pan Roasted Mexican Street Corn
- Middle Eastern Lamb Stuffed Eggplant
- Roasted Winter Squash Soup
Help Us Grow!
Once you finish basking in the glory of another incredible dish we would love for you to rate and comment below. Tell us how you added your own spin to this recipe. Maybe even give us a share on social media with #flavorbible. You can also follow us on our social pages by clicking the links at the bottom of the page. Be sure to check back regularly as we continue on our global culinary journey!

Roasted Spaghetti Squash
Equipment
- Sheet Pan
Ingredients
- 1 Spaghetti Squash, halved and seeds removed
- 1 – 2 tbsp. Olive oil
- Salt and Pepper, to taste
Instructions
- Preheat oven to 425℉. Halve the squash and scoop out the seeds with a spoon (see note 1).
- Brush the squash with oil and season with salt and pepper to taste.
- Place the squash face down and cook for 30 – 40 minutes (see note 2). Flip the squash and let it rest for several minutes until its able to be handled safely (will be hot!). Shred with a fork and use in further dish preparation or serve as a side item.
Notes
The post Roasted Spaghetti Squash appeared first on Flavor Bible.