When it comes to home cooking, nothing beats a roast chicken. That is, unless it’s this Greek-inspired roast chicken, loaded with savory and flavorful Mediterranean spices and ingredients.
Greek-Inspired Roast Chicken: Weeknight Meal with A Mediterranean Twist
I don’t know anybody who gets quite as excited as I do about buying a whole chicken. To my mind, that excitement is entirely justified.
As long as it’s properly seasoned and roasted, even the simplest roast chicken preparation tastes terrific and makes your kitchen smell amazing. It’s one of those meals that every member of the family will enjoy, even the pickiest eaters.
But one of things I love most about roast chicken is the almost countless options it affords for flavor variations. When it comes to culinary creativity, a whole roasting chicken is the equivalent of a blank canvas to a painter.
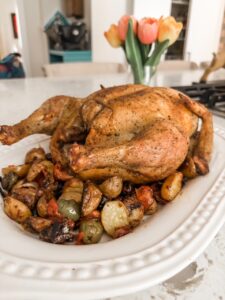
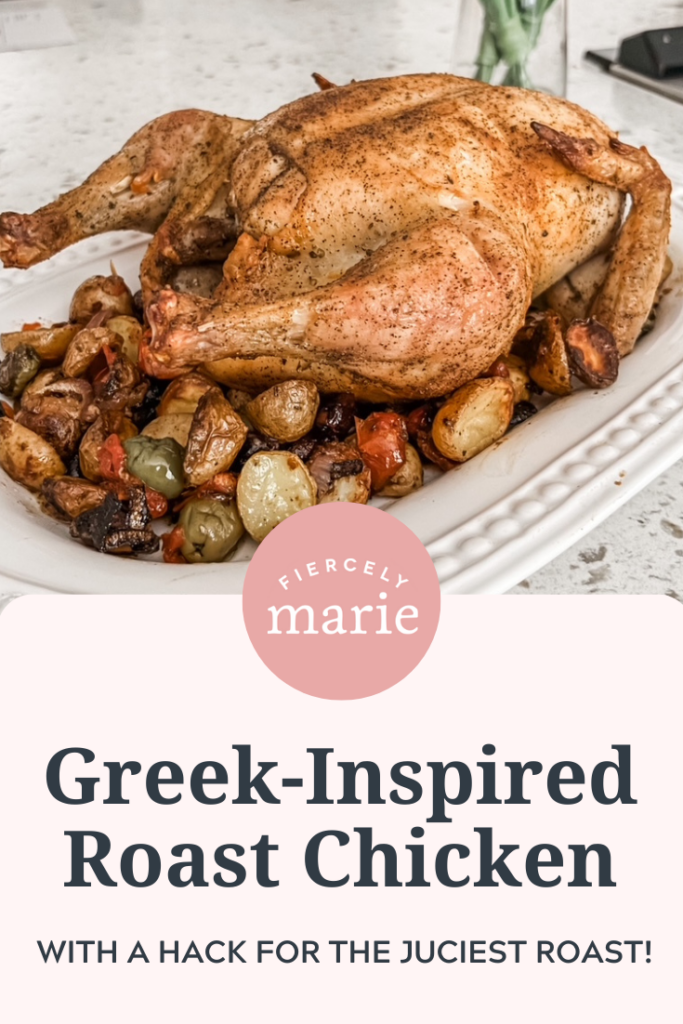
My latest creation is this Greek-inspired roast chicken. And if I do say so myself, it’s something of a masterpiece. The meat is juicy and tender, and the skin is brown and beautifully crispy, flavored with fragrant, mouthwatering spices. As the seasoned bird roasts, the juices drip down onto a blend of Mediterranean veggies and aromatics, adding to the already wonderful flavor.
In short, my Greek-Inspired Roast Chicken takes a favorite family dinner and makes it even more delicious by adding an exciting Mediterranean Twist.
Making Greek-Inspired Roast Chicken – It All Starts with A Perfectly Seasoned Bird
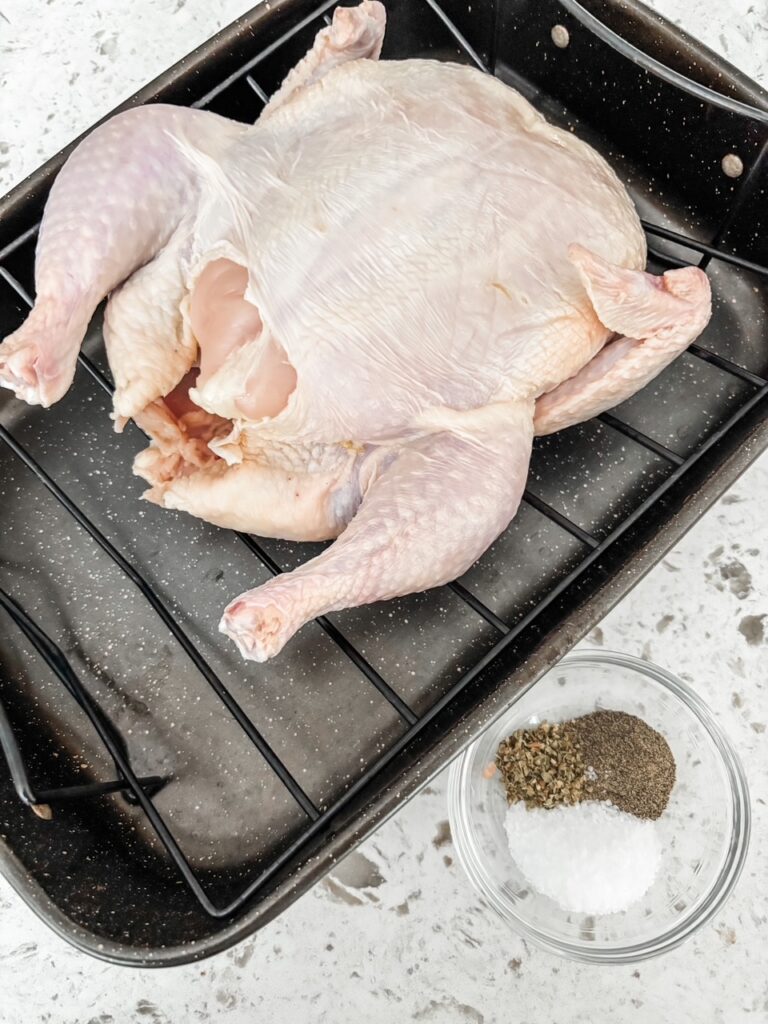
But about ten years ago, I discovered the secret for making roast chicken with juicy meat and a gorgeous, crispy skin. The key to this method is three simple ingredients: a young whole chicken (about 4 pounds), Kosher salt, and fresh ground pepper.
Because this is a Greek-Inspired Roast Chicken, this time I added a generous amount of dried oregano into the mix. But salt and pepper do a lot of work in this recipe.
So does time.
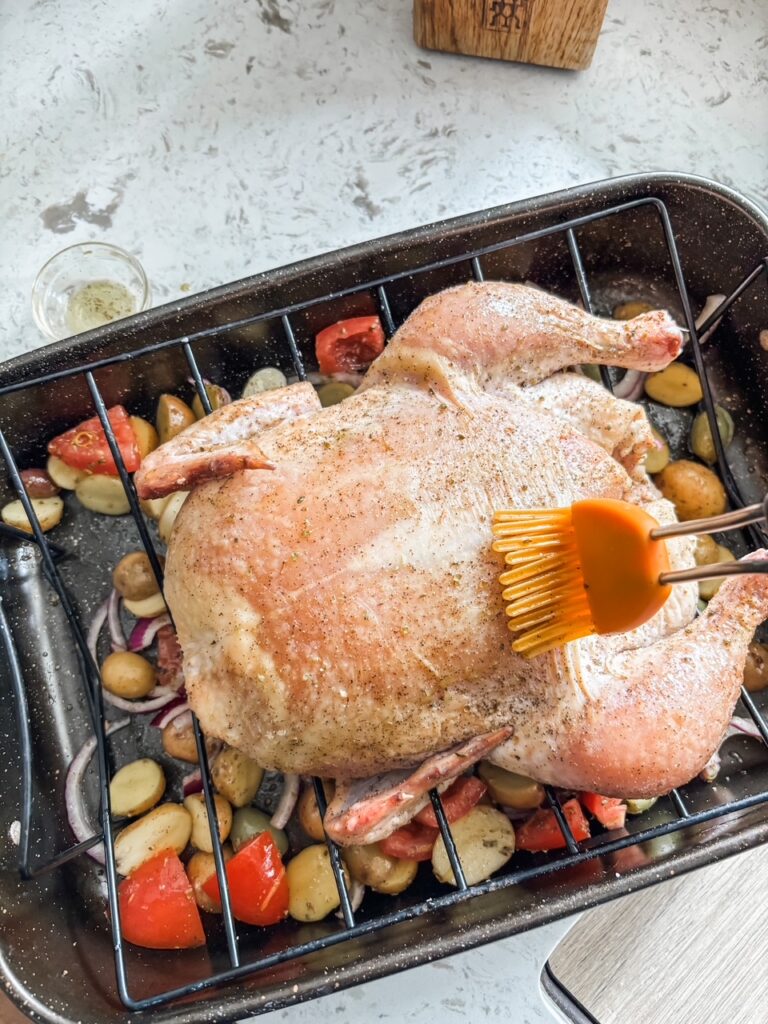
After rinsing the chicken and patting it dry with paper towel, you’ll rub the Kosher salt and spice blend all over the bird, inside and out. Then you’ll place the seasoned chicken on a roasting rack and leave it uncovered in the refrigerator for at least six but up to twenty-four hours.
Yes, you read that right. You’re going to let the seasoned chicken sit in the refrigerator for up to one day before roasting. That might sound a little surprising, but hear me out.
Salt not only enhances flavor, it draws moisture. When Kosher salt is rubbed on the bird and given some time to sit, it pulls excess moisture from the skin. Even though you’ll rub a little oil on the skin before cooking, that chicken will have the crispiest, most wonderful skin ever.
If you’re short on time, you can let the bird rest for as little as 6 hours. But letting it rest in the fridge for a whole twenty-four hours really makes a difference. Keep that in mind when planning your timings for Greek-Inspired Roast Chicken.
One other tip – make absolutely sure you use Kosher salt for this recipe, not table salt. Kosher salt isn’t as salty tasting, and the big flakes are better for drawing moisture.
Add Greek-Inspired Veggies and Aromatics
The oregano in the spice rub brings a lot to this recipe. But the thing that really makes this Greek-inspired roast chicken is the yummy array of veggies and aromatics that roast alongside the bird.
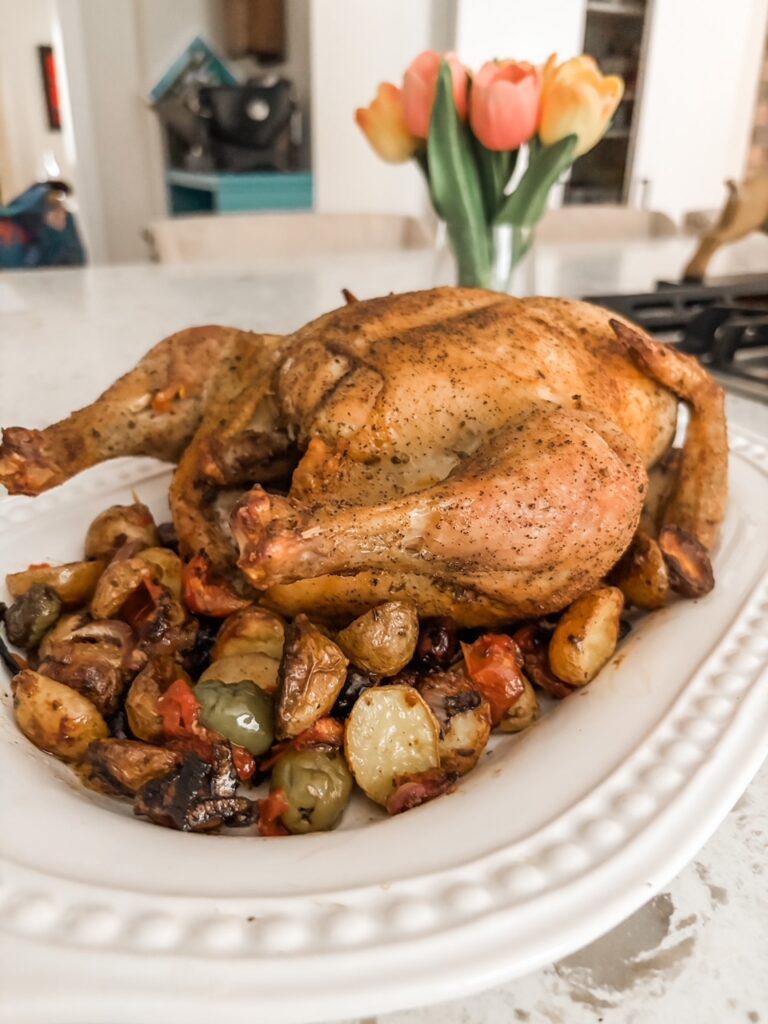
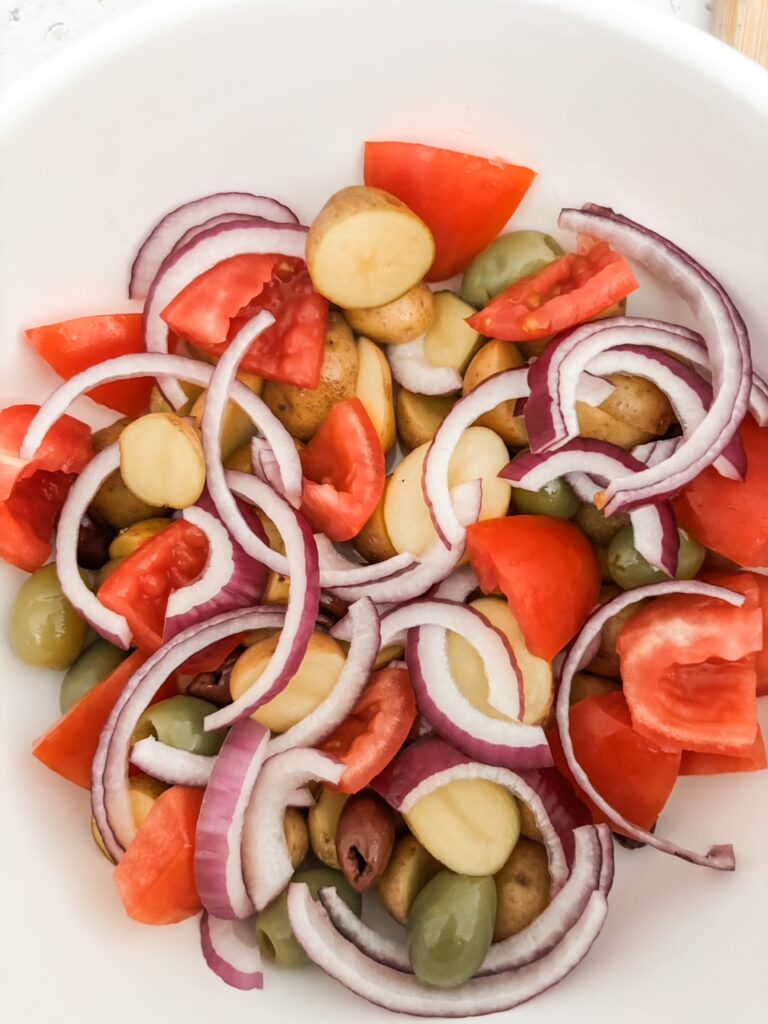
The veggies include tiny potatoes (sliced in half), Roma tomatoes, red onion, and olives (green or Kalamata), drizzled with olive oil, and a little more salt, pepper, and oregano. The veggies are placed under the rack as the chicken roasts, so the juices drip down onto them, making them even more delish.
After cooking, I stir the juice and zest of a lemon onto the veggies. It adds an extra zing of bright, fresh flavor and a wonderful fragrance.
If you’d like, you can also sprinkle some crumbled Feta cheese on top of the veggies for a little extra richness and tang. I was out of Feta, so you won’t see it in this set of photos, but it’s a really tasty option if you want to try it.
When you’re done enjoying this delicious chicken, be sure to save the carcass to make chicken stock. You could use the stock to make one of my yummy chicken soup recipes, such as my Lemon Chicken Soup, also based on Greek cuisine!
16–20 olives (green and/or kalamata), cut into halves
1 lemon, juice and zest
2 oz crumbled feta – optional
Instructions
Remove the innards from inside the chicken, neck, heart, liver, gizzard, etc. (if desired, you can save them for another purpose). Rinse the chicken inside and out with cool water and pat dry with paper towels.
In a very small bowl, mix together 2.5 tsp Kosher salt, 1/2 tsp pepper, 1 tsp dried oregano. Rub the spice blend all over the chicken, including inside the cavity. Set the seasoned chicken in a pan on a rack in a roasting pan, breast side up. Let the chicken rest uncovered inside the refrigerator for at least 6 but up to 24 hours.
When chicken is ready for roasting, preheat the oven to 425 degrees. Remove chicken from oven and brush skin all over with 1 T olive oil.
Place the potatoes, tomatoes, and olives in a medium sized mixing bowl. Drizzle with 2 T olive oil and stir to coat veggies. Sprinkle 1 tsp dried oregano and ½ tsp pepper, stirring again. Arrange prepared veggies into the roasting pan, around or under the rack holding the chicken.
Place roasting pan with chicken and veggies in center rack of preheated oven, breast side up. Roast for 35 minutes. Remove pan from oven and flip chicken over. Roast for an additional 20 minutes, or until an instant-read thermometer pushed into the meatiest part of the thigh reaches at least 165 degrees.
Remove pan from oven. Place chicken on a cutting board and the cooked vegetables in a serving bowl. Sprinkle lemon zest over vegetables. Squeeze lemon juice over vegetables and stir. Taste and adjust seasonings. Slice chicken meat from the bones as desired, serve with vegetables.
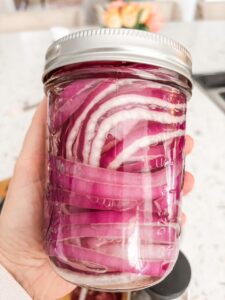
Meet your new favorite condiment! Tart, sweet, and just plain delish, my Quick Pickled Red Onions are an easy way to jazz up salads, sandwiches, bowls, and more. This quick recipe makes a whole jar of pickled red onions in only minutes!
Quick Pickled Red Onion Recipe – Take Dishes From Boring To Bold In Minutes!
Move over, ketchup! Pickled red onions have become the new favorite condiment here at Casa Bostwick.
A few months back, I found a red onion I didn’t have a use for in the vegetable crisper. Rather than let it go to waste, I mixed up a quick brine and pickled them. And I’m so glad I did!
Since then, our fridge has never been without a jar of pickled red onion. Well, unless we’ve just finished the old jar. With so many great ways to use them, we do end up running out pretty often.
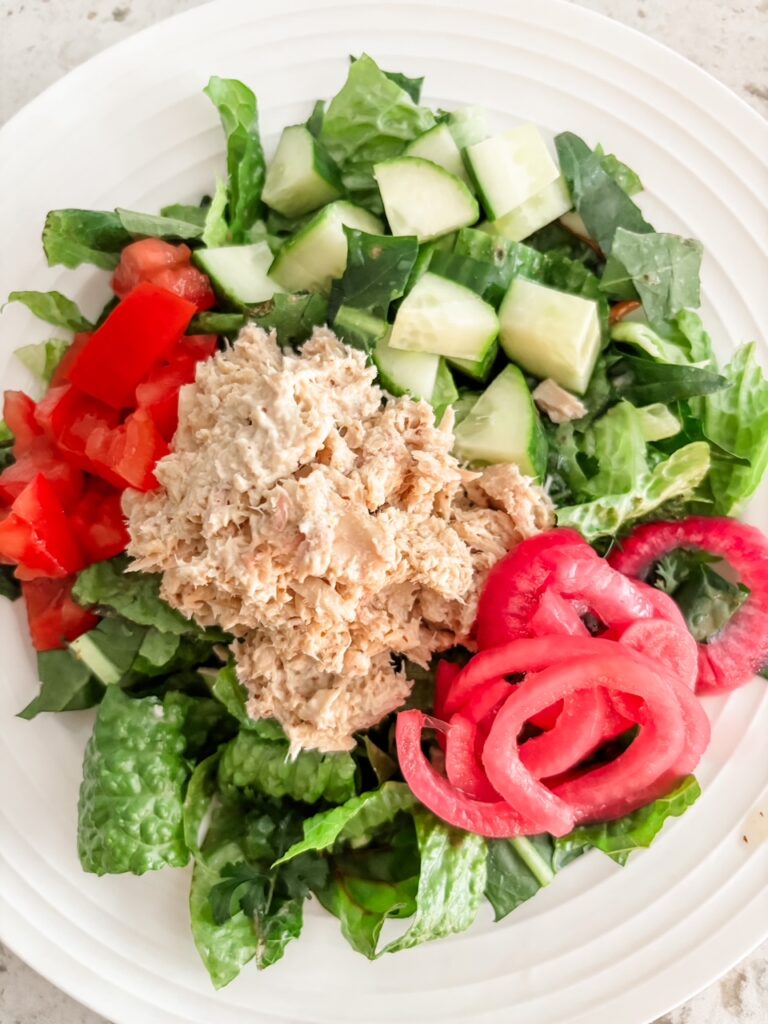
The sweet and sharp taste and slightly crunchy texture of pickled red onions are an easy way to jazz up the flavor of almost any salad, sandwich, or bowl. They’re terrific chopped and sprinkled on top of tacos or a bowl of chili, or served alongside just about any meat, poultry, or fish.
At this point, I think the only dish I haven’t added pickled onions to is my morning oatmeal. However, I do find they’re great in omelets, and even stirred into scrambled eggs. So, yes. We go through a lot of them around here, probably a jar a week.
But that’s no problem. Thanks to this quick pickled red onion recipe, I can have a new jar ready in just minutes.
Quick Pickled Onion Recipe – What You’ll Need
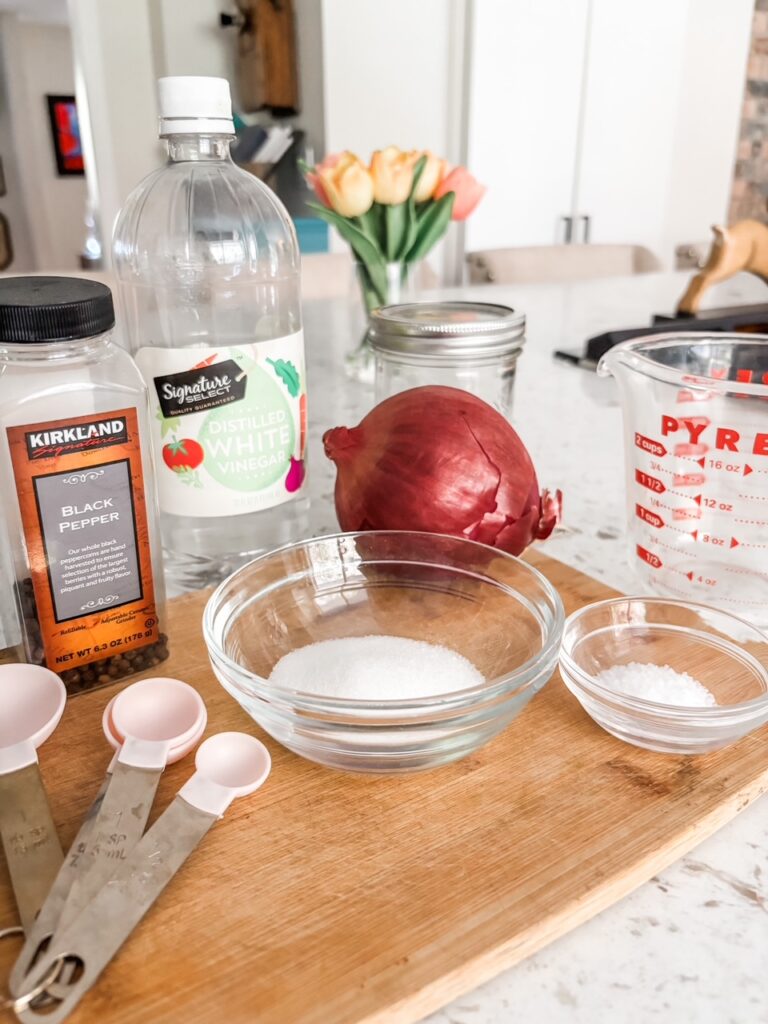
The ingredient list is pretty simple. Chances are good that you’ve already got everything you need on hand, including…
Red Onion
White Vinegar – (You can substitute apple cider vinegar if you’d like. If someone in your family is allergic to corn, you should because most white vinegar is distilled from corn.)
Sugar
Water
Kosher Salt
Peppercorns – (Not required but I like to add a few. It gives the brine an extra kick.)
You’ll also need a jar with a lid. You might need two depending on the size of the onion or the jar. I use my glass canning jars to store my pickled onions. But as long as it’s got a lid, any type of leftover jar will do. Just wash the jar or run it through the dishwasher before you use it.
Making Quick Pickled Red Onions – A Very Easy Recipe
This quick pickled red onion recipe really couldn’t be easier. In fact, it’s so easy that I almost hesitate to call it a recipe. However, it’s one of those things you might not make to make unless somebody explained how to do it.
That’s what I’m here for, so let’s get to it!
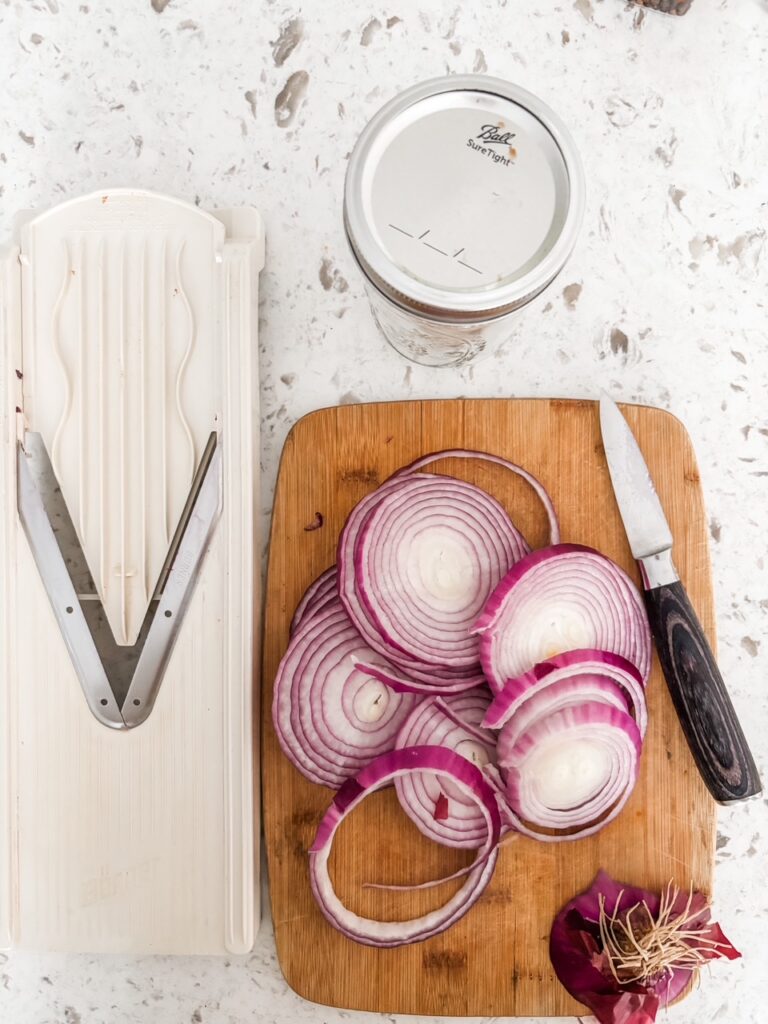
First, you’re going to thoroughly wash and dry your lidded jars. Then, you’ll peel the onion and cut it into slices no more than ¼ inch thick.
I like to use my V-Slicer for these kinds of jobs. It quickly gives me uniformly sized slices, and the safety holder means there’s no chance of slicing my fingers instead of the onion. Of course, a regular knife will work too. But I’ve had my V-slicer for twenty years and I use it almost every week. It’s definitely a handy tool to have around.
Next, you’ll put the sliced onions into the clean jars. If you like, you can sprinkle a few peppercorns on top. Don’t be afraid to pack the onions fairly tightly into the jars, but leave about an inch of room at the top.
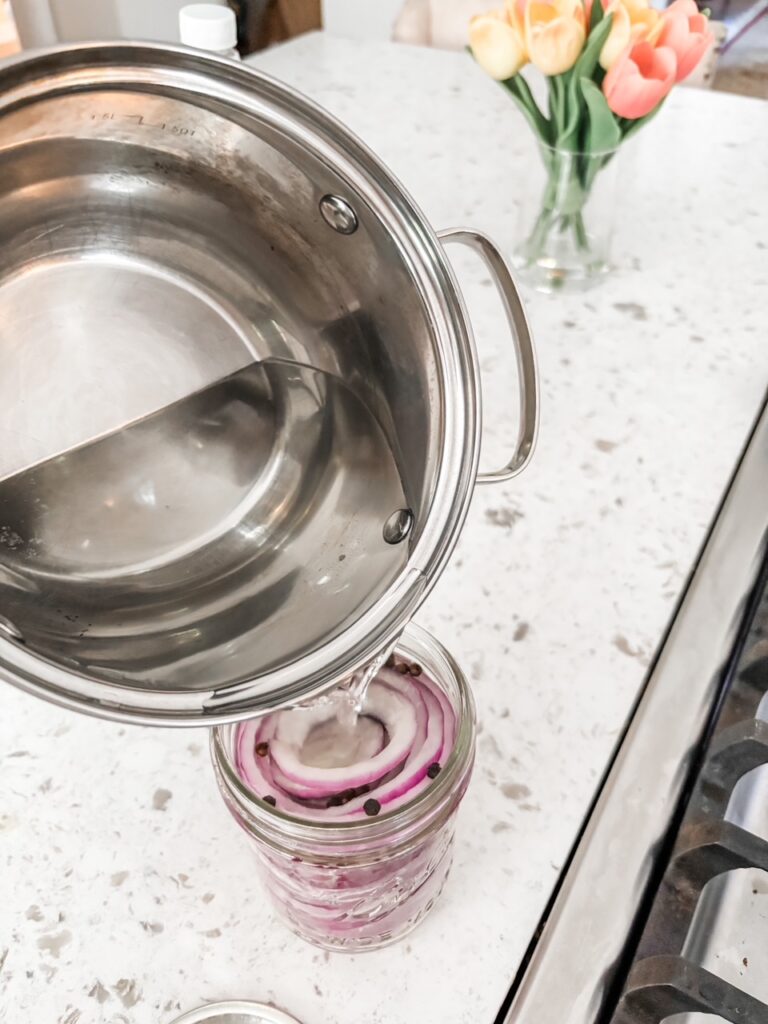
Then you’ll heat the vinegar, water, sugar, and salt in a heavy-bottomed pot on the stove. You don’t need to boil the brine, just heat it enough so the sugar and salt have completely dissolved and the liquid is clear. Finally, pour the brine into the jar until the liquid just covers the onions. Put the lid on the jar.
That’s really all there is to it!
It’s a good idea to let the onions sit in the brine overnight before using, so they soak up more flavor. But I’ve been known to use them within an hour or two if I’m in a rush.
Pickled red onions can be stored in the refrigerator with the lid on for up to four weeks. If your family likes them as much as we do, I really doubt they’ll last that long, but…it’s good information to have.
2 tsp Kosher salt (can reduce by half if sodium is an issue for you)
*A few whole peppercorns – optional
Instructions
Thoroughly wash and dry glass jar(s) and lids.
Peel the onion and cut into slices no more than ¼ inch thick. (Can cut onion rings in half if desired.) Pack clean jars with onions, filling jars to about an inch from the rim. Sprinkle a few peppercorns on top if using.
Place vinegar and water in a heavy bottomed pot on stove over medium heat. Add sugar and water to liquid. Heat, stirring continually, until sugar and salt have dissolved and water is completely clear, making a brine. Do not allow the brine to boil.
Immediately pour the warm brine over the prepared onions, until the liquid just covers the top of the onions. Place lids on filled jars.
Store lidded jars of pickled red in the refrigerator for up to four weeks. (Discard if the brine turns cloudy.)
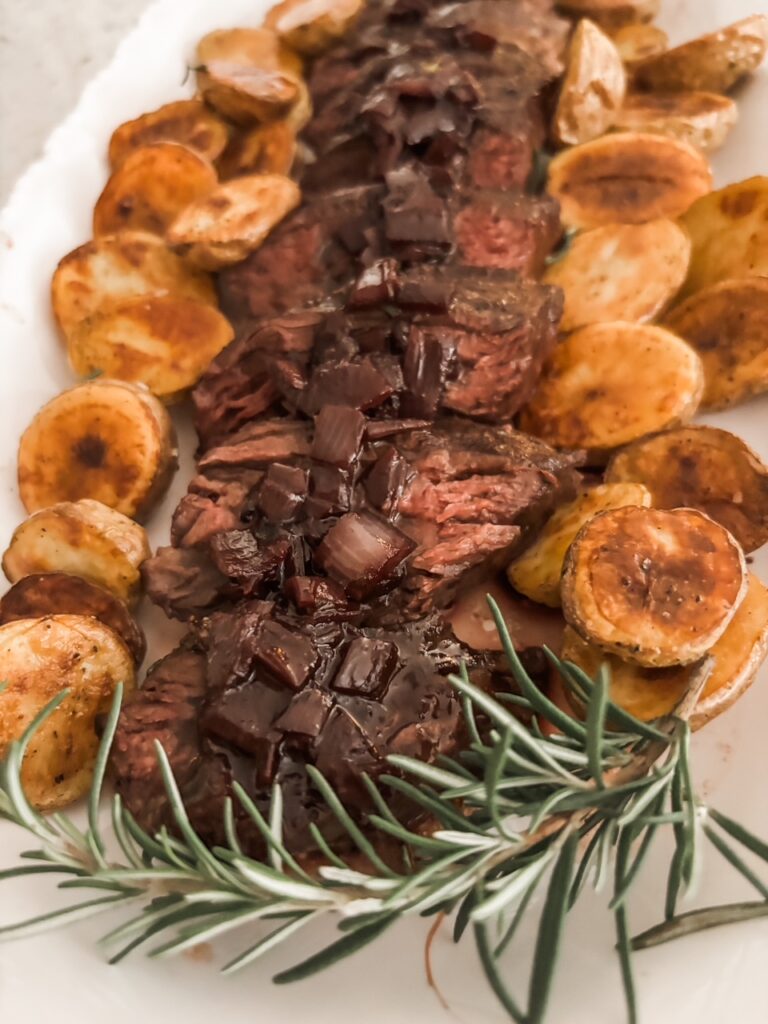
Tender beef medallions served with a rich, flavorful red wine reduction sauce. This oven roasted Hangar Steak recipe is as good as any steakhouse steak and far more affordable. Treat yourself at home!
Hangar Steak – What Is It?
Until I spotted some in the butcher’s case about three months ago, I’d never heard of hangar steak. Since then, this flavorful cut of beef has become our very favorite steak. But what is hangar steak anyway?
Hangar steak is a long, fairly thin cut of meat found on the upper belly of the cow. Its shape is similar to tenderloin and is just as tender but with even more flavor.
Hangar steak is sometimes called butcher’s steak because butchers were known to keep this small, choice cut for themselves. Because there’s only one per cow, the big chain supermarkets don’t always stock it. Smaller, specialty markets or butcher’s shops are your best bet for finding it.
But it’s definitely worth seeking out, because hangar steak really has a lot going for it!
In addition to the above, I like the fact that it’s a smaller cut. Most weigh less than a pound, so one is perfect for two or three servings. But what I really, really love about hangar steak is the price! It’s generally than less half the price of filet mignon, and I think it tastes even better.
If I am going to treat myself to a nice, juicy steak, hangar steak is my new go-to.
How to Oven Roast Hangar Steak
Because I hadn’t heard of it before, I had no clue how to cook hangar steak when I first brought it home. My internet sleuthing told me that a lot of people prepare it on the grill.
Though I may give that a try over the summer, our very wet winter is being followed by a very wet spring. So, I won’t be grilling for a while yet.
But as I discovered, this oven roasted hangar steak recipe is easy to make and tastes fantastic.
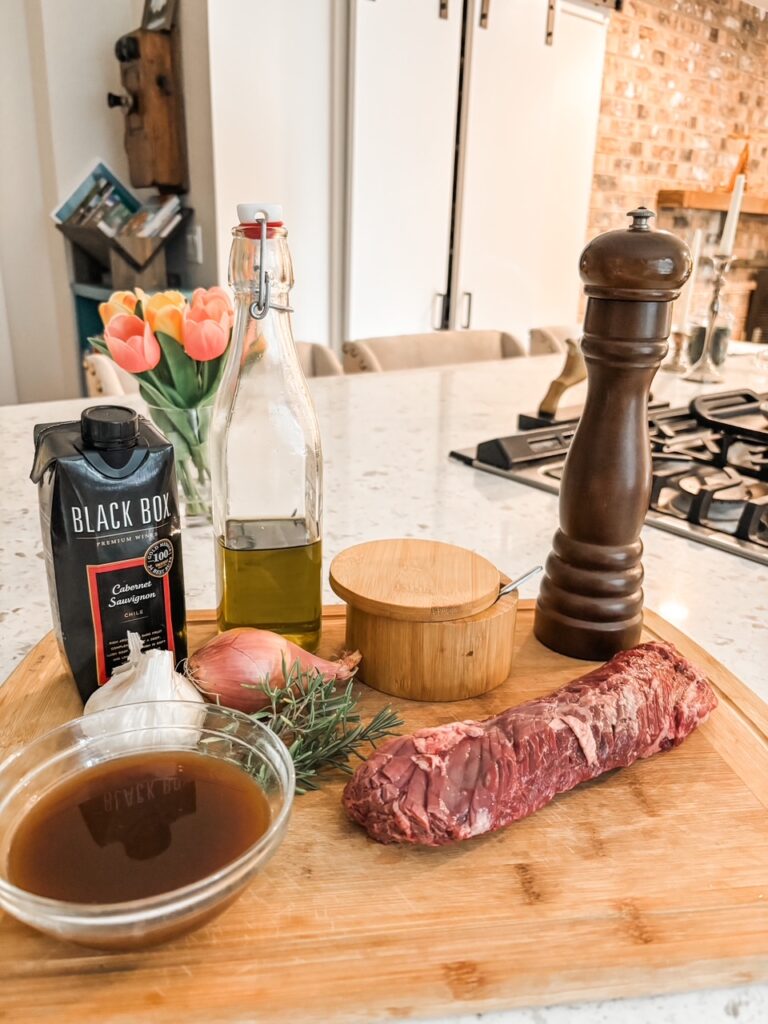
Often, I feel the need to marinate meat before cooking. This is especially true for less expensive cuts (such as my tri-tip). But hangar steak is so tender and flavorful that you can skip the marinade.
All I do is rub a little olive oil over the steak and sprinkle the kosher salt and pepper, then cut a few slits into the steak and push in some slivers of garlic. Then I let the steak come to room temperature before cooking in a preheated, 450-degree oven for about 15 minutes.
(Timing may vary depending on steak thickness and desired preparation. We like ours medium.)
That’s all there is to it! Honestly, you could stop right there and you’d have a tender, really terrific tasting steak. But…
If you want to gild the lily a bit, amp up your oven roasted hangar steak recipe with my simple red wine reduction sauce. It’s the crowning touch that transforms a homemade hangar steak into a meal as good as anything you’d find in any fancy, fifty-dollar-a-plate steak house.
Oven Roasted Hangar Steak Recipe with Red Wine Reduction
Making a red wine reduction to go with your oven roasted hangar steak isn’t difficult, but I do have a few tips.
The first is to make sure you allow enough time. Reducing the wine and broth mixture by half (or even a little more) will take at least fifteen or twenty minutes. Be sure to figure that into your timings before you start. I recommend making the sauce first, so you’re not rushed.
A well-reduced sauce that’s thick, almost syrupy, packs tons of amazing flavor into every bite. Doing it properly is more than worth the time.
Also, I use sauteed shallots in my sauce. Shallots add depth and just a touch of sweetness. I like the texture of the reduction with the shallots. However, if you want a smooth sauce, you can always strain them out at the end.
Make sure you use a good, hearty red wine. It doesn’t have to be expensive but it does need to be something you’d be willing to drink by itself.
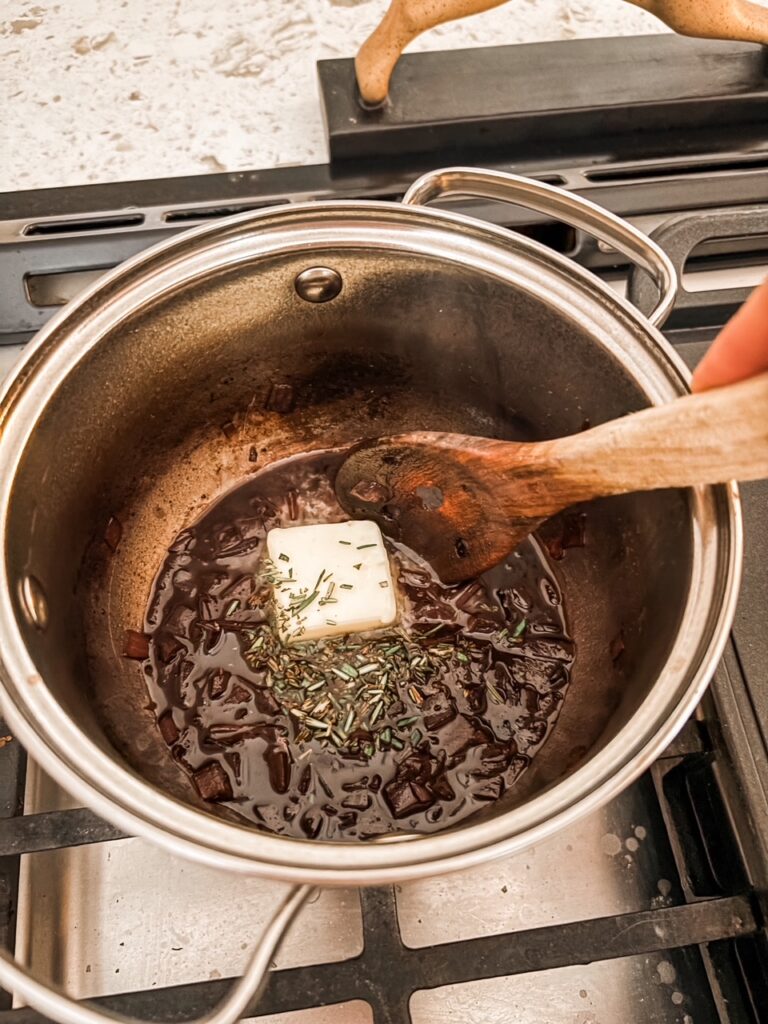
Once the wine and broth mixture are properly reduced, I stir in some butter and rosemary.
Rosemary can have a strong flavor, but using just a teaspoon and mincing it very fine adds a lovely layer of complexity to the sauce. But make sure you mince, as opposed to chop, the rosemary. Rosemary leaves can be a bit tough, so it’s not something you want to bite into.
Melting the butter into the reduction is going to make it thinner. So, my final step is to simmer the sauce for another minute or two, just to thicken it up a bit.
Plating and Serving Your Oven Roasted Hangar Steak
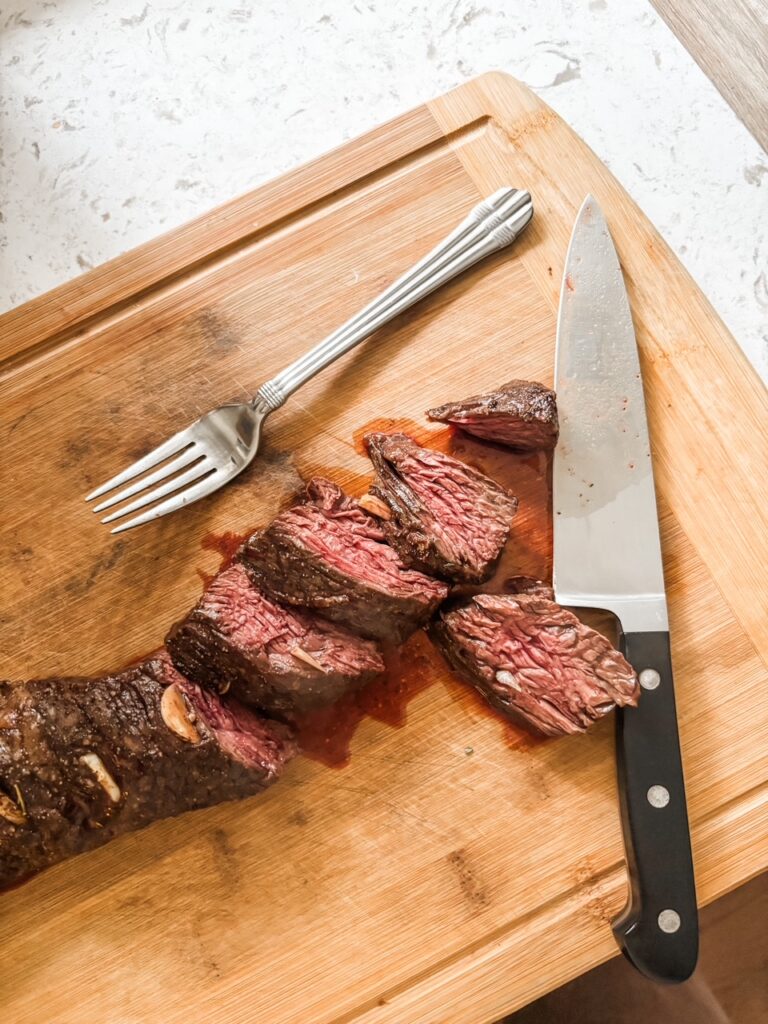
Once the meat comes out of the oven, be sure to let it rest for about 5 to 8 minutes before slicing. That will give the juices time to absorb back into the meat. If you’re worried that the meat will get too cool before you serve it, tent a little foil over the top while it rests.
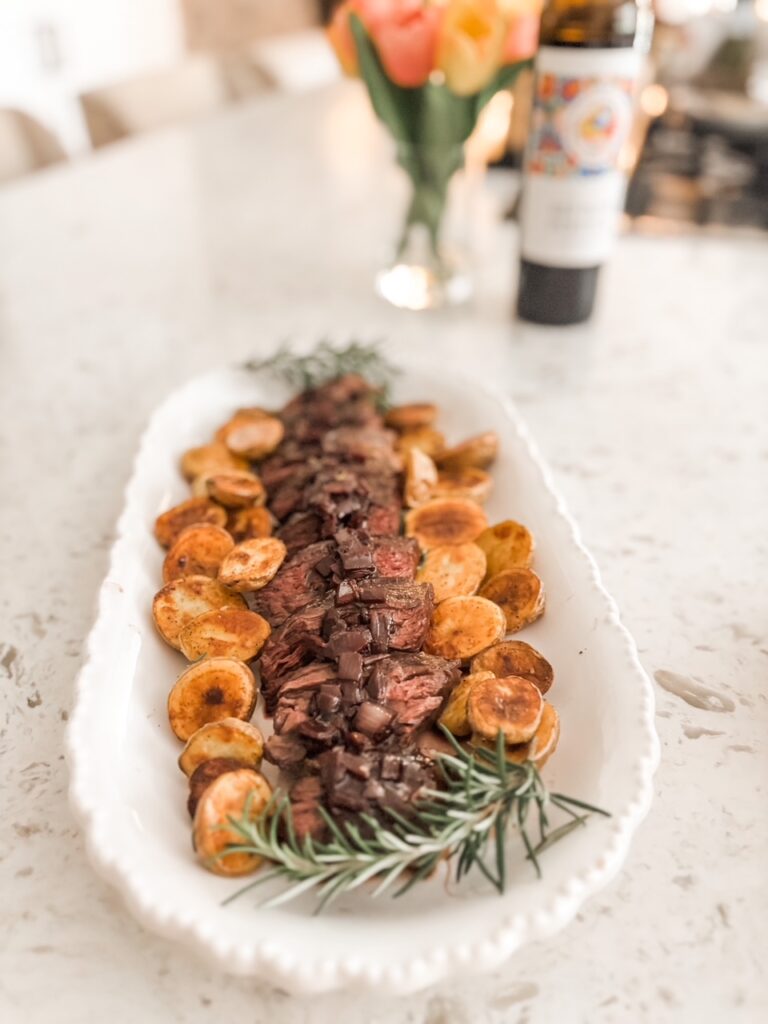
Slice your hangar steak just slightly on the diagonal, cutting medallions about an inch thick. Fan the medallions out onto the serving platter or plate, and spoon the red wine reduction down the center of the fan.
Garnish with a sprinkle of extra rosemary or chopped parsley, if desired.
Serve immediately. Enjoy thoroughly. I know you will!
Preheat the oven to 450. Pat the steak dry with paper towels. Rub olive oil over the surface, the sprinkle with salt and pepper on all sides. Cut small slits into the meat and shove a sliver or garlic into each slit. Set the steak aside, allowing it come to room temperature while you make the sauce.
Heat the olive oil in a heavy bottomed saucepan over medium-high heat. Add the shallots to the pan and saute for 3-5 minutes, until they are soft and somewhat translucent.
Add the broth and wine to the saucepan. Increase the heat, bringing the liquid to a boil, then lower the heat and simmer until the sauce is reduced by half. Stir the butter and minced rosemary into the sauce. Simmer for another 2-3 minutes, stirring frequently, until sauce thickens. Taste and adjust seasonings if necessary. Set sauce aside. Reheat just before you’re ready to slice the steak.
Place prepared steak into preheated oven on center rack. Oven roast for about 15 minutes. (Timing will depend on thickness of steak and desired level of doneness.)
Remove cooked steak from oven. Place on a cutting board and allow meat to rest for 5-8 minutes. Slice the steak into medallions on the diagonal. Fan medallion out on serving platter or individual plate. Spoon some of the red wine reduction down the center of each fan. Serve immediately.
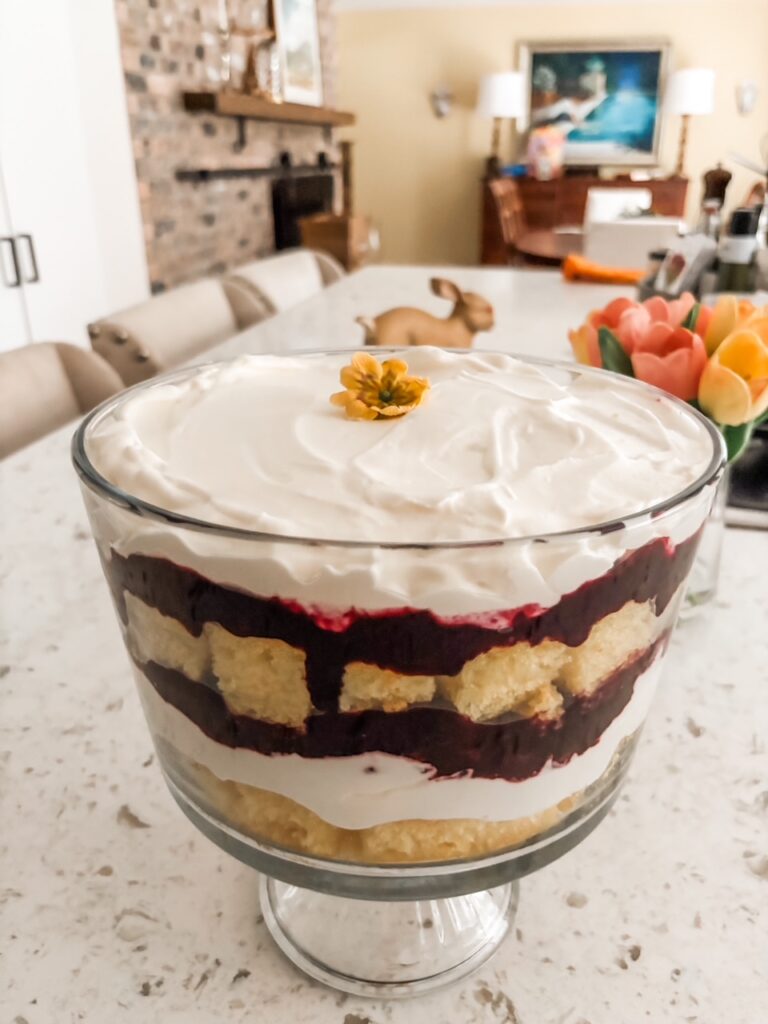
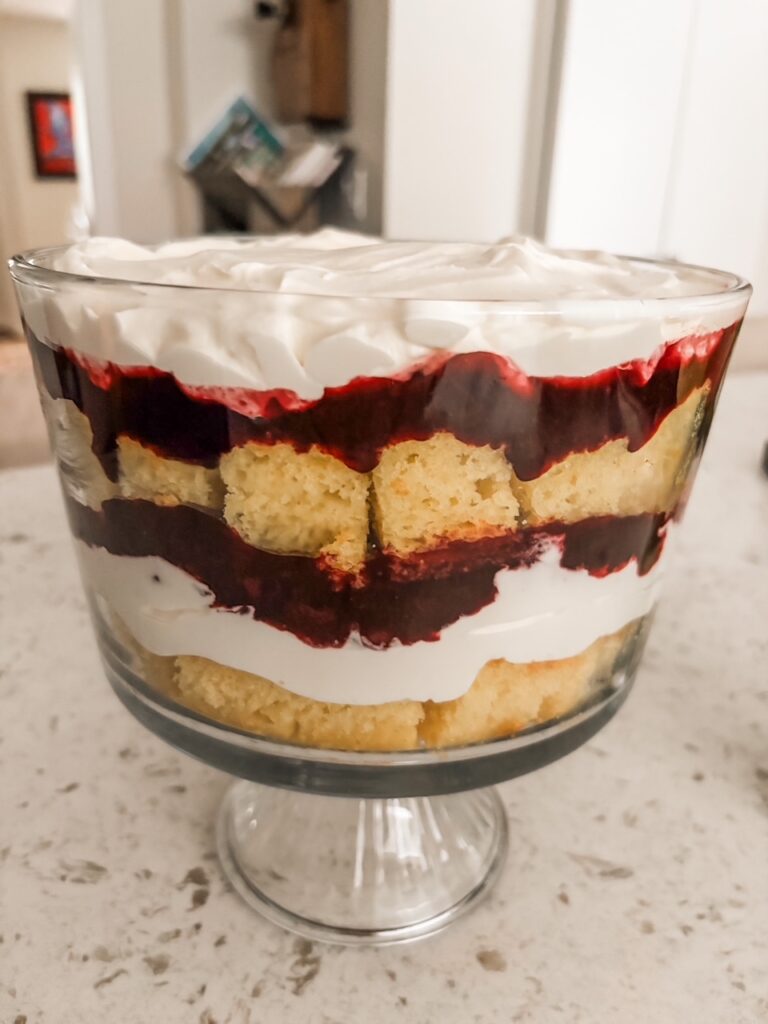
Sweet blueberry compote and tangy lemon cream, layered with luscious lemon cake. My Easy Blueberry Lemon Trifle Recipe is a delicious, showstopping dessert. Perfect for Easter, Mother’s Day, and spring celebrations!
Blueberry Lemon Trifle – A Showstopping Dessert That’s Surprisingly Easy To Make
Thanks to the distinct layers of tender cake, colorful fruits, and flavorful fillings, trifles are a feast for the eyes. This is one of those impressive-looking desserts that makes people ooh and ahh even before they take the first bite.
Thankfully, this trifle tastes just as good as it looks. What’s not to love about cake, fruit, and cream? And one of the things I love most about these showstopping desserts is how incredibly easy they are to make.
But there’s no need to let your guests in on that last part. Go ahead and bask in the compliments as you set your gorgeous trifle down on the table. Then maybe wave a dismissive, modest hand and say, “Oh, shucks. It was easy.”
You won’t be lying. This beautiful Blueberry Lemon Trifle is absolutely scrumptious and incredibly easy.
Two Simple Shortcuts for Deliciously Easy Blueberry Lemon Trifle Recipe
Though I’m a big believer in “made from scratch”, I’ve got nothing against time-saving shortcuts. As long as they don’t compromise the taste of the dish.
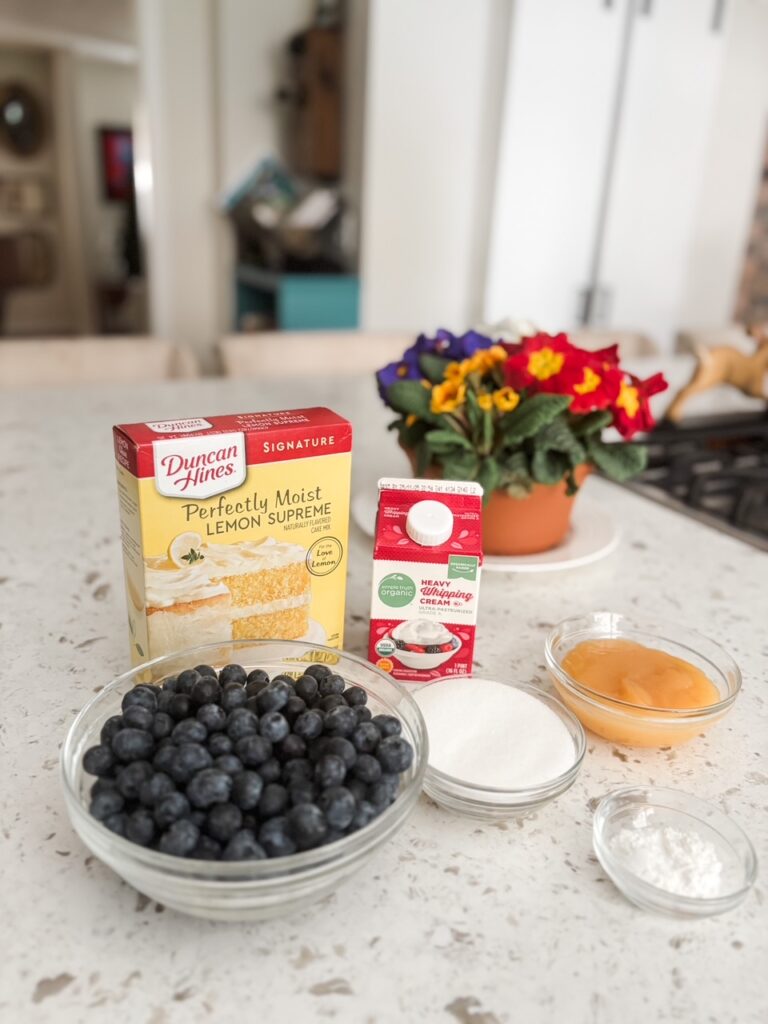
My Easy Blueberry Lemon Trifle recipe uses two shortcuts that meet that standard – cake from a mix and jarred lemon curd.
Today’s cake mixes are not the dry, flavorless cake mixes of my youth. Many pre-packaged mixes available now will give you a cake that is moist, light, and as good or nearly as good as made from scratch. I used a Duncan Hines Perfectly Moist Lemon Supreme cake mix for my trifle. Baked in a 13×9 pan according to the package directions, it was moist, tender, and lemony.
If you love to bake and want to make a scratch lemon cake, go for it. But this cake mix is a time saver and gives a terrific result.
I also used Bonne Maman lemon curd for my lemon cream. It’s thick, sweet, and tangy, and required me to do nothing but open the jar. My supermarket stocks it in the baking aisle, near the canned pie filling. Some stores may stock jarred lemon with the jams and jellies.
Prepping the Other Ingredients – Easy Blueberry Lemon Trifle Recipe
There are three components to my Blueberry Lemon Trifle – cake, lemon cream, and blueberry filling.
We’ve already talked about the cake – just bake according to the package. So, let’s move onto the lemon cream.
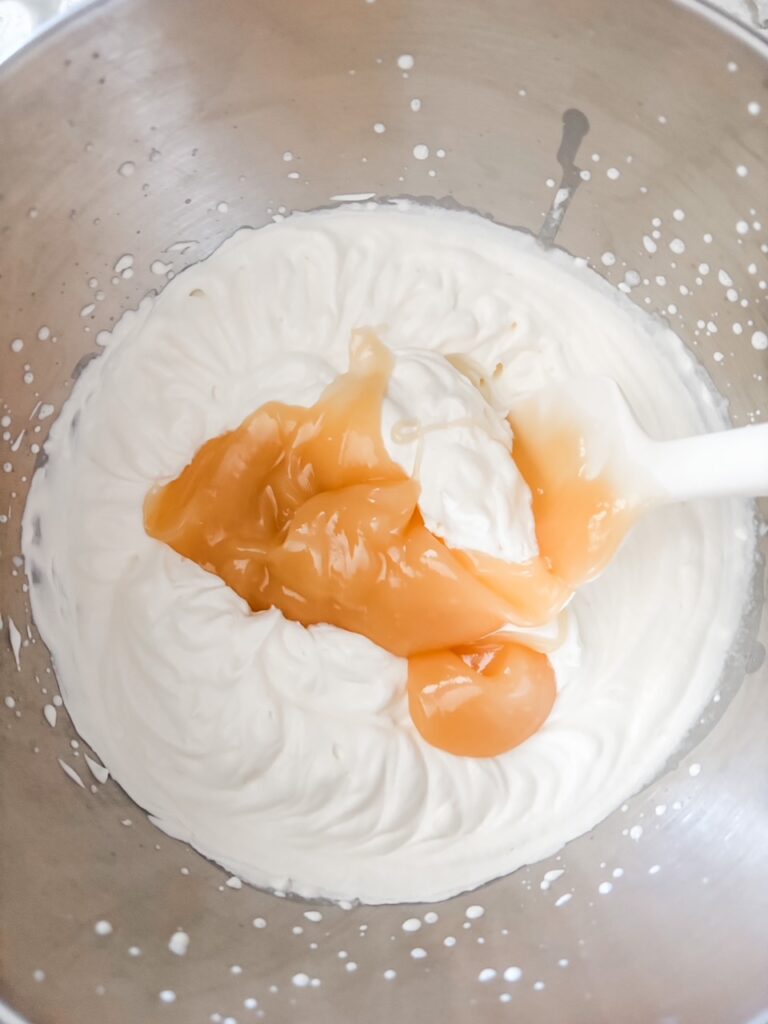
All you need to do here is gently fold the lemon curd into sweetened whipped cream. And by whipped cream, I mean REAL whipped cream, not whipped topping. Real whipped cream tastes much better and richer than store-bought whipped topping. And preparing it takes only minutes.
You’ll just pour it into a mixing bowl with the sugar, then beat it with a mixer until the soft but stable peaks form when you lift the beater. Once you’ve whipped the cream, all you’ll need to do is fold in the gently lemon curd, combining the cream and curd.
The third and final component is the blueberry filling. Yes, you can buy blueberry filling at the market. But fresh tastes better and is easy to make.
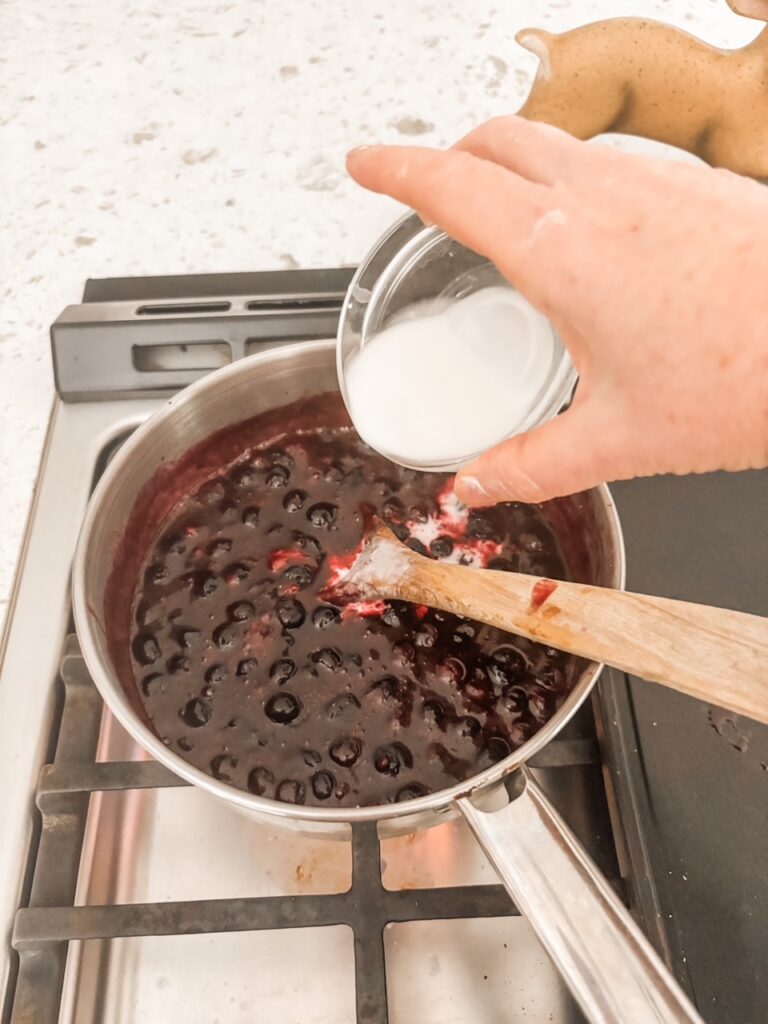
Just stir blueberries, sugar, and a little lemon juice together in a saucepan, bringing them to a boil. Then you’ll make a slurry of water and cornstarch, stir it into the blueberry mixture, and simmer to thicken.
The blueberry filling needs to cool completely before assembling the trifle, so factor that into your timing. It will thicken considerably once it’s cool.
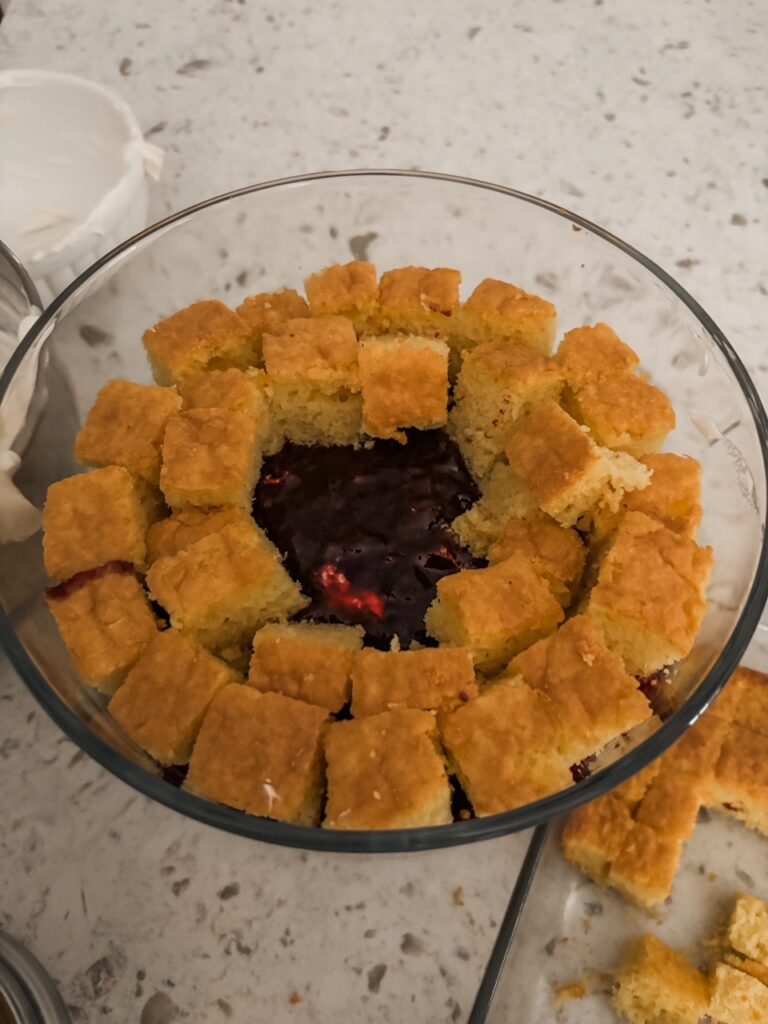
Assembling the Blueberry Trifle Layers
Being able to see the layers is part of what makes a trifle so impressive looking. You may be able to use a glass bowl for this purpose, but a proper trifle bowl looks so pretty. I use a three-quart trifle bowl for this recipe. While it’s made specifically for trifles, I also use it for layered salads.
The last step to making your trifle is simply layering the cake, blueberry filling, and lemon cream in your trifle bowl. You can do that however seems best to you. I’ve made this recipe more than once and tried it a couple of different ways. But I think the best method to create the distinct layers is this…
Place half of the cake in the bottom of the bowl, top with half the blueberry filling, and half the lemon cream. Then repeat these layers again, smoothing the lemon cream with a spatula before serving. (Those with sharp eyes will note that the trifle in the photos doesn’t quite follow my recommended layering. Yes, I got a little mixed up. These things happen.)
You can make your trifle up to twenty-four hours ahead of time. Just cover the top with plastic wrap and store it in the refrigerator until ready to serve.
If you’re looking for a showstopping finish to a special meal, you can’t go wrong with this Easy Blueberry Lemon Trifle Recipe. Give it a try soon!
One 9x 13 inch Lemon Cake (made from mix, baked according to package directions and cooled)
3 T cornstarch
3 T water
1 lb blueberries (fresh or frozen)
1 T lemon juice
¾ cup sugar, divided
1 pint whipping cream
1 cup lemon curd
Instructions
Make the blueberry filling (do ahead of time to allow for cooling). Stir the cornstarch and water together in a small bowl, making a smooth slurry. Set aside.
Stir berries, lemon juice, and ½ cup of sugar together in a heavy bottomed saucepan over medium heat, until the mixture begins to boil.
Lower the heat to a simmer. Stir the cornstarch slurry into the berries. Simmer for 2 to 3 minutes or until the mixture has thickened, stirring constantly. Place filling the refrigerator until completely cooled and very thick.
Place the whipping cream and ¼ cup of the sugar in a mixing bowl. Use a mixer or hand whisk to whip the cream until it soft, stable peaks form. Gently fold the lemon curd into the whipped cream until they are completely combined.
Slice the entire lemon cake into approximately 1-inch squares. The pan is deeper than an inch, so pieces will be rectangular “bricks” of cake when removed from pan.
Layer half of the cake on the bottom of the trifle bowl. Begin at the outside, gently pressing the cake “bricks” against the side of the bowl, then moving toward the center. Layer half the blueberry filling onto of the cake. Top with half the lemon cream. Repeat the layers once more – cake, blueberry filling, lemon cream. Smooth the top layer of lemon cream with a spatula.
Can be made up to 24 hours ahead. Cover bowl with plastic wrap and store in the freezer until ready to serve.
Crumb piecing quilting with fabric scraps is a fun and easy way to turn leftover fabric into one-of-a-kind quilt blocks. A great stash buster that lets your creativity shine through. No patterns are needed!
What is Crumb Piecing Quilting with Fabric Scraps
If you’ve been quilting for any length of time, chances are good that you have a bin that’s overflowing with fabric scraps. Here’s a peek at mine.
It’s a little out of control, but I know I’m the only one. Quilters have always saved scraps.
And why not? Most quilts are made from scraps. That’s why we call it patchwork, because most quilts are made with patches of fabric that are pieced together into patterned blocks.
However, now that good quilter’s cotton runs fourteen dollars a yard and more, we’re saving more scraps than ever, holding onto ever smaller bits of fabric that we might have thrown away before. But what should we do with all those little scraps?
That’s where crumb piecing quilting with fabric scraps comes in.
Crumb piecing is an easy, creative way to turn small “crumbs” of leftover fabric into useable, unique quilt blocks. It’s a practical technique to add to your quilting toolbox. It’s also a lot of fun!
Getting Started with Crumb Piecing Quilting with Fabric Scraps
One of the great things about crumb piecing is that quilters don’t need to buy anything new to start doing it.
All you need is a pile of fabric scraps – even little crumbs – a sewing machine, and scissors. A rotary cutter, cutting mat, and ruler will make crumb piecing easier but aren’t absolutely required. If you’re already quilting, you likely have all that on hand already.
Since crumb piecing is a very improvisational quilting technique, you don’t even need a pattern. This is all about making it up as you go along!
How to Crumb Piece a Quilt Block – Choose Your Scraps
My crumb pieced blocks will be used in a quilt made with blocks from a swap I took part in years ago. The heart pattern on those swap blocks is the same, but everyone used different fabrics.
Because of that, I’m taking an “anything goes” approach with my scraps. Creating scrappy secondary blocks with a huge variety of colors will be a unifying factor for my many-colored heart blocks.
But you don’t have to go scrappy.
If you like, crumb pieced blocks can focus on just one color – all blues, yellow, red, pinks, etc. Or you can focus on a limited range of colors – blue and yellow, red and green, pink and purple.
Before you start sewing, it’s a good idea to iron your scraps. If they’ve been stuffed in a bin, they’re probably pretty wrinkled. Pressing out the wrinkles will make sewing them easier.
In crumb piecing and so much else, a picture really is worth a thousand words.
Follow along with commentary and photos below to see how to I stitched, trimmed, stitched, and repeated to create a cute, scrappy crumb pieced quilt block!
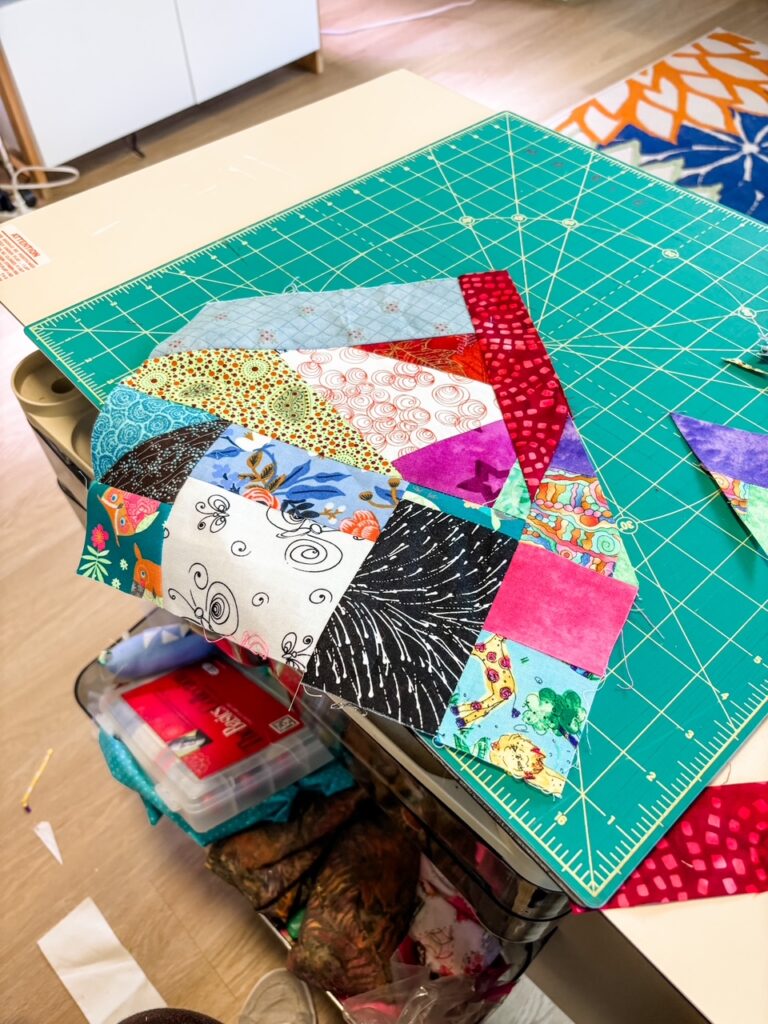
How to Crumb Piece a Quilt Block – Stitch, Trim, Stitch, Repeat
Start with Two Crumbs
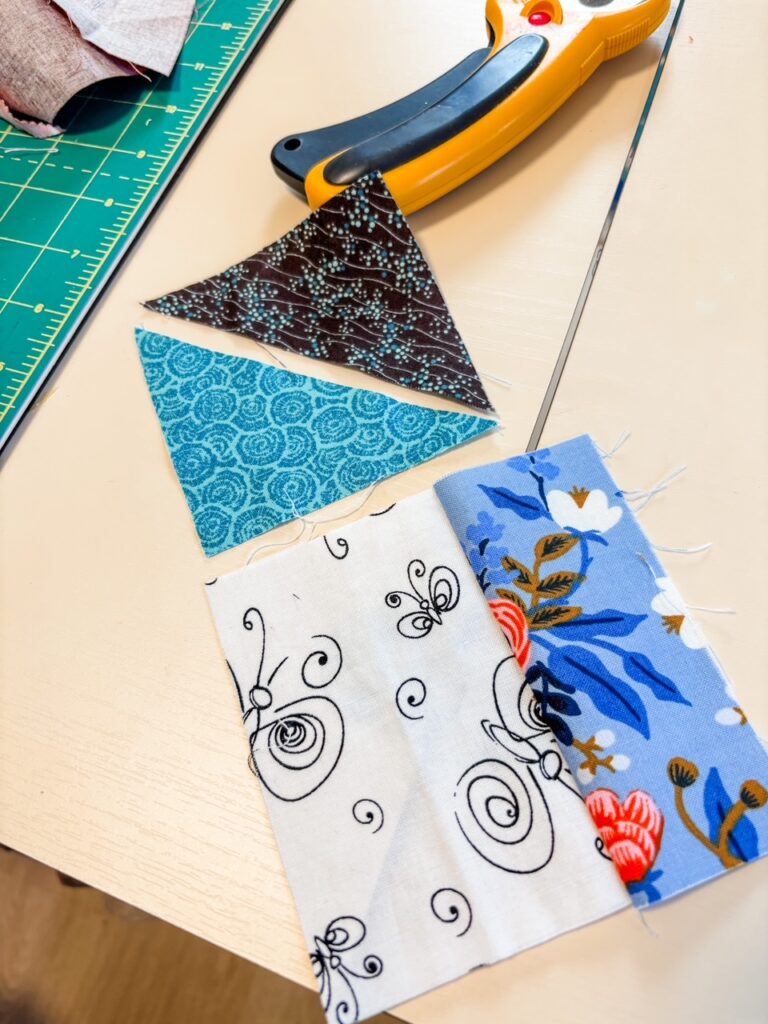
Every crumb-pieced block starts by sewing two fabric scraps together along one straight edge. As with regular quilting, we use a quarter-inch seam and place the fabrics’ right sides together.
The two scraps do not need to be the same size or shape. In fact, it’s more interesting if they’re not. As you can see in the photo below, I started this crumb piece block with two differently sized rectangles.
Now, I could have just gone on from there, sewing more rectangles to the first two. But I think crumb pieced blocks are more interesting when they include some angles.
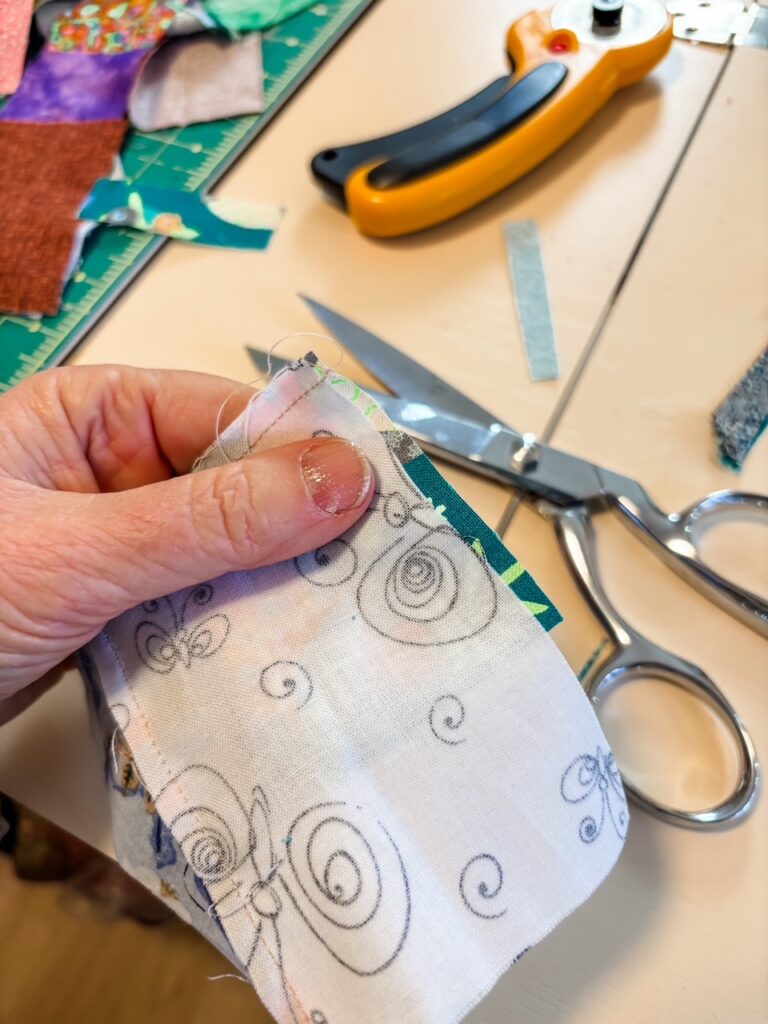
Angles and Changed Direction to Add Interest
For the next section, I decided to sew two triangles in a half-square triangle block and then sew another rectangle to the side to make it big enough to stitch onto the first section. But it was a little too big, so I trimmed off the excess fabric before pressing it open.
For the next round, I decided to use another rectangle scrap, turned sideways. Changing the direction of scraps is another easy way to add interest to crumb pieced blocks. Once again, the scrap wasn’t quite big enough to, so I stitched another crumb along one side and then trimmed it to fit after sewing.
My crumb-pieced block was starting to look pretty good! But do you know what would make it look even better? Even more angles.
Wonky is Good
I pieced together another section using some scraps that were cut on the bias. Then I used a ruler and rotary cutter to trim and straighten the edge so the two pieced sections could be sewn together easily.
Something else that I love about crumb piecing is that you don’t need to worry about matching seams. In crumb piecing, wonky is good!
To make the block bigger, I stitched strips along the peaked angles of the block. Next, I sewed some colorful squares together to make a wider strip. Then, I used my rotary cutter to trim the excess, creating a straight edge.
After sewing more fabric crumbs to increase the block size, I trimmed it down into an 11-inch square, the same size as the heart blocks from my long-ago swap.
Though I’ve still got a way to go before this quilt is finished, it’s coming along nicely. The scrappy, wonky, crumb pieced blocks pull things together. And they’ve been a lot of fun to make, too!
A Couple More Notes About Crumb Piecing Quilting with Fabric Scraps
Giving Orphans a Home
Crumb piecing isn’t just a great way to use up scraps, it can also make use of orphan blocks. Orphan blocks are the blocks we pieced and then abandoned, but couldn’t bring ourselves to throw away. We’ve all got a few of those, right?
There was a double wedding ring block in my scrap bin. My original idea for using a teal background…Well, let’s just say it didn’t turn out as well as I’d hoped.
However, whacking it into scraps and adding a couple to my crumb pieced blocks was a very good idea! If you’ve got some orphan blocks lying around, cut them up and give them a home in your crumb pieced quilt.
Crumb Piecing for Applique or Traditional Blocks
This time, I crumb pieced my scraps into great big squares. But you can also cut crumb pieced blocks into shapes for applique or even into patches for use in traditional pieced quilts.
Here’s an example from a quilt I own, designed and made by Deb Tucker. She used crumb piecing quilting with fabric scraps in the traditional basket blocks. They really add a lot!
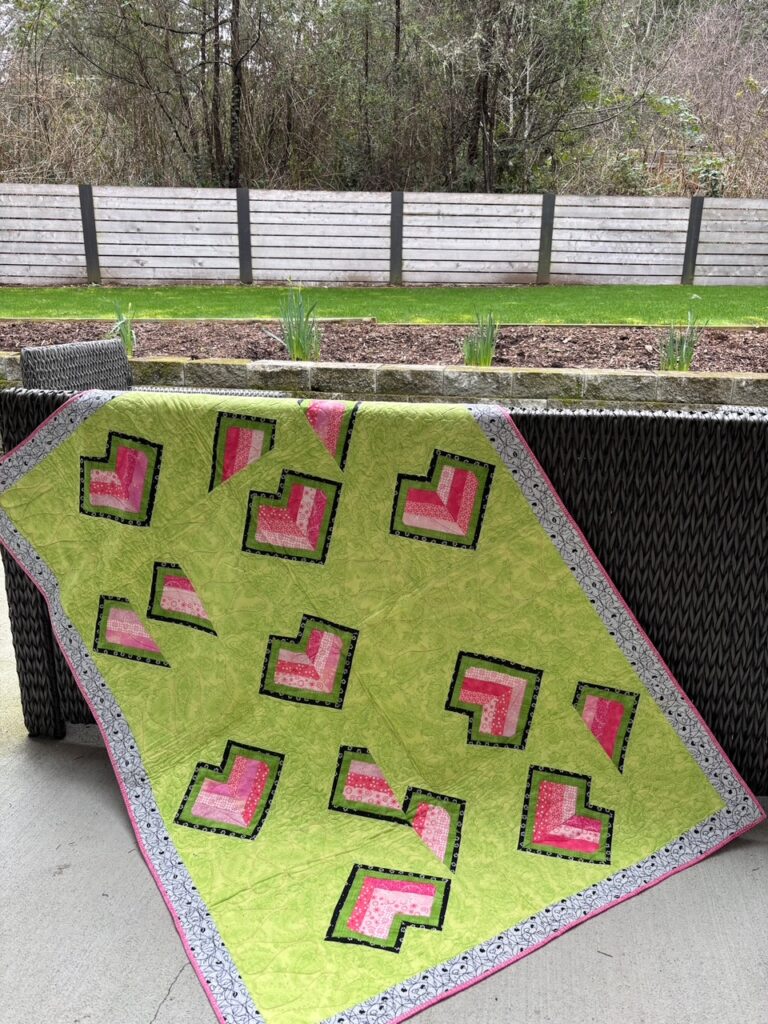
The Heart Blocks from my Quilt
One last thing I thought I’d mention, the heart blocks from my swap are the same blocks you’ll find in the pattern for my Broken Hearts Mending quilt, pictured below. It’s a companion quilt for the first book in my Cobbled Court Quilt series of novels.
Broken Hearts Mending is just one of eleven FREE companion patterns for my novels that you can download for your personal use from my website. Click this link to get to the patterns.
Creamed Potatoes and Peas are easy to make and easy to love! Tender, bite-sized potatoes and sweet peas swim in a rich, creamy sauce. They’re the perfect side dish for St. Patrick’s or Easter dinner.
Creamed Potatoes and Peas – One Of Many Traditional Irish Recipes and a Childhood Favorite I Still Love
Even as a kid, I loved vegetables. With the exception of mushrooms and canned spinach, there weren’t any veggies I wasn’t willing to eat.
However, creamed potatoes and peas were a particular favorite.
Potatoes of all types frequently appeared on the table of our Irish-descended family. But around this time every year, Mom would make creamed potatoes and peas. I always asked for seconds, and sometimes thirds.
The sweetness of the peas was a perfect foil to the tiny and tender new potatoes. Mom’s rich, creamy, delicately flavored white sauce brought everything together perfectly. It was culinary marriage made in heaven.
Spotting a bag of bite-sized potatoes at the supermarket made me think about Mom’s recipe, which I hadn’t made in quite a while.
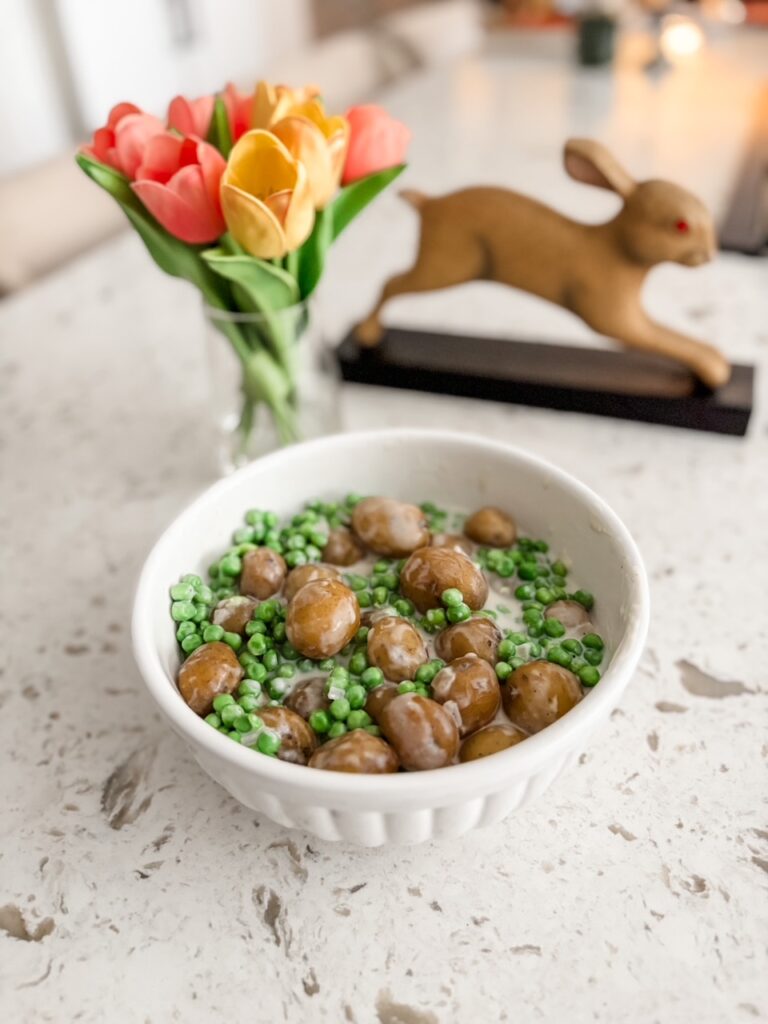
I’m happy to report that my Mom’s recipe for Creamed Potatoes and Peas is just as tasty as it was back in the day! Yes, I had seconds. So did The Chairman.
This is one of those sides that goes well with so many things – pork, beef, chicken, or fish. Mom often served it with our Easter ham.
With St. Patrick’s Day and Easter coming up, this feels like the ideal time to share this family favorite.
What Do You Need to Make Creamed Potatoes And Peas?
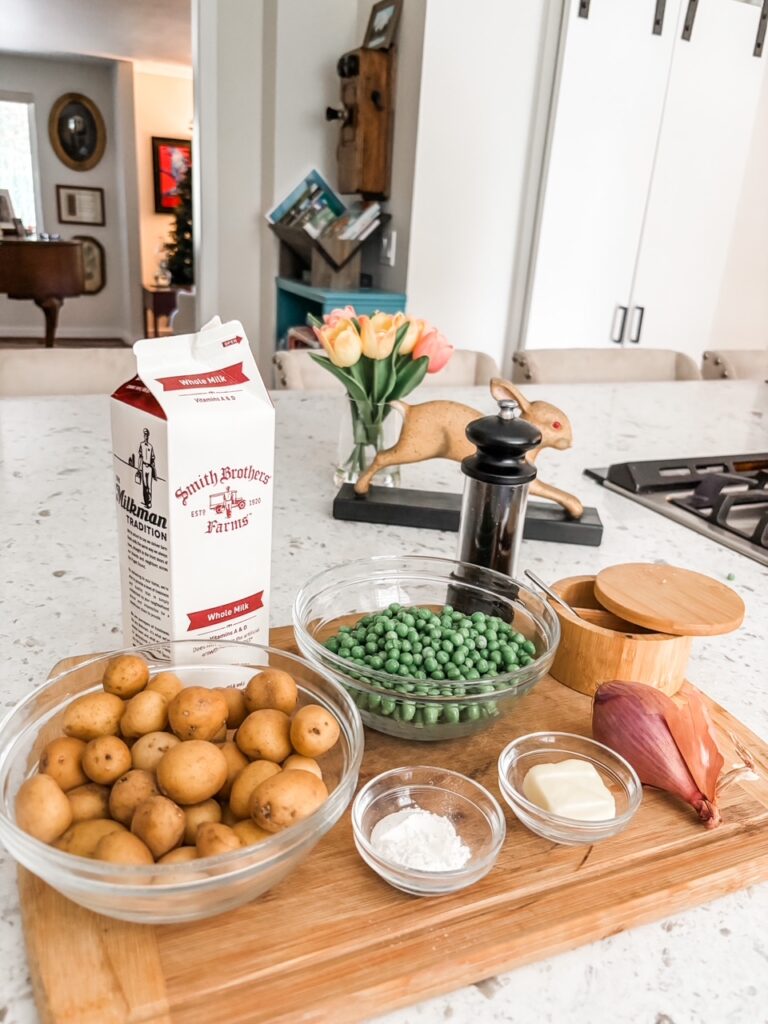
One of the things that’s so great about this recipe is that it doesn’t require a lot of ingredients. All you’ll need is…
Potatoes: My preference is for whole, round, small potatoes with the skin on. Our store carries some they call “nibbles” that are perfect. Fingerlings could work, too. You could also cut a regular-sized potato into bite-sized pieces.
Peas: I use frozen peas for this dish. They’re easy to find and use. They’re also fairly inexpensive. Rather than cook the frozen peas beforehand, I just rinse them under some cool water to thaw. They taste wonderful that way – fresh and sweet – and retain their bright green color.
Shallots: Mom would sometimes add some sauteed, chopped onion to her recipe. It gives the dish a little extra oomph. I prefer to use shallots, which are just a bit milder. But either can work.
Milk: Whole milk is best here. You could substitute 2% milk, but the sauce won’t be quite as thick or rich.
Butter
Flour
Salt and pepper – I like quite a bit of pepper here. It kicks the flavor up a notch. You can use less if you like; just make sure to taste the sauce and adjust the seasonings accordingly. A delicately flavored sauce is fine, but a bland sauce is not!
Making Creamed Potatoes and Peas is Easy!
This recipe is super simple to make. In fact, I’d even call it easy-peasy! (Sorry, I couldn’t resist.)
The first step is to boil the potatoes in well-salted water. The only tip here is to make sure you don’t overcook them. Nobody likes mushy potatoes.
Set a timer for about 15 minutes, then check for doneness by trying to pierce one of the potatoes with a fork. Your fork should go in fairly easily, but you should still feel a little resistance.
My recipe uses frozen peas. Though I do rinse them under cool water to make sure they’re thawed, I don’t cook them beforehand. They’ll cook just enough when they’re added to the white sauce but still retain their texture and color.Should you want to use fresh peas instead of frozen, you’ll need to boil them in salted water for no more than three or four minutes.
Making the cream sauce starts with melting the butter in a pot, then cooking the shallots in butter until they’re soft – about four minutes. Next, whisk the flour into the melted butter and shallots to make a thick roux. Cook the roux, whisking continually, for about a minute. That will cook off any raw taste from the flour.
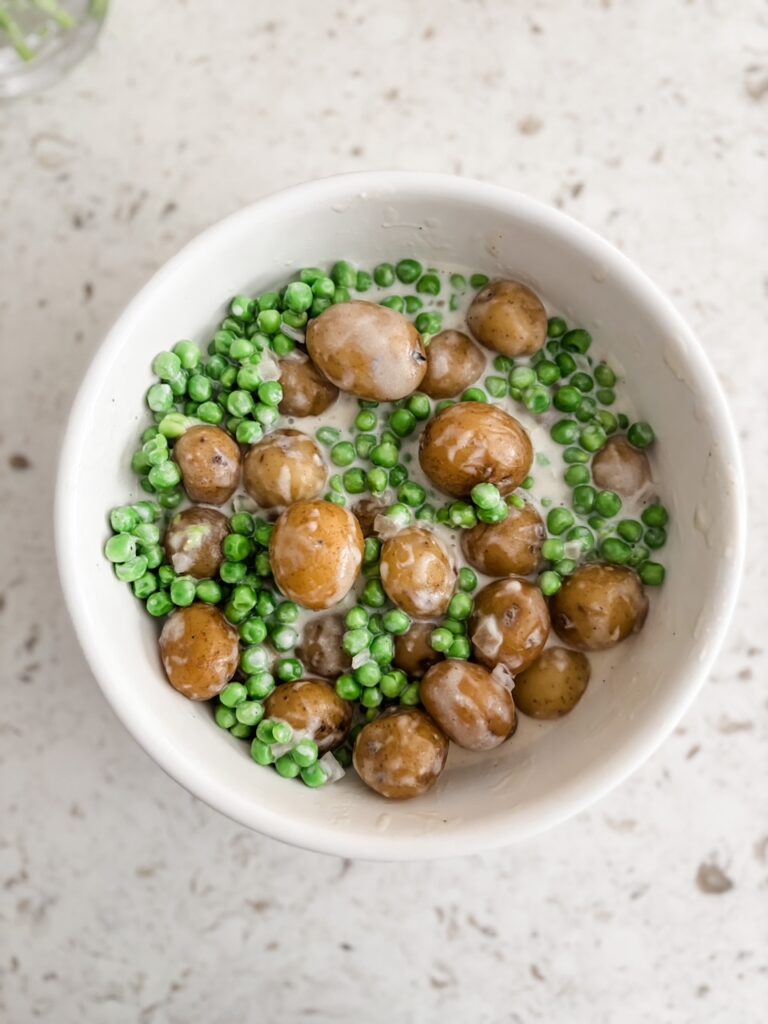
Slowly pour the milk into the pot, whisking constantly to prevent lumps. Then you’ll add the salt and pepper and bring the sauce to a boil before lowering the heat slightly.
You’ll then simmer the sauce for three to four minutes, stirring frequently, until the sauce becomes thick and creamy. Gently stir the cooked potatoes and peas into the sauce and cook on low heat for another two or three minutes to warm through. Taste to adjust seasonings and serve.
Creamed potatoes and peas are a crowd-pleasing side dish. Try making some soon!
1 lb small, round, skin-on potatoes (can sub fingerlings or cut large potatoes into bite-sized pieces)
10 oz. small frozen peas
¼ cup minced shallot (can sub yellow or white onion)
1 T butter
1 T flour
1 cup whole milk
½ tsp kosher salt
¼ to ½ tsp fresh ground pepper
Instructions
Bring 8 cups of salted water to boil in a pot. Add the potatoes and boil for about 15 minutes, until potatoes are tender but not mushy. Drain water and set aside.
Place the frozen peas into a colander or sieve. Run cool water over the peas to thaw, then set aside.
Melt the butter in a pot over medium-low heat. Add the minced shallots and cook for about three minutes, stirring frequently, until soft and translucent. Whisk the flour into the butter and shallot mixture, creating a roux. Cook for a full minute, whisking constantly.
Slowly pour the milk into the pot, whisking continually to prevent lumps. Add the salt and pepper. Bring the sauce to a boil, then lower the heat slightly. Simmer the sauce for 3 to 5 minutes, until it becomes thick and creamy.
Add the potatoes and peas to the pot, stirring gently into the sauce. Cook on low heat for two or three minutes to warm the vegetables through. Taste and adjust seasoning if necessary. Serve immediately.
This delicious Slow Cooker Chicken Tinga is a convenient take on a traditional Mexican recipe. Loaded with smoky flavor and savory spice. Adjust the heat level for a dish the whole family will love.
Slow Cooker Chicken Tinga – A Convenient Take On A Mexican Favorite
When my family and I moved to Mexico back in 1995, an adventure that lasted almost five years, I’d never heard of chicken tinga. But it didn’t take long for me to learn to love it because chicken tinga is a staple of Mexican cuisine.
Chicken tinga is tender shredded chicken simmered in a rich, delicious, flavorful sauce of tomato, chipotle chiles, and spices. It’s used as a filling or base for all kinds of traditional Mexican dishes, including tostadas, tacos, gorditas, and enchiladas.
Because traditional preparation for tinga involves boiling and simmering, adapting it to the slow cooker makes a lot of sense. Cooking the chicken and sauce at a low heat for a few hours not only allows for a deep infusion of flavor, it’s also incredibly convenient for busy cooks.
Slow Cooker Chicken Tinga – Not Quite Fix And Forget, But Close
Many slow cooker recipes fall into the “fix it and forget it” category.
There’s something to be said for being able to dump a bunch of ingredients into the slow cooker and walk away. However, it tends to be more about convenience than taste, which is why slow cooking has gotten a bad rap in some circles.
I love slow cooking! It’s my go-to dinner solution for busy days (you can find more of my slow cooker recipes here). But over the years, I’ve learned that adding a step or two in the preparation can give me a dish that tasty as well as convenient.
Slow Cooker Chicken Tinga is one of those dishes. A little extra prep makes a big difference.
Slow Cooker Chicken Tinga – Method and Making It Your Own
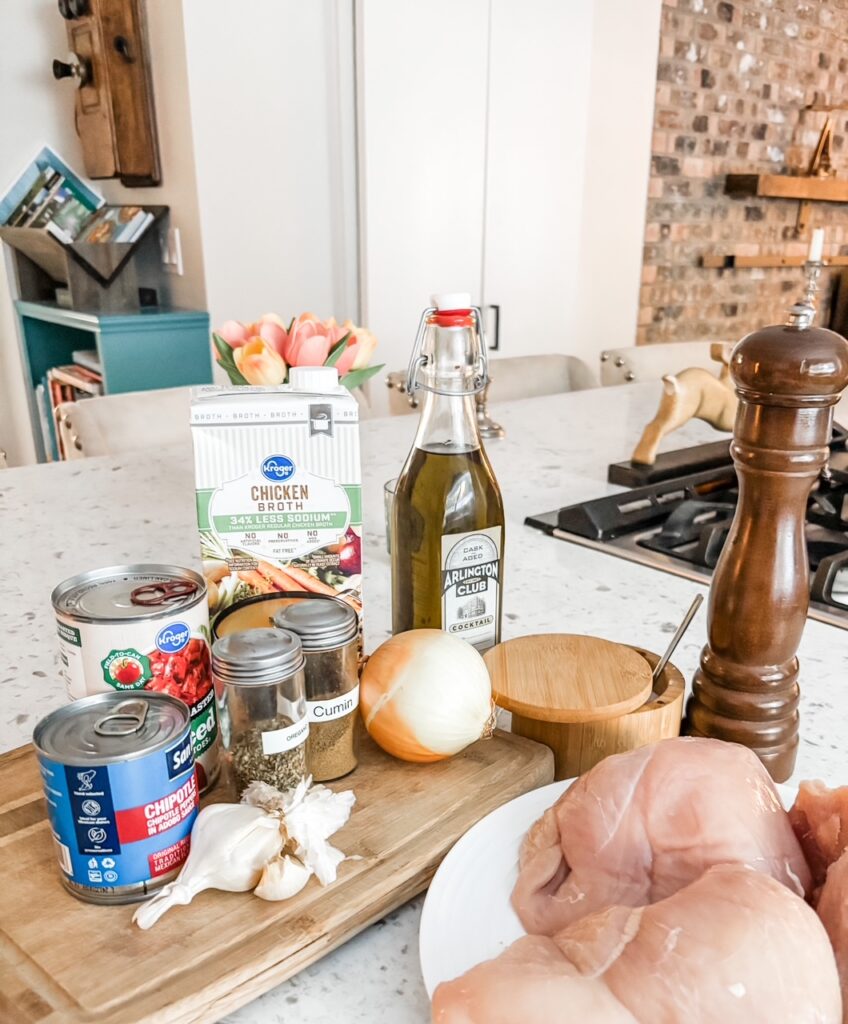
This recipe starts off with a sauce of sauteed onions and garlic, fire-roasted canned tomatoes, chipotle chilies in adobo sauce, and spices, briefly simmered on the stovetop.
Slow cooking can lessen the flavor profile of spices. My recipe offsets that by calling for generous amounts of cumin and oregano.
However, the heat in the recipe comes from adding canned chipotle chilies in adobo sauce. Depending on your preference, you may want to adjust the number of chiles or the amount of adobo sauce up or down.
For a higher heat level, use three chiles and two tablespoons of adobo. If your family really loves hot and spicy food, you could even consider adding an additional chile and spoonful of sauce.
Those who like just a little heat will should use only two chiles and one tablespoon of adobo sauce. Even if heat isn’t your thing, I don’t recommend leaving the chipotle and adobo out entirely. Doing so will result in a very bland sauce.
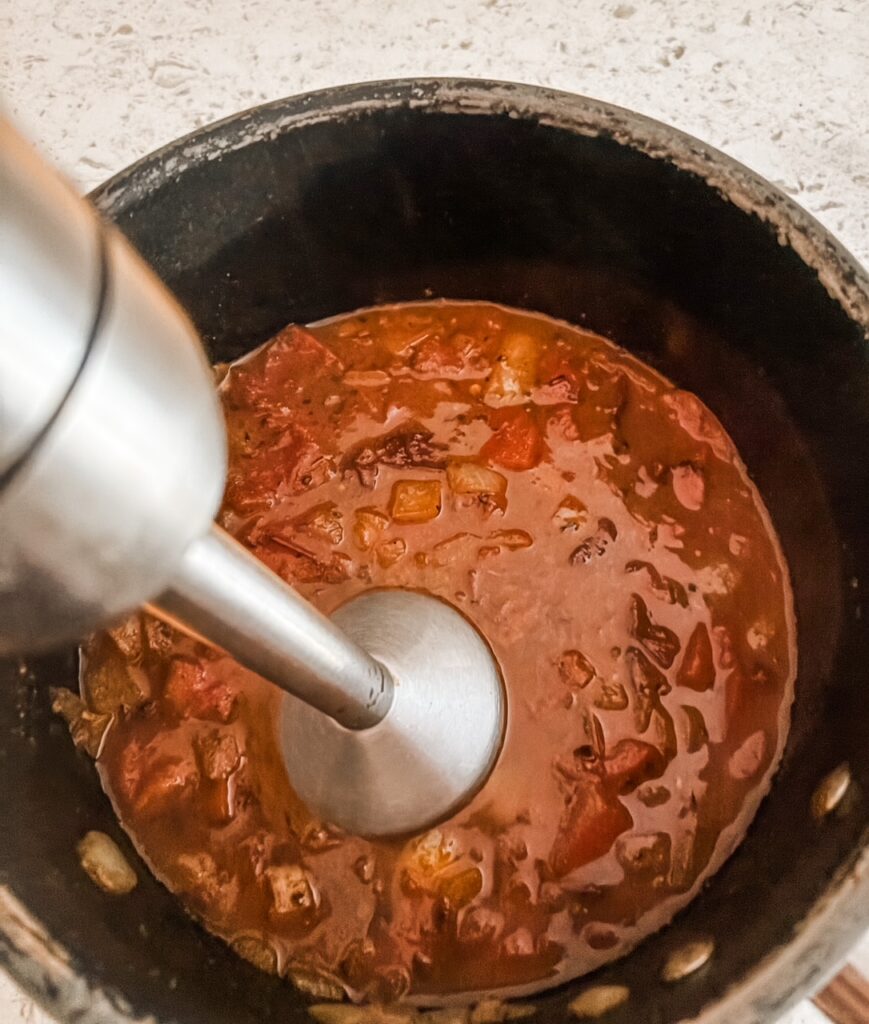
Once the sauce ingredients have finished simmering on the stove, you’ll use an immersion or countertop blender to create a thick, delicious puree.
The sauce is poured into the slow cooker over seasoned chicken breasts and cooked for three to four hours.
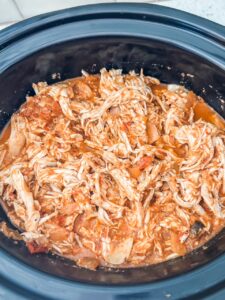
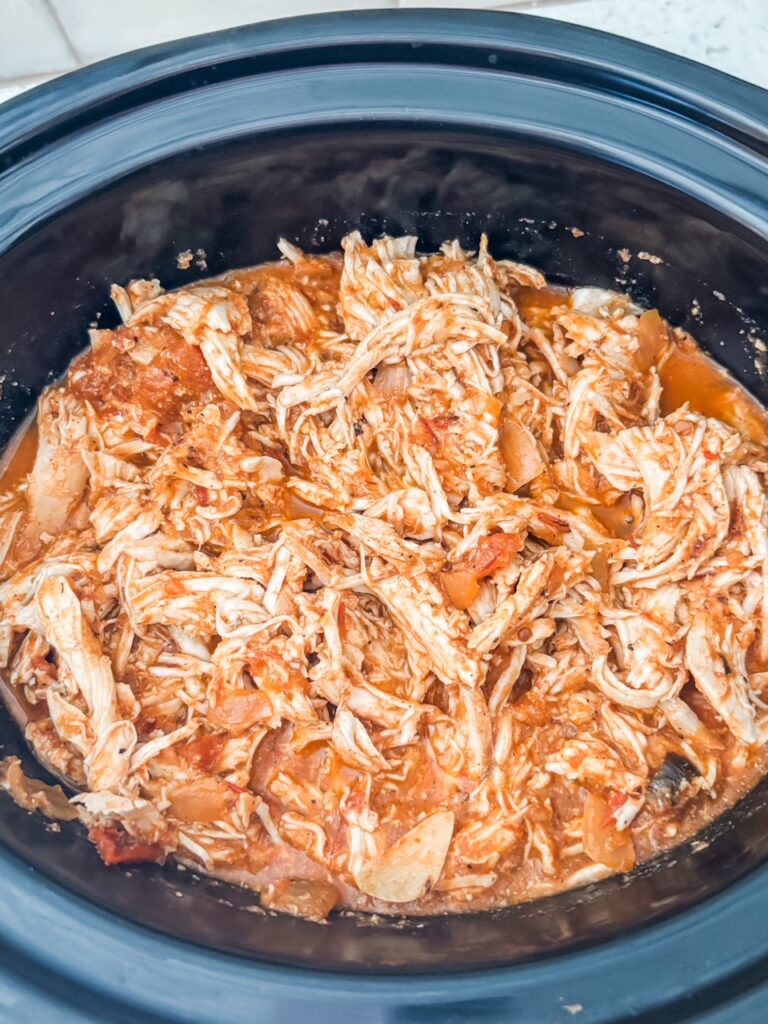
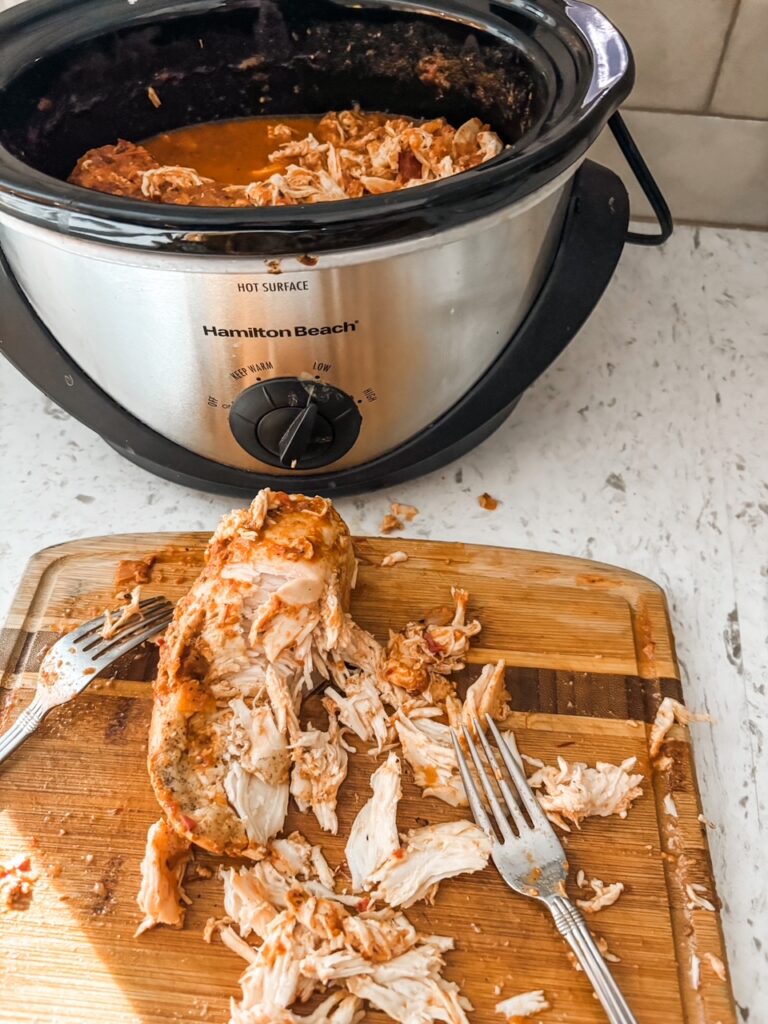
After cooking, you’ll take the chicken breasts from the cooker and shred the meat. Pulling two forks across the chicken breast is opposite directions will shred the meat easily and keep you from burning your fingers.
The last step is to return the shredded chicken to the slow cooker, stirring it into the sauce. Allowing the meat to simmer in the sauce for an additional thirty minutes will infuse every bite with wonderful flavor.
Once that’s done, your slow-cooker chicken tinga is ready to serve!
How To Serve Slow Cooker Chicken Tinga?
My recipe calls for three pounds of chicken breast. With so many ways to serve chicken tinga, you should have no trouble using it up.
Fillings for Mexican-inspired dishes like tostadas, tacos, and enchiladas are just the beginning of what you can do with chicken tinga.
A couple of scoops of chicken tinga make a terrific addition to your favorite salad. It’s also a great filling for wraps or omelets.
My favorite way to use chicken tinja is in bowls.
This week, I piled some on top of a bowl filled with brown rice, oven-roasted sweet potatoes, avocado, chopped cabbage, cilantro, and diced avocado. It was a quick and easy, terrific-tasting dinner.
Slow-cooker chicken tinga can be stored in the freezer for up to three months. If you’re not able to use it all right away, just let it cool completely, then place in plastic freezer bags or containers. Be sure to write the date on the containers.
2–3 canned chipotle chiles in adobo sauce (depending on heat preference), chopped
1–2 T adobo sauce (depending on heat preference)
¾ cup low salt chicken broth
Instructions
Rinse chicken breasts with water, then pat dry with a paper towel. Sprinkle chicken breasts all over with half the salt and half the pepper. Place in slow cooker.
Cook onions and garlic in olive oil in a pot on the stove over medium heat for 4-5 minutes, until soft and translucent. Add cumin and oregano. Cook onions and spices for an additional minute, stirring.
Add canned tomatoes, chopped chipotle chiles, adobo sauce, chicken broth, and remaining salt and pepper to the cooked onions and spices. Bring to a boil, then lower heat and simmer sauce for 5 minutes.
Puree sauce with an immersion blender or in regular blender. (Take care as the sauce will be hot.) Pour pureed sauce over the chicken breasts in the slow cooker. Cook on low setting for 3-4 hours.
Remove cooked chicken from slow cooker and place on cutting board. Shred chicken into small pieces, using two forks. Return shredded chicken back to slow cooker, stirring it into the sauce. Cook an additional 30 minutes before serving. Unused chicken tinga can be cooled completely, then stored in closed containers in the freezer for up to three months.
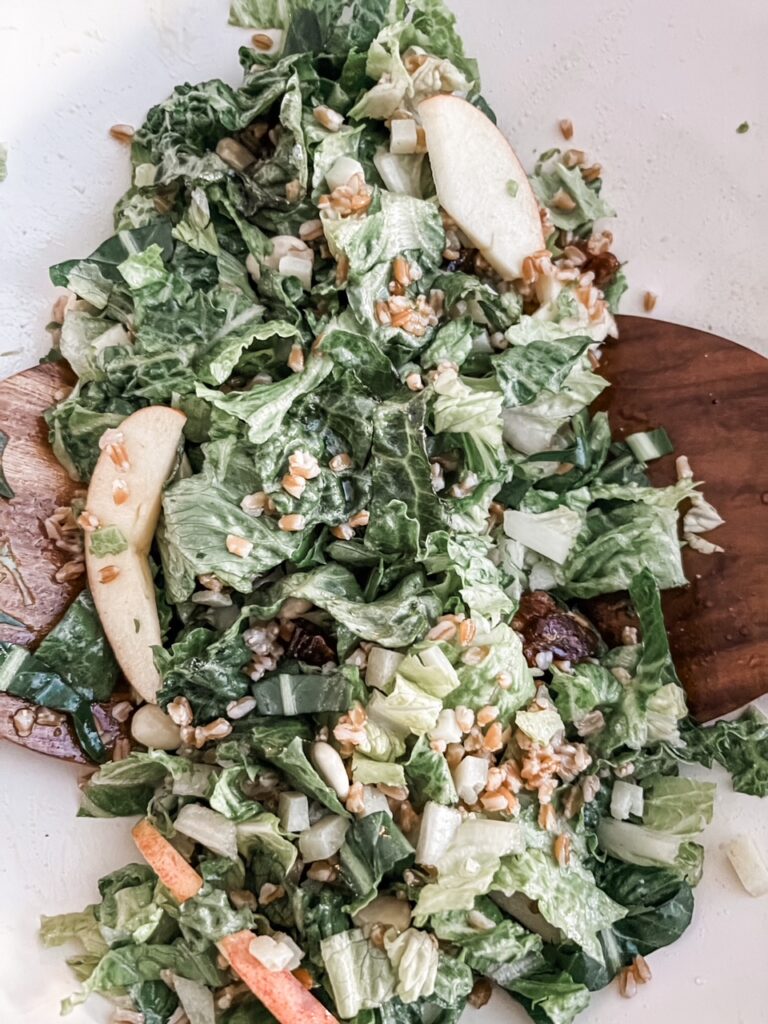
Fan of True Food Kitchen? Looking for True Food Kitchen Copycat recipes? Then meet your new favorite salad! This yummy Date, Almond, Farro Salad makes a satisfying meal or tasty side salad. Sweet, tart, and savory all at once, with loads of flavor in every bite. So good!
Date, Almond, Farro Salad – Make A True Food Kitchen Copycat RecipeAt Home
Back when we had an apartment in Denver, I used to eat at True Food Kitchen all the time. They make healthy food that tastes terrific.
So, when we took a winter trip to Scottsdale earlier this month, I was excited to learn there was a True Food Kitchen near our hotel. We ate there twice, and I had the Date, Almond, and Farro Salad on both occasions.
With a wonderful combination of sweet and chewy dates, crunchy almonds, tart apples, and savory Manchego cheese, this may be one of my all-time favorite salad (And I have a lot of salad recipes I’ve shared over the years!). I enjoyed every delicious bite during our two visits but felt a little sad when my plate was empty.
You see, there aren’t any True Food Kitchen Restaurants in my state. When I looked up locations online, I realized I’d have to travel more than 800 miles to get to the nearest restaurant.
That’s when decided to take matters into my own hands and create my own True Food Kitchen copycat recipe for their Date, Almond, and Farro Salad.
My copycat version of the True Food Kitchen favorite is as close to the original as I could get in my own kitchen. And I’ve got to say, it’s good. Really good!
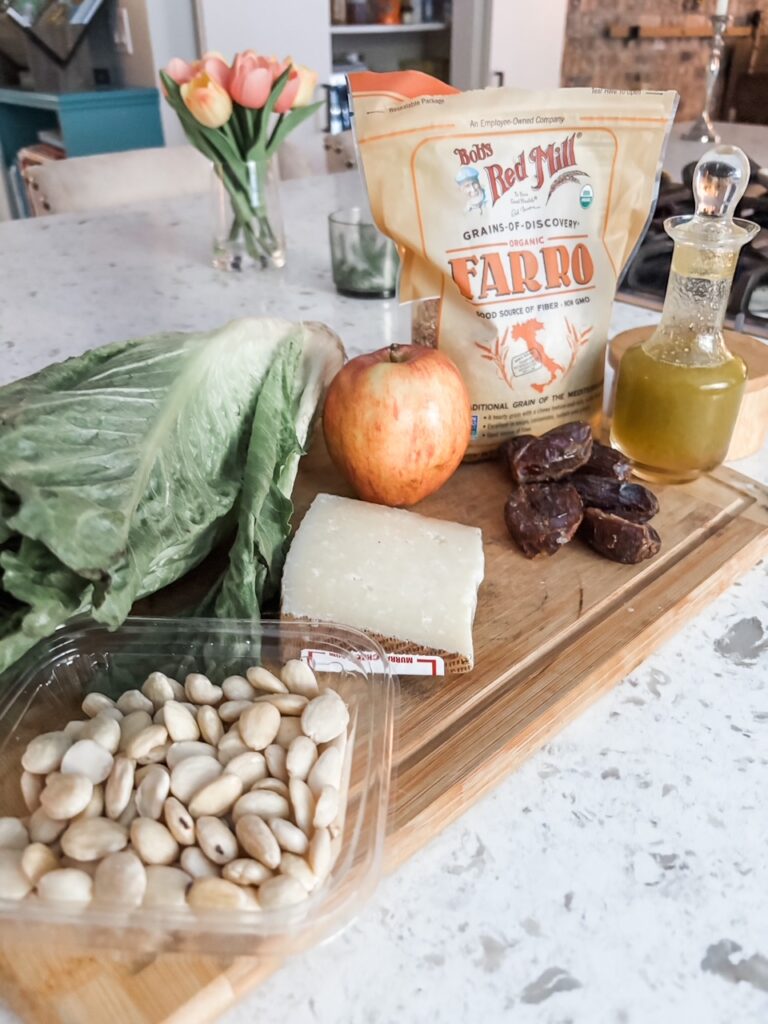
What Do You Need To Make Date, Almond, And Farro Salad?
Lettuce – My preference is for crisp, fresh romaine. It’s sturdy with a nice crunch and doesn’t wilt when you add dressing. You could also use red or green leaf lettuce in a pinch. If you’ve got some fresh herbs or arugula, add a few handfuls for extra flavor.
Medjool Dates – While you could substitute another variety of pitted dates in this recipe, Medjool dates are highly preferred and worth seeking out. They’re larger and sweeter than other types and have a soft, chewy texture.
Marcona Almonds – This Spanish variety of almond is pricier than standard almonds but worth it. Marcona are skinless and have a softer but still firm texture. They’re sweeter than other almonds and have a wonderful buttery flavor.
Apple – I like Fuji apples for this salad but feel free to sub your favorite variety of sweet and tart apples.
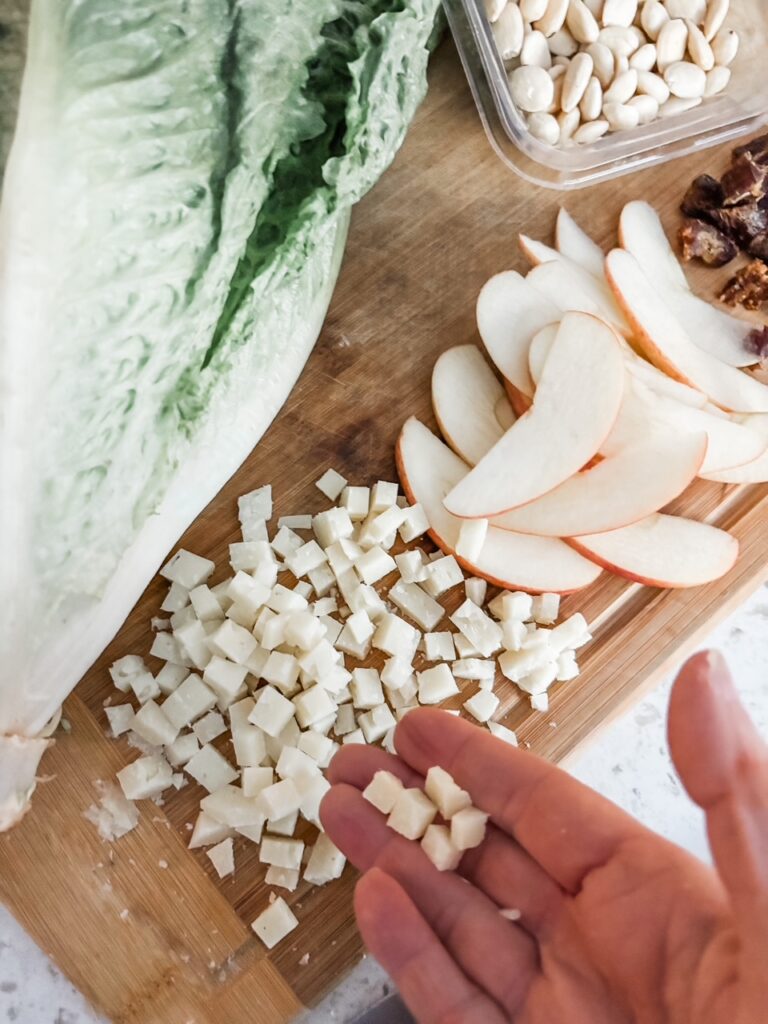
Manchego Cheese – This is firm textured, Spanish sheep’s milk cheese that is aged at least 60 days. The flavor is strong in a good way, which is why I recommend dicing it very small. It’s lovely to taste a little bit in every bite. If you can’t find it at the store, sub Pecorino Romano cheese.
Farro- Farro is a wonderful, chewy, and somewhat nutty-tasting type of whole-grain wheat. It’s high in protein and fiber. You should be able to find it in most grocery stores. If not, you could substitute barley.
Champagne Vinaigrette – my vinaigrette calls for olive oil, honey, Dijon mustard, and champagne vinegar. You can sub apple cider vinegar if you’d like
What To Serve With Date, Almond, And Farro Salad
With so many tasty, healthy, satisfying ingredients, Date, Almond, and Farro Salad really is a meal in itself.
A nice piece of crusty bread with butter on the side might be nice, but it’s not absolutely necessary. The entrée sized portions are very generous, so bread or no bread, you’ll leave the table satisfied.
If you want to serve it as a side dish, a mound salad and a cup of soup would make a perfect lunch or light dinner. It’s also a great accompaniment with just about any kind of grilled or broiled meat, poultry, fish, or your favorite pasta.
Bring the taste of True Food Kitchen into your kitchen. Make a Date, Almond, and Farro Salad this week!
For the Salad 8 cups romaine or other sturdy lettuce, chopped into bite-sized pieces 6 Medjool dates, chopped into bite-sized pieces ¼ cup Marcona almonds 1 large Fuji apple, very thinly sliced (can sub any variety of sweet tart apple) 3 oz Manchego cheese, cut into ¼ inch dice (can sub Pecorino Romano) 1 cup cooked farro (cook according to package directions, can sub cooked barley)
For the Vinaigrette ½ cup champagne vinegar (can sub apple cider vinegar) ½ cup olive oil 2 T honey 2 tsp Dijon mustard
Kosher salt and pepper to taste
Instructions
Place all the salad ingredients together in a large serving bowl.
In a smaller bowl, vigorously whisk together all the vinaigrette ingredients.
Pour the desired amount of vinaigrette onto the salad (save any extra vinaigrette for another purpose, store covered in the refrigerator), and toss to coat. Serve immediately.
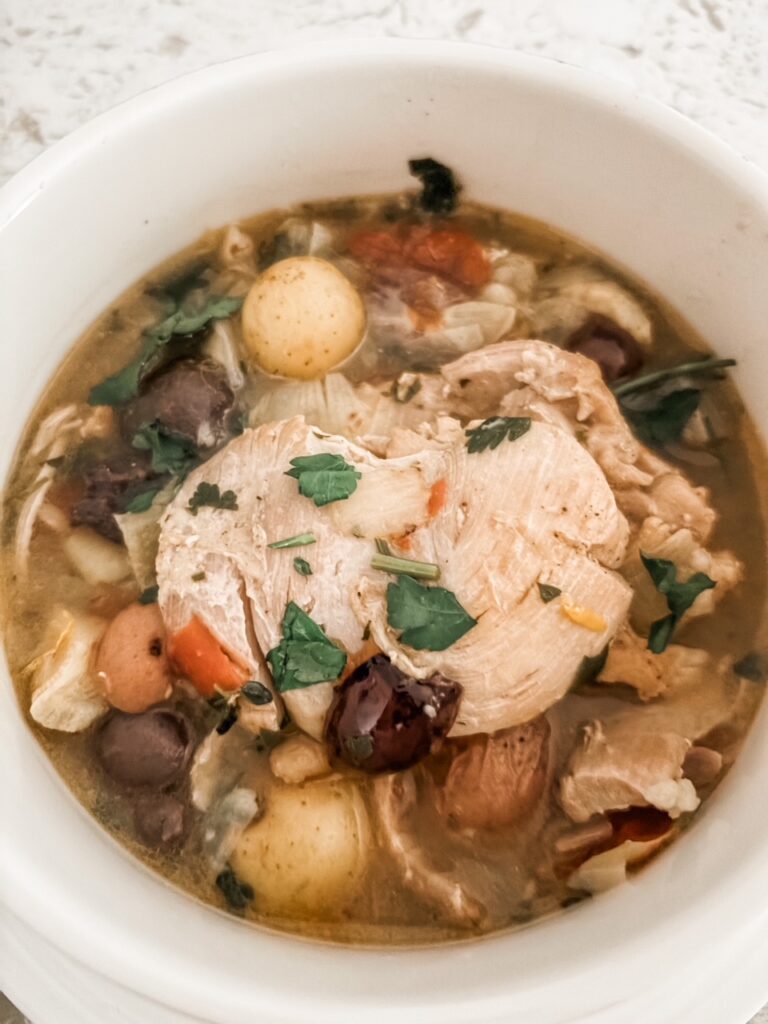
Tender chicken with potatoes, artichoke hearts, tomatoes, and olives, braised in a flavorful herb infused sauce. My One Pot Braised Chicken Thighs is a delicious, comforting meal that’s a perfect dinner for cold winter nights.
One Pot Braised Chicken Thighs With Potatoes And Artichoke Hearts – Winning The Pantry Challenge
Have you ever watched one of those cooking show contests where somebody pulls a bunch of random items from the pantry and challenges somebody else to make a meal from it? Hopefully a delicious one?
A lot of cooking show challenges seem pretty contrived to me. I mean, are any of us ever going to be required to bake a showstopping wedding cake in three hours? Doubtful.
But the pantry challenge makes sense to me. Because haven’t we all been there?
Picture this.
You’ve had a crazy busy day. So busy that you haven’t had any time to plan dinner, or go to the grocery store. But ready or not, dinnertime is approaching. You start pulling stuff out of the fridge, pantry, and freezer, wracking your brain for a way to turn it into something edible. And hopefully delicious.
It’s a scenario that’s played many times in my life. Sometimes the results of my pantry challenges turn out pretty well. Other times? Not so much.
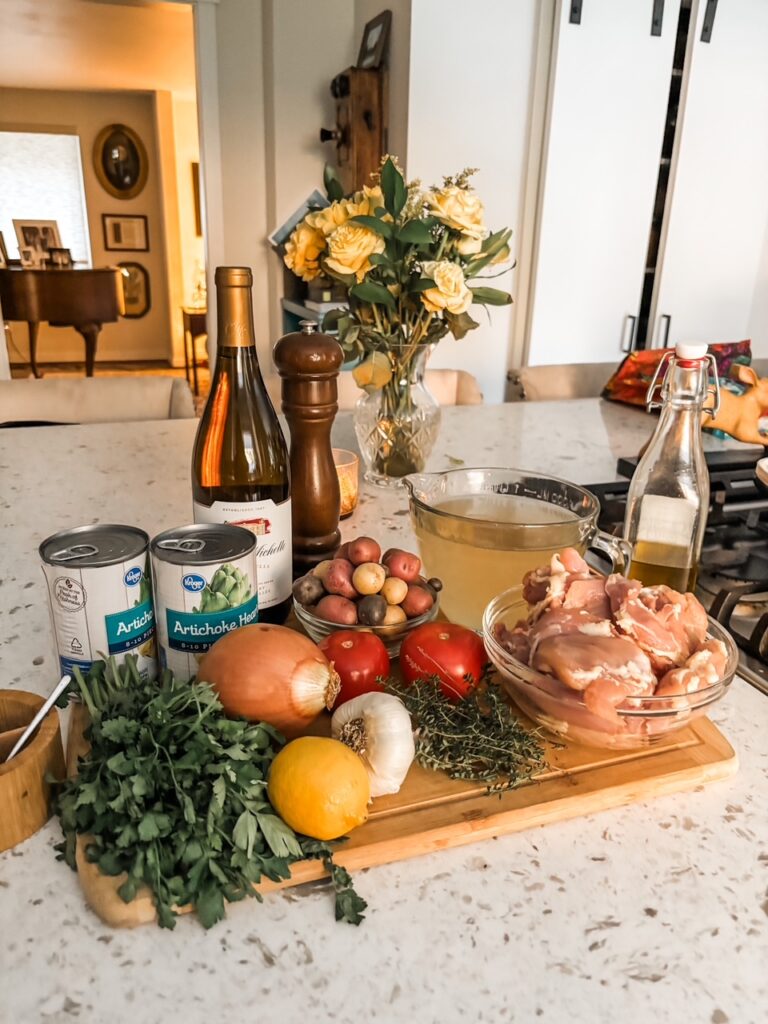
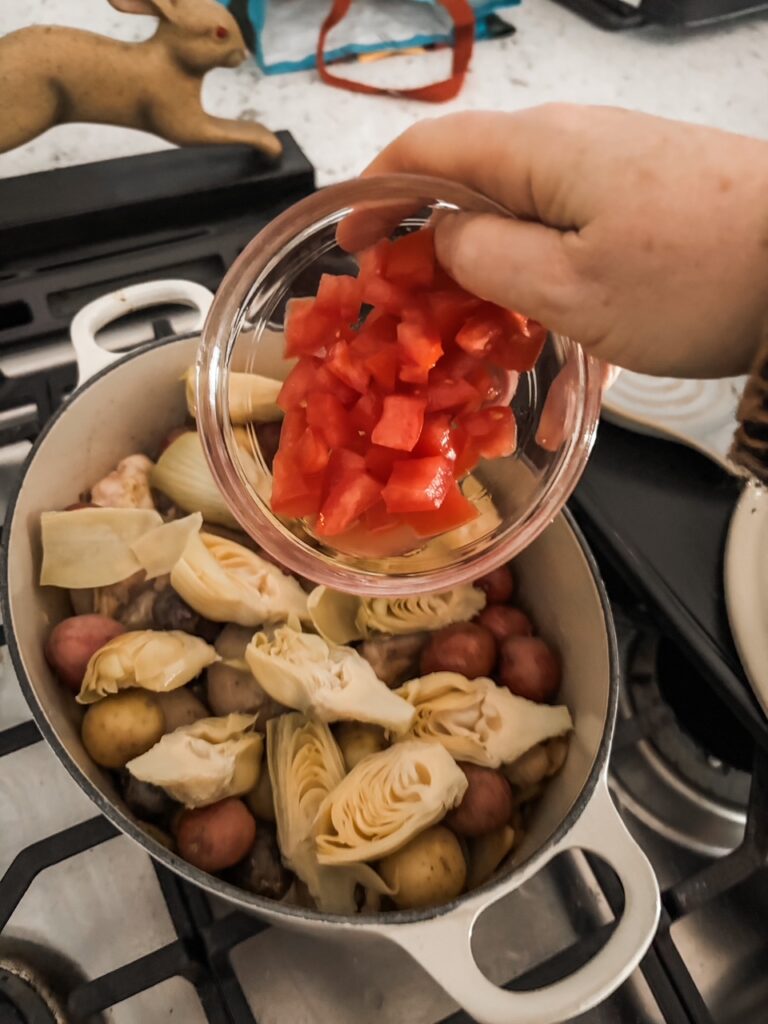
A few weeks ago, I found myself in that same position. With the dinner hour approaching and no time to go to the grocery store, I opened the pantry, saw a can of artichoke hearts, and took it from there.
The end result of my experiment was a one pot Braised Chicken Thighs with Potatoes and Artichoke Hearts. It wasn’t just edible, it was good. Really good. As in, my husband has asked me to make it three times in the last month good.
In short, I won the pantry challenge.
One Pot Braised Chicken Thighs With Potatoes And Artichoke Hearts – Grown Up Comfort Food
Braising is when meat is partially cooked at high heat in fat, then steamed in a relatively small amount of liquid in a covered container.
This cooking method that’s often used for red meats, it’s also wonderful for chicken thighs. The end result is juicy, flavorful, and melt-in-your-mouth tender.
Something else that makes this recipe for my one pot Braised Chicken Thighs so wonderful is the amount and variety of veggies and aromatics that cook along with the chicken.
In addition to the potatoes and artichoke hearts, I’ve included savory onion and garlic, fresh tomatoes to add a little acid and body, and Kalamata olives for a surprisingly salty bite now and then.
All those luscious goodies are braised in a wonderful, light chicken and white wine broth. It’s flavored with fresh herbs and finished with lemon juice and zest. Though this is technically a one-dish dinner, you’ll want to serve it with some crusty bread to soak up every mouthful of that fabulous broth.
Braised chicken thighs with potatoes and artichoke hearts is one of those dishes I’d be happy to eat year-round. However, it’s especially good on chilly winter days, when you want something hot, hearty, and absolutely delicious.
If you’re on the lookout for grown-up comfort food, you’ve found it.
Though the ingredient list is a little long, the recipe is pretty easy and comes together in under an hour.
Making Braised Chicken Thighs With Potatoes And Artichoke Hearts – In One Pot!
This dish cooks on the stovetop and in the oven. You’ll need a Dutch oven or a heavy, large flame and oven-proof lidded casserole to make it. I used my 5-quart Le Creuset oval Dutch oven, which I love and have had for years.
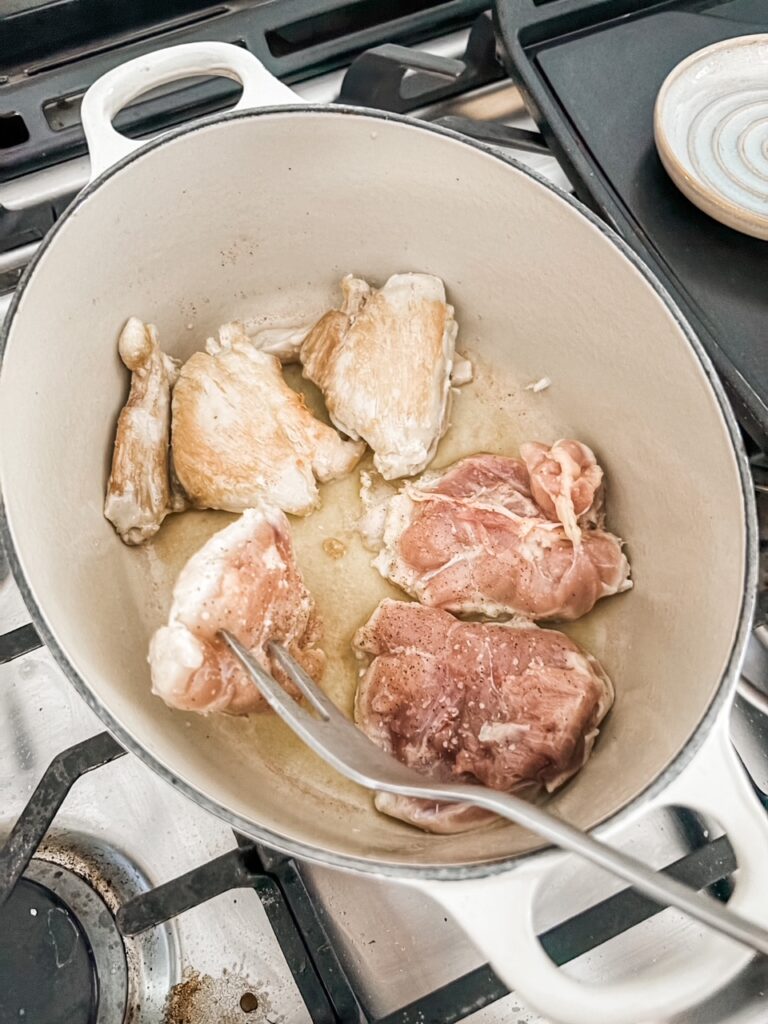
You’ll start by seasoning the chicken thighs and then searing them in hot olive oil on both sides. Getting a nice, golden brown on both sides of the chicken thigh is important. You’ll have to work in batches, doing about half the chicken at one time.
Once the chicken is seared, you’ll pull it out of the pot and set it aside. Then you’ll add a little more oil and cook the onion and garlic until the onion is golden brown and caramelized. Don’t rush this part! Taking the time to get a deep color adds a lot of richness to the dish.
After the onions are cooked, you’ll pour the wine into the pot, then scrape up any browned bits on the bottom. In addition to adding extra flavor to the broth, it makes it easier to clean the pot later.
Next, you’ll put the chicken back in the pot along with th artichoke hearts, tomatoes, chicken broth, half of the thyme, and the potatoes.
I really love using tiny, bite-sized potatoes or fingerlings for this dish. Having the whole potato with the skin on it is a tasty touch. But you can sub regular potatoes, cut into bite-sized pieces if you need to.
With most of the ingredients in the pot, you’ll turn up the heat on the burner and bring the liquid to a boil. Then you’ll pop the pot into a preheated oven.
This next part isn’t required, but I like to thicken the sauce just a little bit. So, after 20 minutes in the oven, I pulled it out and created a slurry of flour and about half a cup of the hot broth. Then I added to slurry back into the pot, stirred it, and let it cook for another 10 minutes.
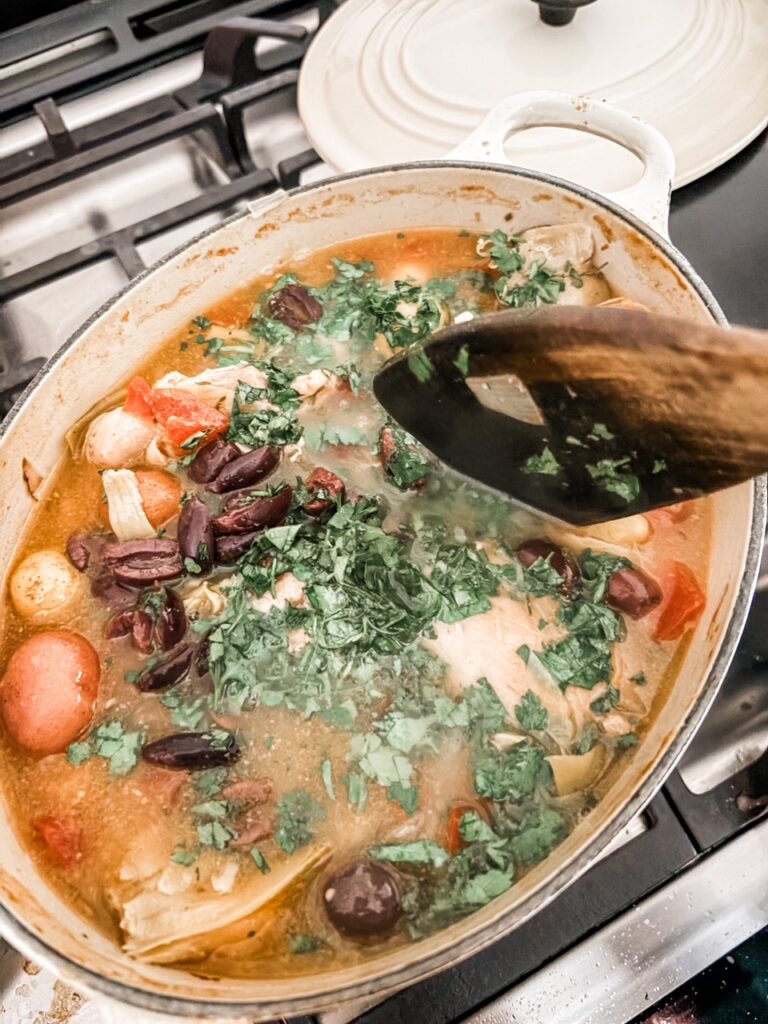
As I said, thickening is optional, but you’ll still have to pull out the pot to add the olives and fresh parsley after 20 minutes. Then you’ll return the pot to the oven for 10 more minutes.
When the timer goes off, your kitchen will smell amazing and the dish will smell good enough to eat! But don’t dig in just let!
Some fresh lemon juice and zest, plus the remaining thyme are the finishing touches on this fabulous dish.
Once they’re in, taste and adjust the seasonings. Then ladle a generous helping of the chicken, potatoes, artichokes, and broth into bowls and enjoy!
12 oz whole bite-sized potato (can sub regular potatoes, cut into bite-sized pieces)
1 14oz can artichoke hearts, drained and sliced into halves
2 medium tomatoes, seeded and chopped
4 tsp fresh thyme, divided
1.5 cups low sodium chicken broth
20 kalamata olives, sliced into halves
¼ cup chopped parsley
2 lemons, zested and juiced
2 T flour (optional)
Kosher salt
Pepper
Instructions
Preheat oven to 350 degrees. Sprinkle chicken thighs lightly with salt and pepper
Place 2 T olive oil in ovenproof lidded casserole or Dutch oven, on the stove over medium high heat. Place half the chicken in the hot oil, searing about 3 minutes on each side, until beginning to brown slightly. Remove seared chicken to a platter. Repeat with the remaining pieces.
Add remaining ½ T of oil to the casserole, along with onion and garlic. Sprinkle with lightly with salt and pepper. Lower heat to medium. Cook, stirring frequently, until onions are soft and translucent, 4 to 5 minutes. Pour the half cup of wine into the pot. Scrape bottom with a wooden spoon or spatula, to loosen any browned bits.
Add seared chicken thighs, potatoes, artichoke hearts, tomatoes, half the fresh thyme, and the chicken broth to the pot. Increase the heat and bring the liquid to a boil.
Place the casserole in the preheated oven and cooked, covered, for 20 minutes.
Pull the casserole from the oven. Place the flour in a small bowl and whisk into about ½ cup of the hot broth, making a thick smooth slurry. (Flour is optional and only necessary if you want a slightly thicker sauce. Omit for a gluten free version.) Add the slurry to the pot, along with the parsley and olives. Return pot to the oven and cook, covered, for an additional 10 minutes.
Remove pot from stove. Stir in juice and zest of the lemons and the remaining thyme. Taste to adjust seasonings and serve.
Your favorite dippers plunged into rich, gooey, melted cheese sauce. Homemade Cheese Fondue is easy to love and even easier to make! Perfect for parties, date nights, or a festive family dinner.
Homemade Cheese Fondue – A Retro Dish That Deserves A Comeback!
Those of us who grew up in the 60s and 70s probably remember cheese fondue.
This delectable dish originated in Switzerland and was very popular back then, possibly owing to the 60s era craze for Scandinavian décor. Or maybe because Americans were traveling more and new recipes home with them.
Whatever the reason, cheese fondue was something I ate often as a kid, especially if my mom was entertaining. In addition to being slightly exotic and absolutely delish, fondue was a lot of fun! What’s not to love about dipping something yummy into a bowl of molten cheese?
However, Homemade Cheese Fondue fell out of fashion at some point. I hadn’t made it for years.
The memory of that fabulous bubbly cheese bubbled up into my brain while I was working on my 1960s-era novel, The Book Club for Troublesome Women. Soon, I was digging through cupboards in search of my old fondue pot.
It was dusty but still in working order. When I texted my book club to say I was making Homemade Cheese Fondue for our next meeting, the response was an enthusiastic and universal, “Hooray!”
I wasn’t surprised. Fondue is one of those things that almost everybody loves. It’s simple but it’s also kind of special. And as far as I’m concerned, it’s due for a comeback.
With Valentine’s Day just around the corner, this might be the perfect time to give it a try. I can’t think of a better date night dish to share you a special someone.
Equipment and Ingredients for Homemade Cheese Fondue
Maybe, like me, you have a fondue pot hidden away somewhere. If not, they’re easy to find online.
The same 3-quart electric Cuisinart model I’ve had forever is still available. It comes with color-coded fondue forks, is easy to clean, and has an adjustable temperature probe so you can heat cheese, chocolate, broth, or oil to the perfect temperature.
I’ve had mine for at least ten years and it still works great. Here’s a link.
If you don’t mind a smaller, 2-quart version, this might be right for you. It has many of the same features as the Cuisinart fondue pots, but costs less than $40. Here’s a link.
Of course, you don’t absolutely need a fondue pot to make fondue. A heavy-bottomed pan over a slow and steady heat source can work too. But I prefer the convenience of a proper fondue pot for a couple of reasons.
First, a fondue pot makes it easier to control the temperature and avoid burning the cheese. Second, it’s much better for serving.
If you’re cooking fondue on the stove, you’ve got to keep it there so cheese will stay melted. Having guests gather around the stove to eat fondue just feels a little awkward to me.
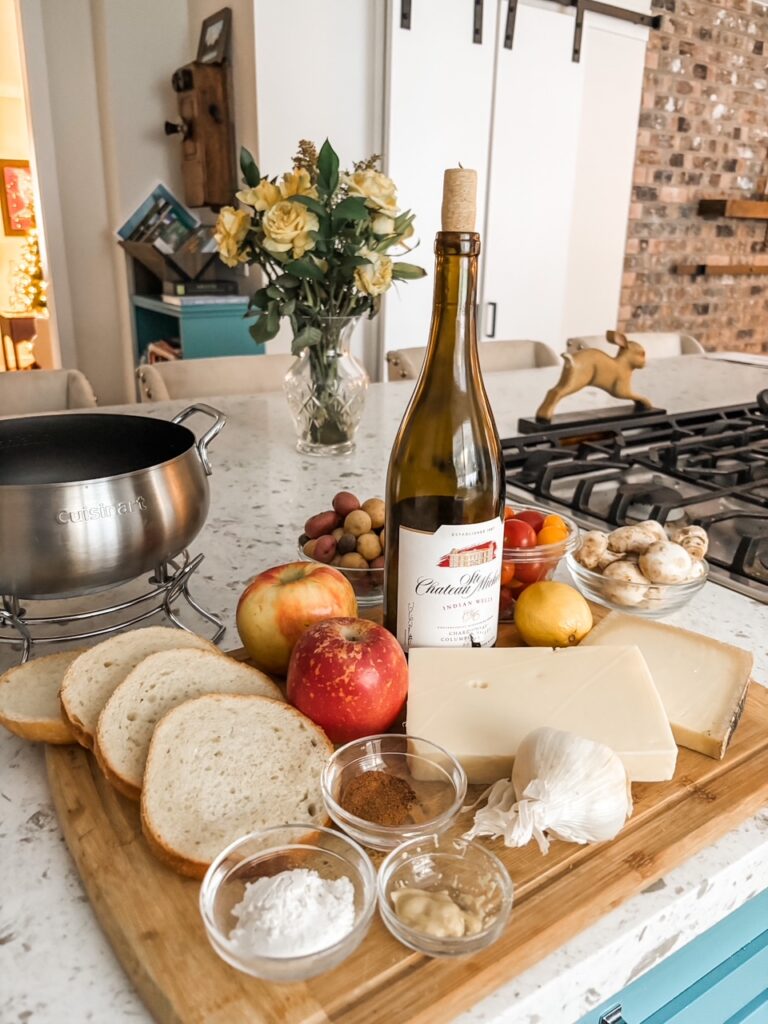
The ingredients for Homemade Cheese Fondue are simple and few. All you need is…
Swiss cheese
Emmentaler or Gruyere cheese (Gruyere has a slightly stronger flavor)
Dry white wine (needs to be a good wine, one you’d be willing to drink by itself)
Juice of one lemon (fresh is best but can sub bottled juice)
Flour (you can sub gluten-free flour or cornstarch for gluten-free fondue)
Garlic
Nutmeg (optional but it does add extra depth and a nice, nutty flavor)
Mustard (also optional but brings in a bit of a tang)
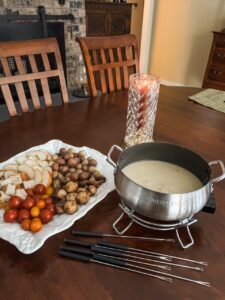
Dippers of your choice – bread cubes (use a firm bread, such as sourdough, French, or rye), apple or pear slices, small boiled potatoes, oven-roasted mushrooms, cherry tomatoes, sweet pepper chunks, cooked steak or chicken cubes
Making Homemade Cheese Fondue
Making Homemade Cheese Fondue is simple. But there are a few tricks to making sure your fondue is silky smooth, not stringy or ropey.
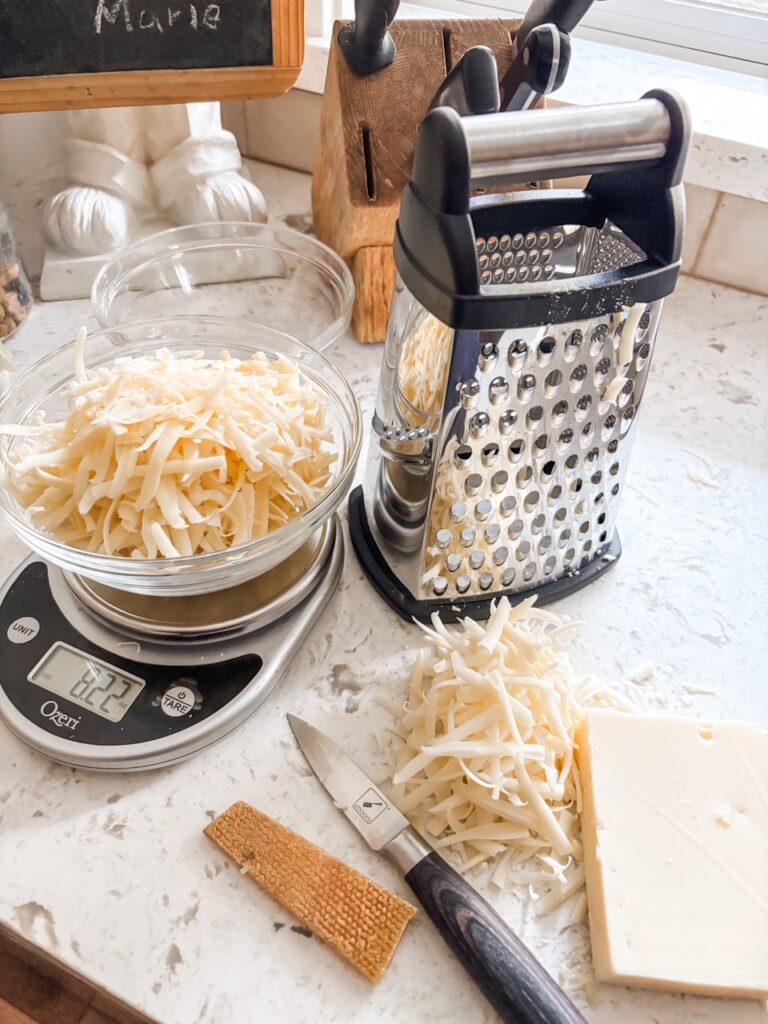
Grate the cheese before you start, using the largest holes on your grater. Cheese that’s grated, as opposed to diced, melts more easily.
Toss the grated cheeses with the flour. The flour is a very important ingredient because it keeps the cheese and wine from separating. Tossing the cheese with the flour will help prevent flour lumps. Nobody likes lumpy fondue!
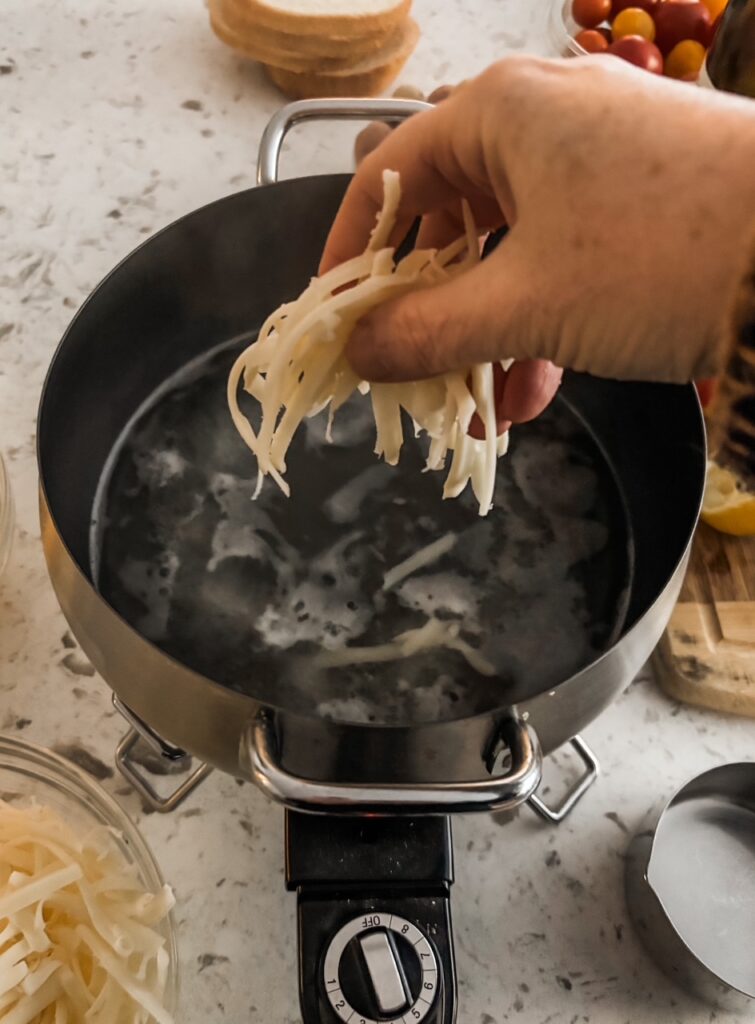
Add the wine and the fresh lemon juice to the fondue pot and turn on the heat to medium-low, warming the liquid until small bubbles start to form.
Add the cheese in batches, a couple of handfuls at a time. Stir thoroughly until the cheese is melted into the liquid before adding more. Take your time with this.
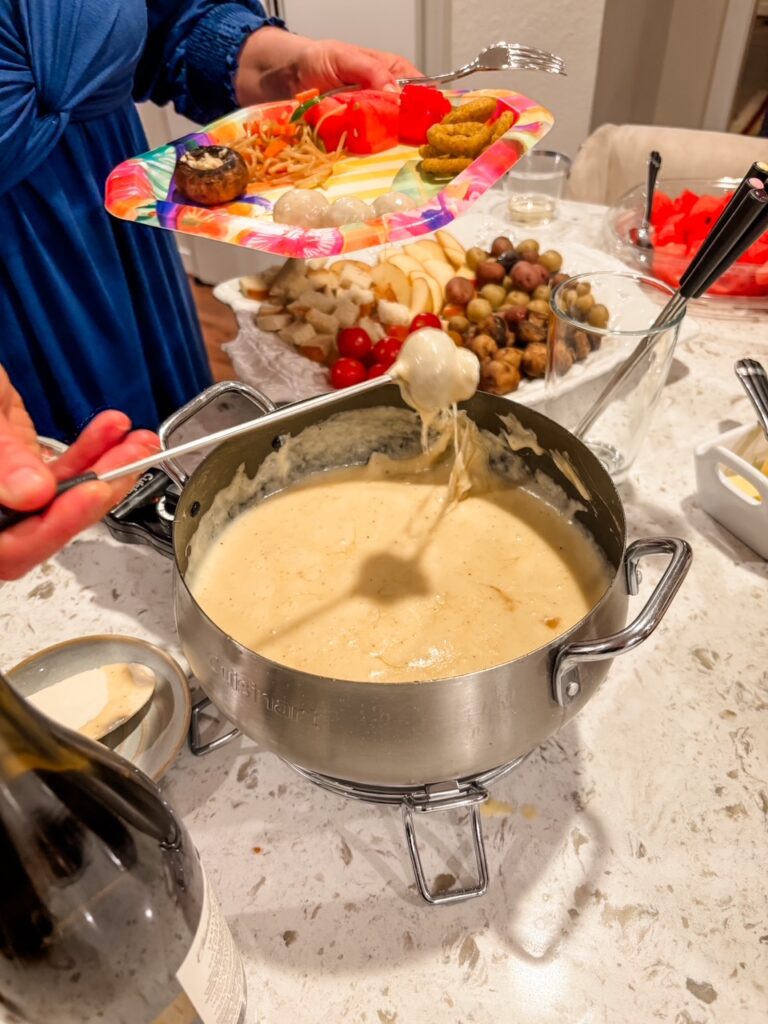
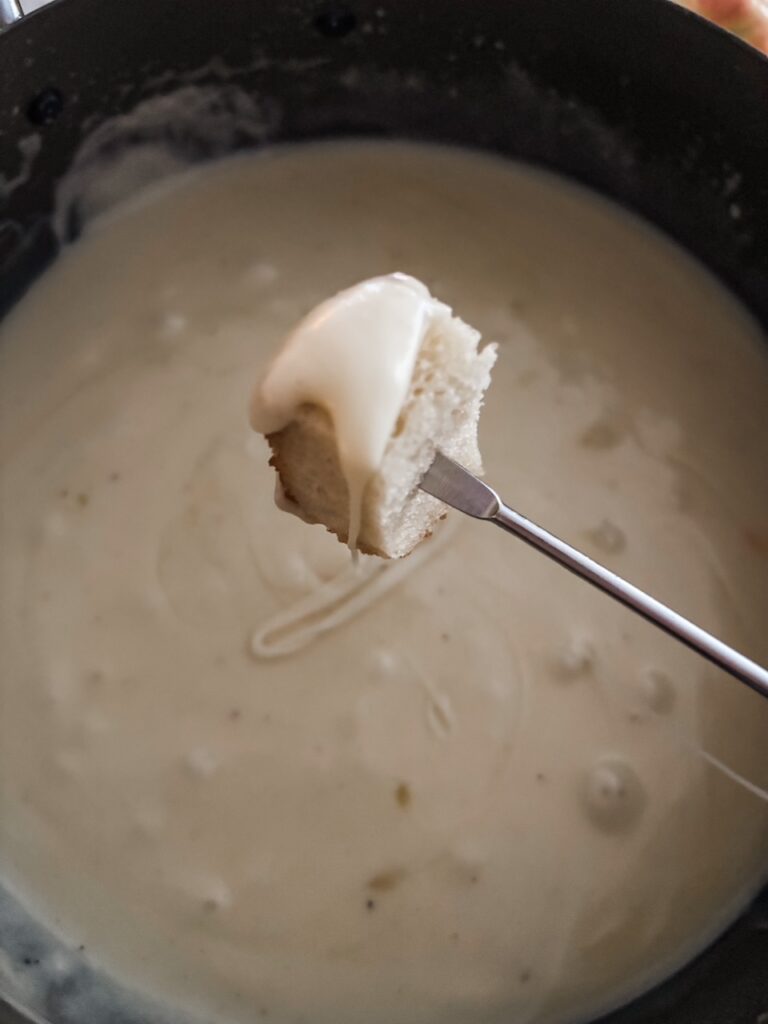
Once the cheese, wine, and flour have been incorporated into a thick, smooth sauce, lower the temperature slightly. Stir in the remaining ingredients and start dipping!
You’ll need to keep the heat going under the pot the whole time so the fondue will stay warm and liquid enough or dipping. It will start to get thicker the longer it stays on the heat. If it starts to get too thick, thin it out by stirring in a couple more tablespoons of wine.
Homemade Cheese Fondue is best served immediately. However, in the unlikely event of leftovers, fondue can be reheated.
Just put it into the pot on a low heat, add more wine, and stir until melted again. You may need to use quite a bit of wine to get the fondue to the right consistency.
2 T flour (can sub gluten free flour or cornstarch for gluten free version)
1 cup dry white wine (plus additional if sauce becomes thick)
Juice of one lemon (fresh juice is best but can sub 2 T bottled lemon juice)
¼ tsp grated nutmeg
2 tsp Dijon mustard
Instructions
Rub the two halves of the cut garlic clove around the inside surface of the fondue pot.
Place the two grated cheeses in a medium sized bowl. Sprinkle the flour over the cheeses and gently toss to distribute.
Turn the fondue pot onto a medium low heat. Pour the wine and lemon juice into the pot. Heat until bubbles just begin to form.
Add a couple of handfuls of the cheese/flour mixture to the pot. Stir until the cheese completely and combined with the wine. Add more cheese as above, working in batches and stirring after each addition.
When all the cheese is melted and well combined with the wine, creating a smooth sauce. Lower the heat slightly, then stir in the nutmeg and mustard. Taste and adjust seasonings if necessary.
Serve immediately with your favorite dippers (see post for dipper suggestions). If the sauce starts to become too thick, stir a little more wine to the pot, adding as much as needed to achieve the desired consistency.