Add your feed to SetSticker.com! Promote your sites and attract more customers. It costs only 100 EUROS per YEAR.
Pleasant surprises on every page! Discover new articles, displayed randomly throughout the site. Interesting content, always a click away
A Window into the Cascades Alpine Climbing Course 19 Mar 2025, 10:00 pm
The North Cascades offer some of the finest alpine climbing in the U.S. Check it out and if you’re new to the adventure of mountaineering and rock climbing, read this blog about one of our most comprehensive courses. And then pack your bags for the Cascades!
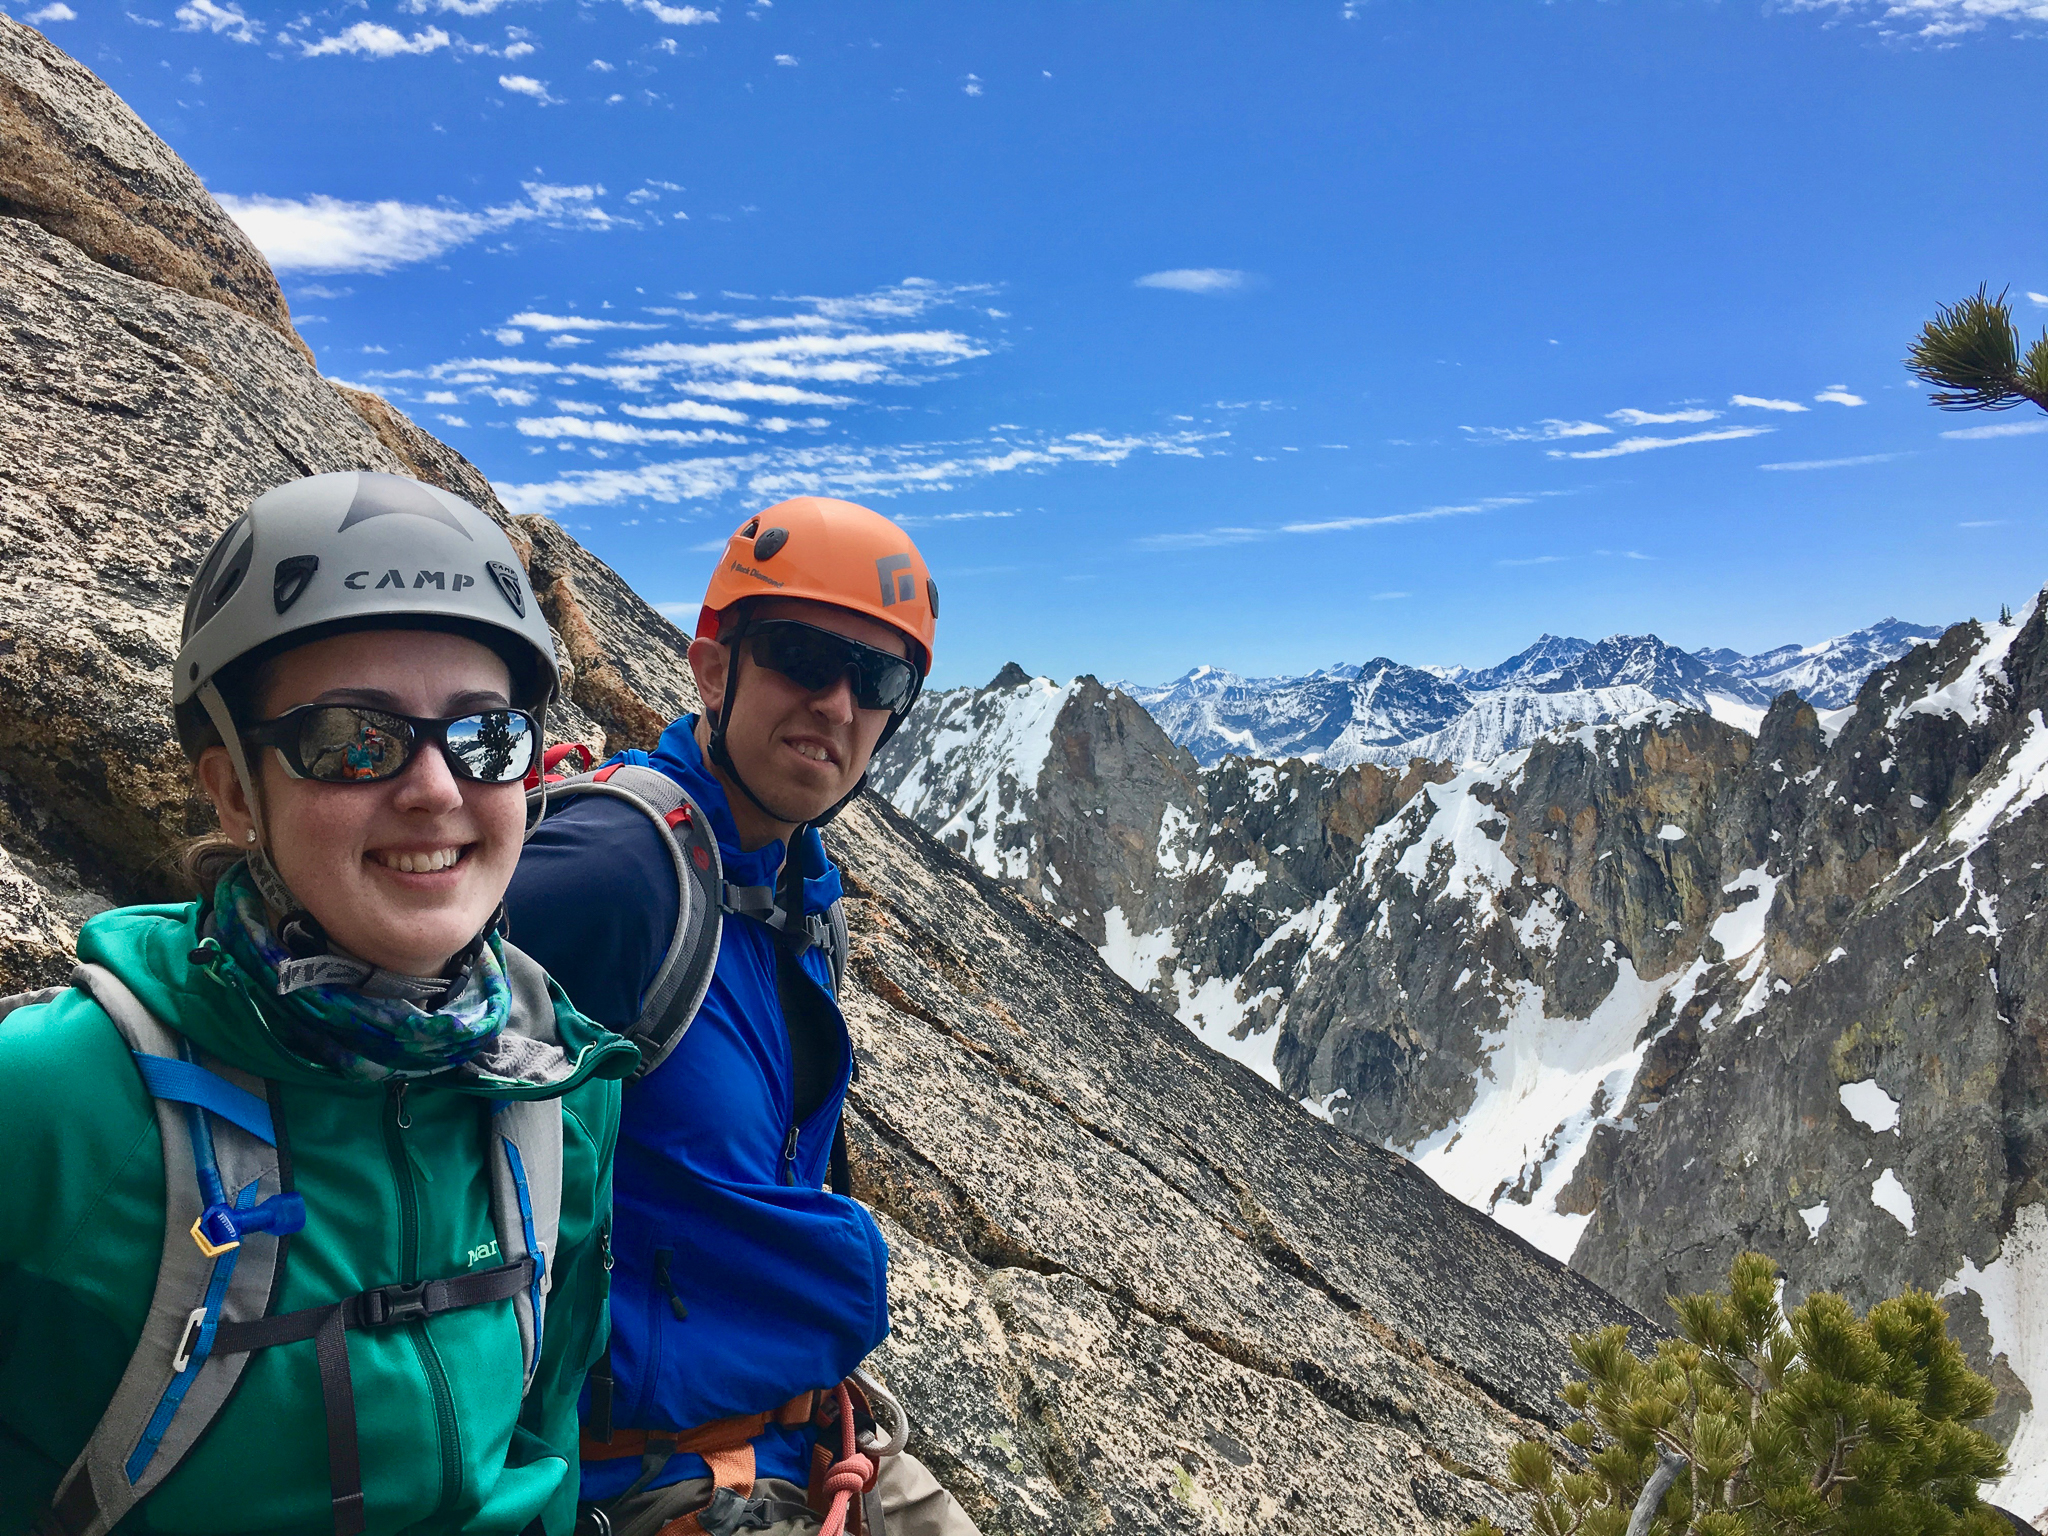
What a whirlwind these last eight days have been! From clear skies and perfect sunsets to high winds and post holing through snow, Jennifer, Alex and Guide Niels Meyer saw it all during their Alpine Climbing Course. It even rained for a brief spell, just to remind them they were in the Cascades. Progressing from rock climbing to alpine rock climbing, and then to glaciated travel on one of the North Cascades’ most beautiful peaks, the Alpine Climbing Course provides an introduction to many forms of mountain travel.
Alex and Jennifer approaching South Early Winters Spire. Niels Meyer photo
Jennifer, Alex, and Niels began their adventure in Seattle, where they met for the first time to discuss equipment, plan meals, and purchase food for the next 8 days. After wandering around the grocery store picking out simple but nutritious food for our upcoming days in the mountains, they hopped in the Madness Mobile and took off for Leavenworth to climb some rocks.
Jennifer and Alex both had experience climbing, but it had been a number of years; reviewing the basics was an easy but valuable refresher. Most of their climbing history had been top roping, so the three discussed and practiced the differences between top rope climbing and lead climbing. After they climbed a few pitches and were feeling comfortable with the basics, Niels taught Jennifer and Alex some of the more advanced climbing skills, such as rigging and rappelling for multi-pitch climbing, and the ins and outs of building anchors for both bolted and traditionally protected climbs. And then: Boom! Part one was a wrap! They packed up, jumped back in the car and headed to Washington Pass to do some alpine climbing.

Sister and brother, climbing together on South Early Winters Spire. Niels Meyer photo
After a good night’s sleep at the North Cascades Mountain Hostel, our team started early and drove to Washington pass to climb The South Arête on South Early Winter Spire. This involves a snow climbing approach to excellent ridge running on 4th and 5th class rock. With only a light freeze the night before, they post holed their way to the base of the climb (good training for what was to come on Shuksan…). Cruising up one of the most classic moderate climbs in Washington, with some of the most scenic views in the whole state, they talked about and used different methods for alpine climbing. The gang worked their way to the top and sat on the summit boulder for some photos and a snack. The beautiful blue skies were a real treat!
Jennifer, Alex, and Niels woke up their second morning at Washington pass to high winds. They decided going up the Liberty Bell was probably not the best idea. Luckily, Fun Rock was close and there were plenty of skills to practice! After some warm up climbs, Jennifer and Alex moved on to mock leading. Jennifer had led a few climbs years ago and Alex had never lead climbed. Mock leading allows the climber to practice lead climbing while still on top rope. This eliminates the risk of dangerous lead falls while still allowing the climber to get the hang of placing and clipping into protection. In the afternoon they began crevasse rescue, a crucial skill to know when traveling through glaciated mountains.
Next they were off to Mount Shuksan to continue crevasse rescue practice, learn glacier travel skills, and attempt the summit. Warm temps and no night freeze made for a hard first day getting into base camp. The trail was still mostly snow and the post holing was tough. When you fall almost to your knee with every step, it makes for a long walk. After a full day of this, Jennifer, Alex, and Niels made it to camp and settled in for a well-deserved sleep. Day two on the glacier to be snow school and crevasse rescue.
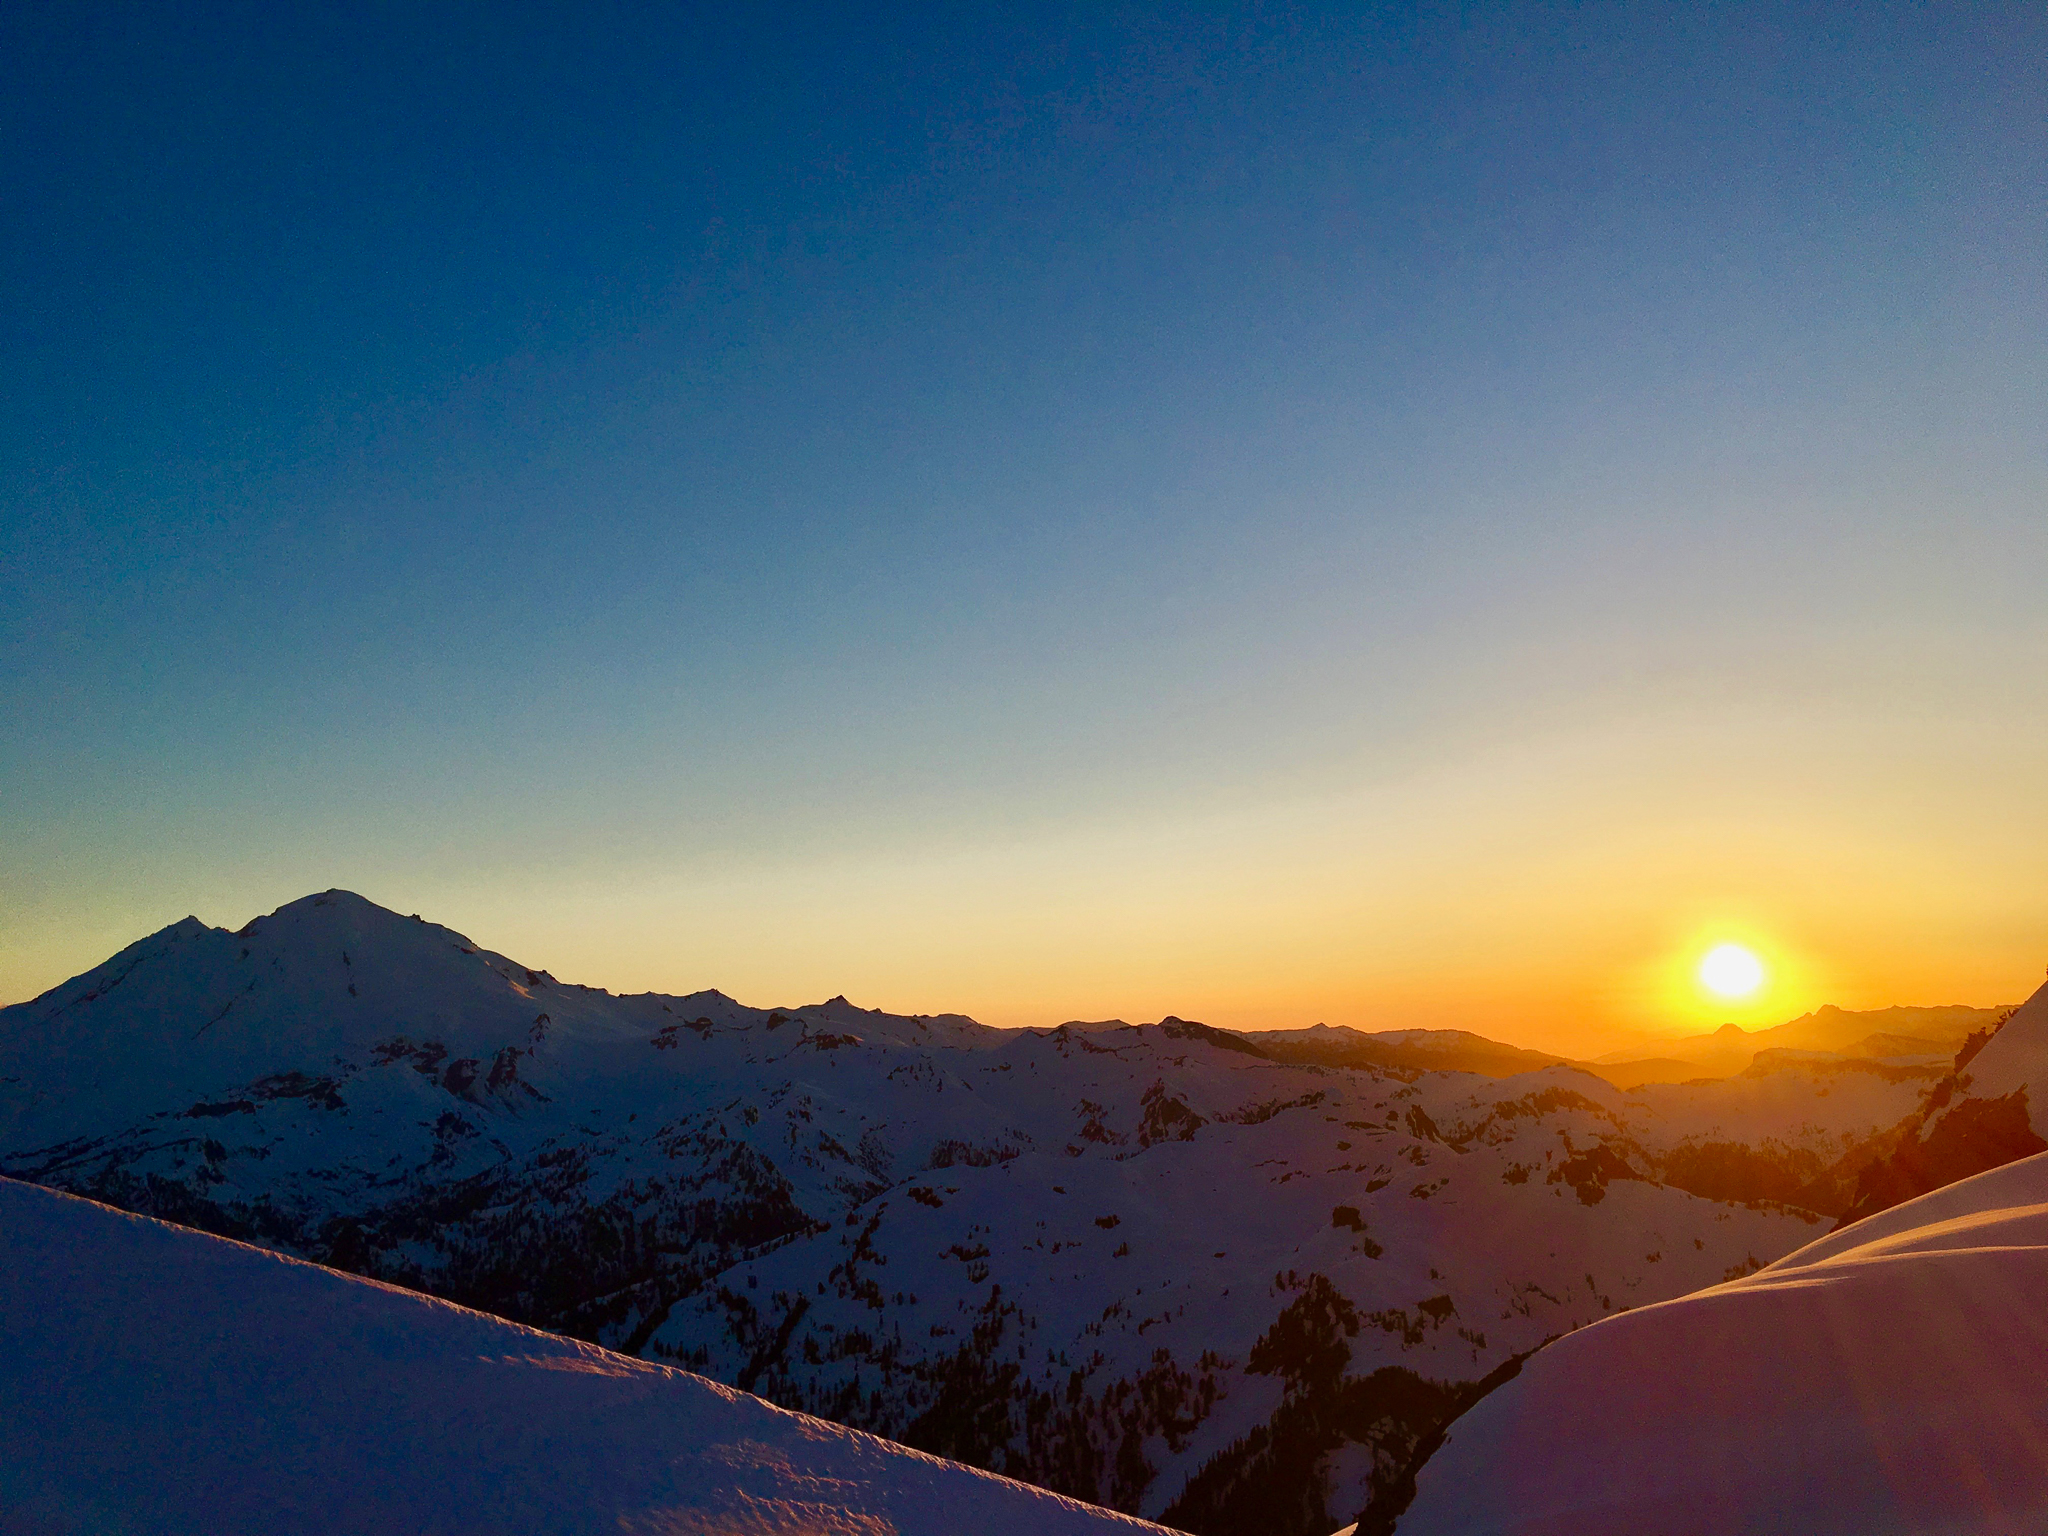
Sunset from Shuksan camp. Niels Meyer photo
Crevasse rescue is very important, but the first margin of safety is comfort and stability while walking on snow. So, the team spent the better part of the morning using different stepping techniques and getting comfortable walking on snow, with and without crampons. After snow school it was time to practice the mechanical advantage systems learned at Fun Rock. After Niels showcased a full crevasse rescue scenario, Alex and Jennifer jumped right in. After only a few times it was obvious that both of them had a talent for understanding the different systems, so they practiced, practiced, practiced, and then it was time to rest for the summit the next morning.

Planning our ascent of Mt. Shuksan over a cup of tea. Niels Meyer photo
Due to it barely freezing at night, the gang left camp at 2:30 AM to avoid avalanche danger and traveling during the heat of the day. It was so snowy on Shuksan that the only open crevasses were in the ice fall, so the team was able to bee-line for the summit pyramid. Arriving at the base of the summit, they were ahead of schedule. The summit pyramid at this time of year is a steep, snow filled gully. There was way more snow in the gully than usual, which made for awesome climbing! Pitching out the gully, they moved steadily towards the summit as the sun cast beautiful colors across the North Cascades. Climbing past the steepest final section, they gained the summit ridge and made their way towards the top. The summit was a lot smaller than usual due to all the snow! With cornices on most sides and a steep drop of on the others, they sat in the very middle to enjoy the amazing view and refuel before descent. After descending the summit pyramid with belayed down climbing and lowers, the team lathered themselves in sunscreen before the long, hot walk back to camp. Many hours of sleep later Jennifer, Alex, and Niels packed up camp and headed back to the car before the heat of the day set in.
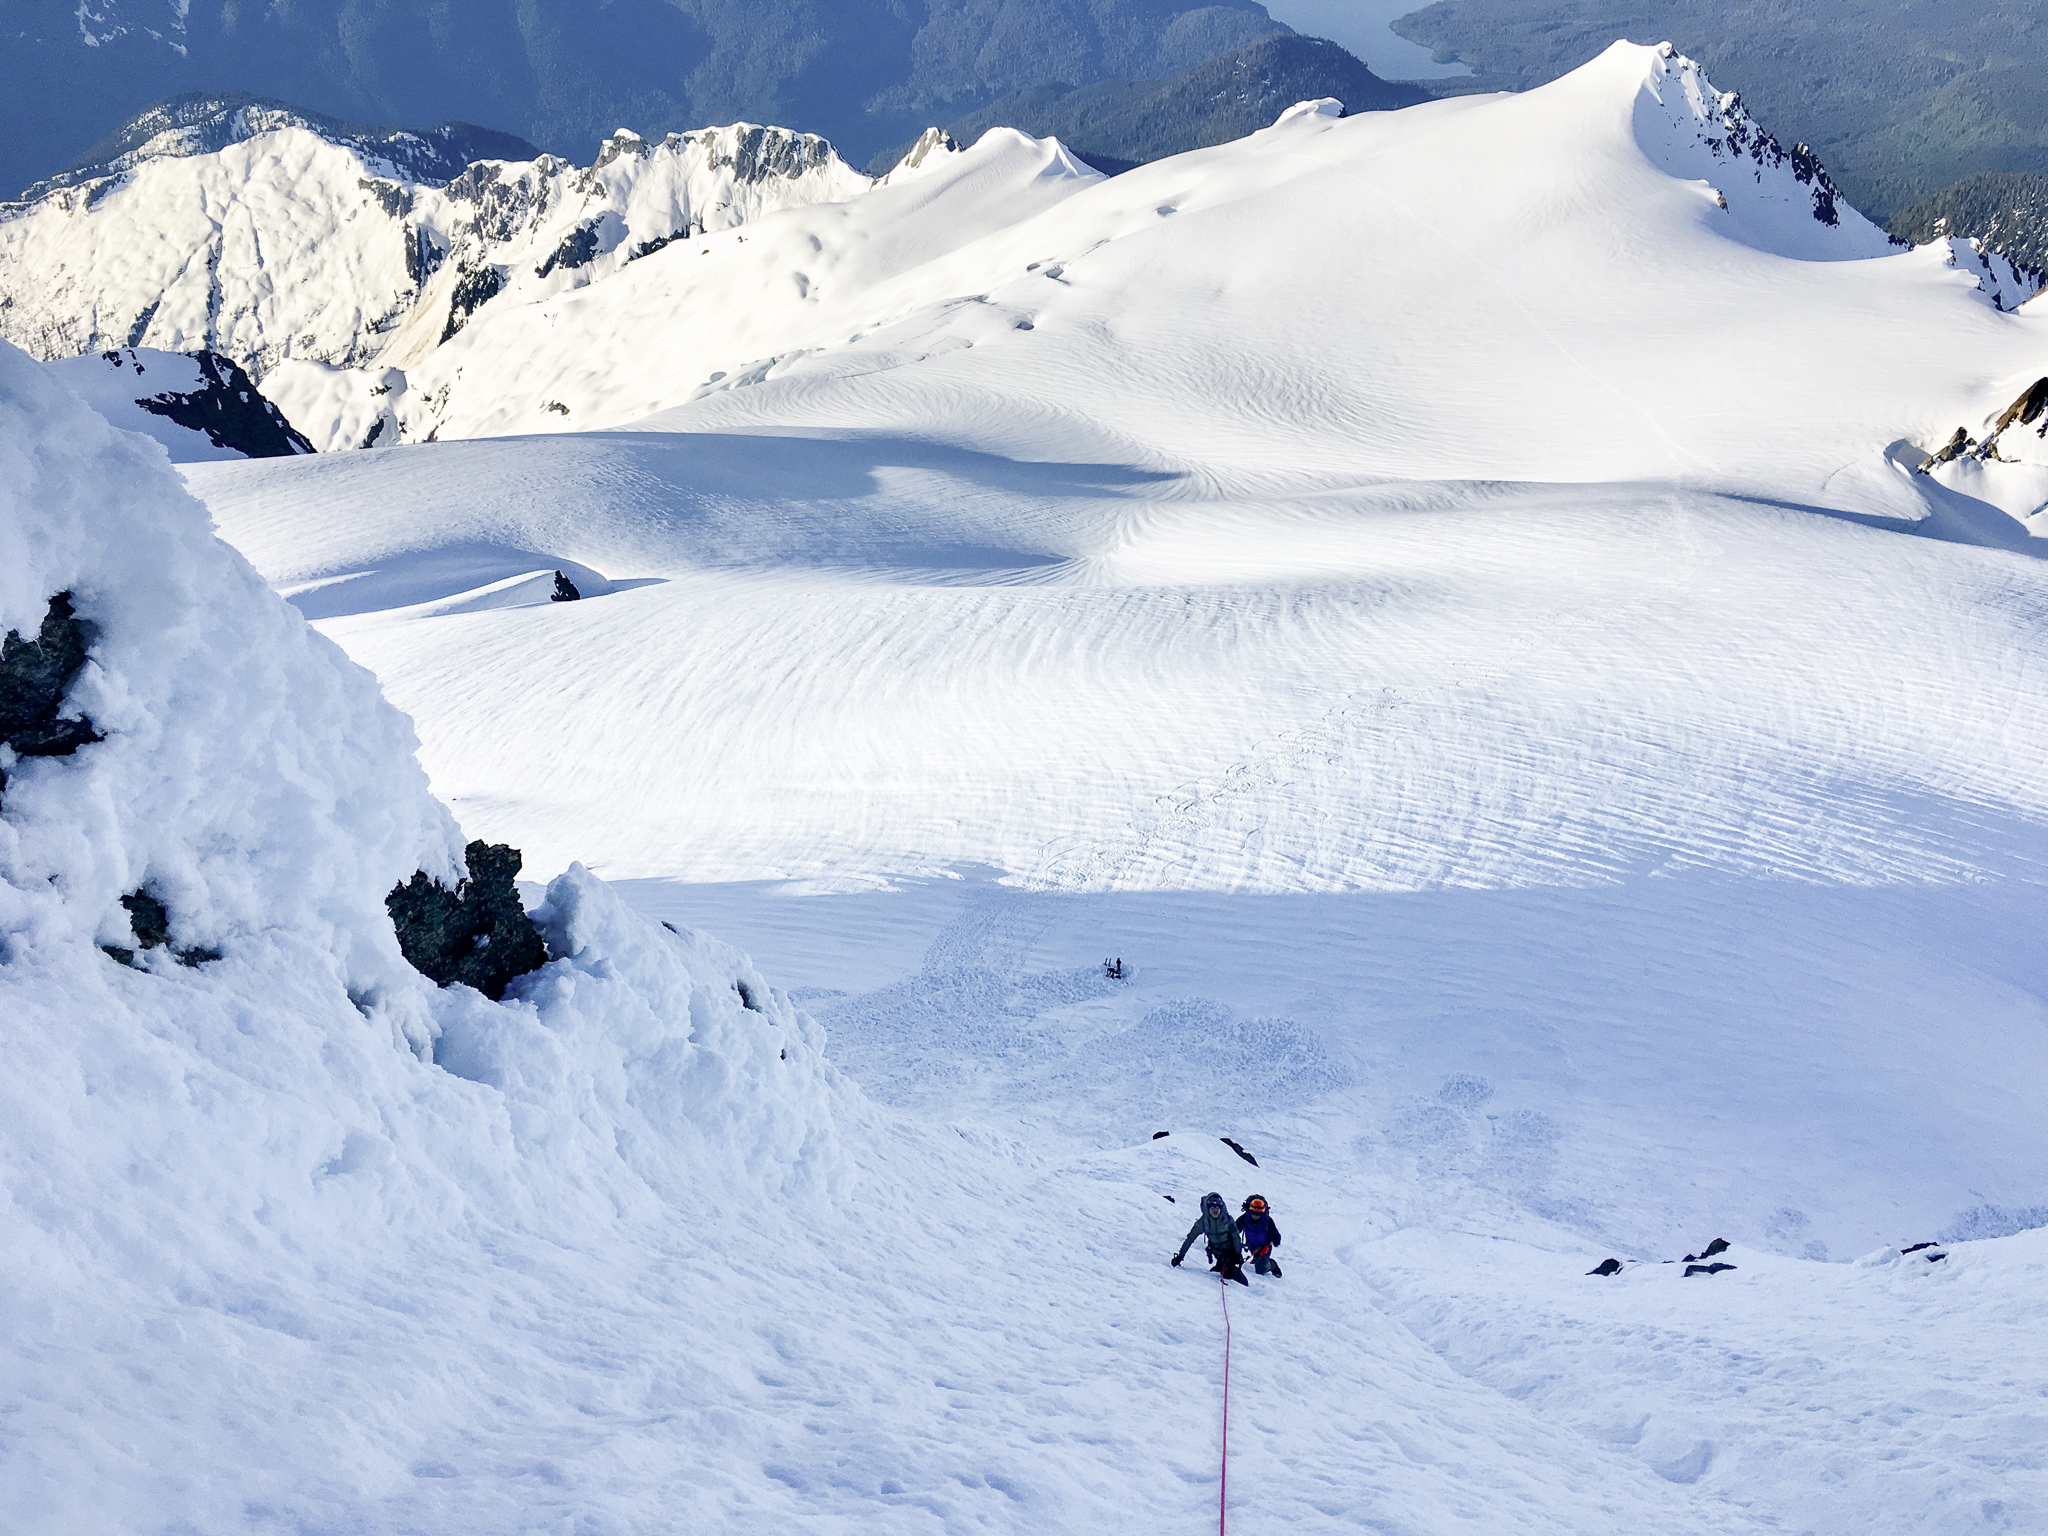
The final push for the summit on Shuksan! Niels Meyer photo
During the Course Alex and Jennifer learned about everything from single pitch rock climbing all the way to traveling on glaciers and climbing alpine rock spires. With these skills they have begun their journey in mountain travel. It takes a wide range of skills to safely travel through a mountainous environment, and the Alpine Climbing Course provides an introduction to those needed skills. It is important that after the ACC our newly minted climbers continue to practice these skills, or else they will lose them as fast as they learned them. Jennifer and Alex are now ready to head out with a solid skill base and continue to enjoy the mountains safely. Even though they are headed back to the mid west, there are plenty of opportunities to practice these skills. That being said, I hope we see them back out west soon!
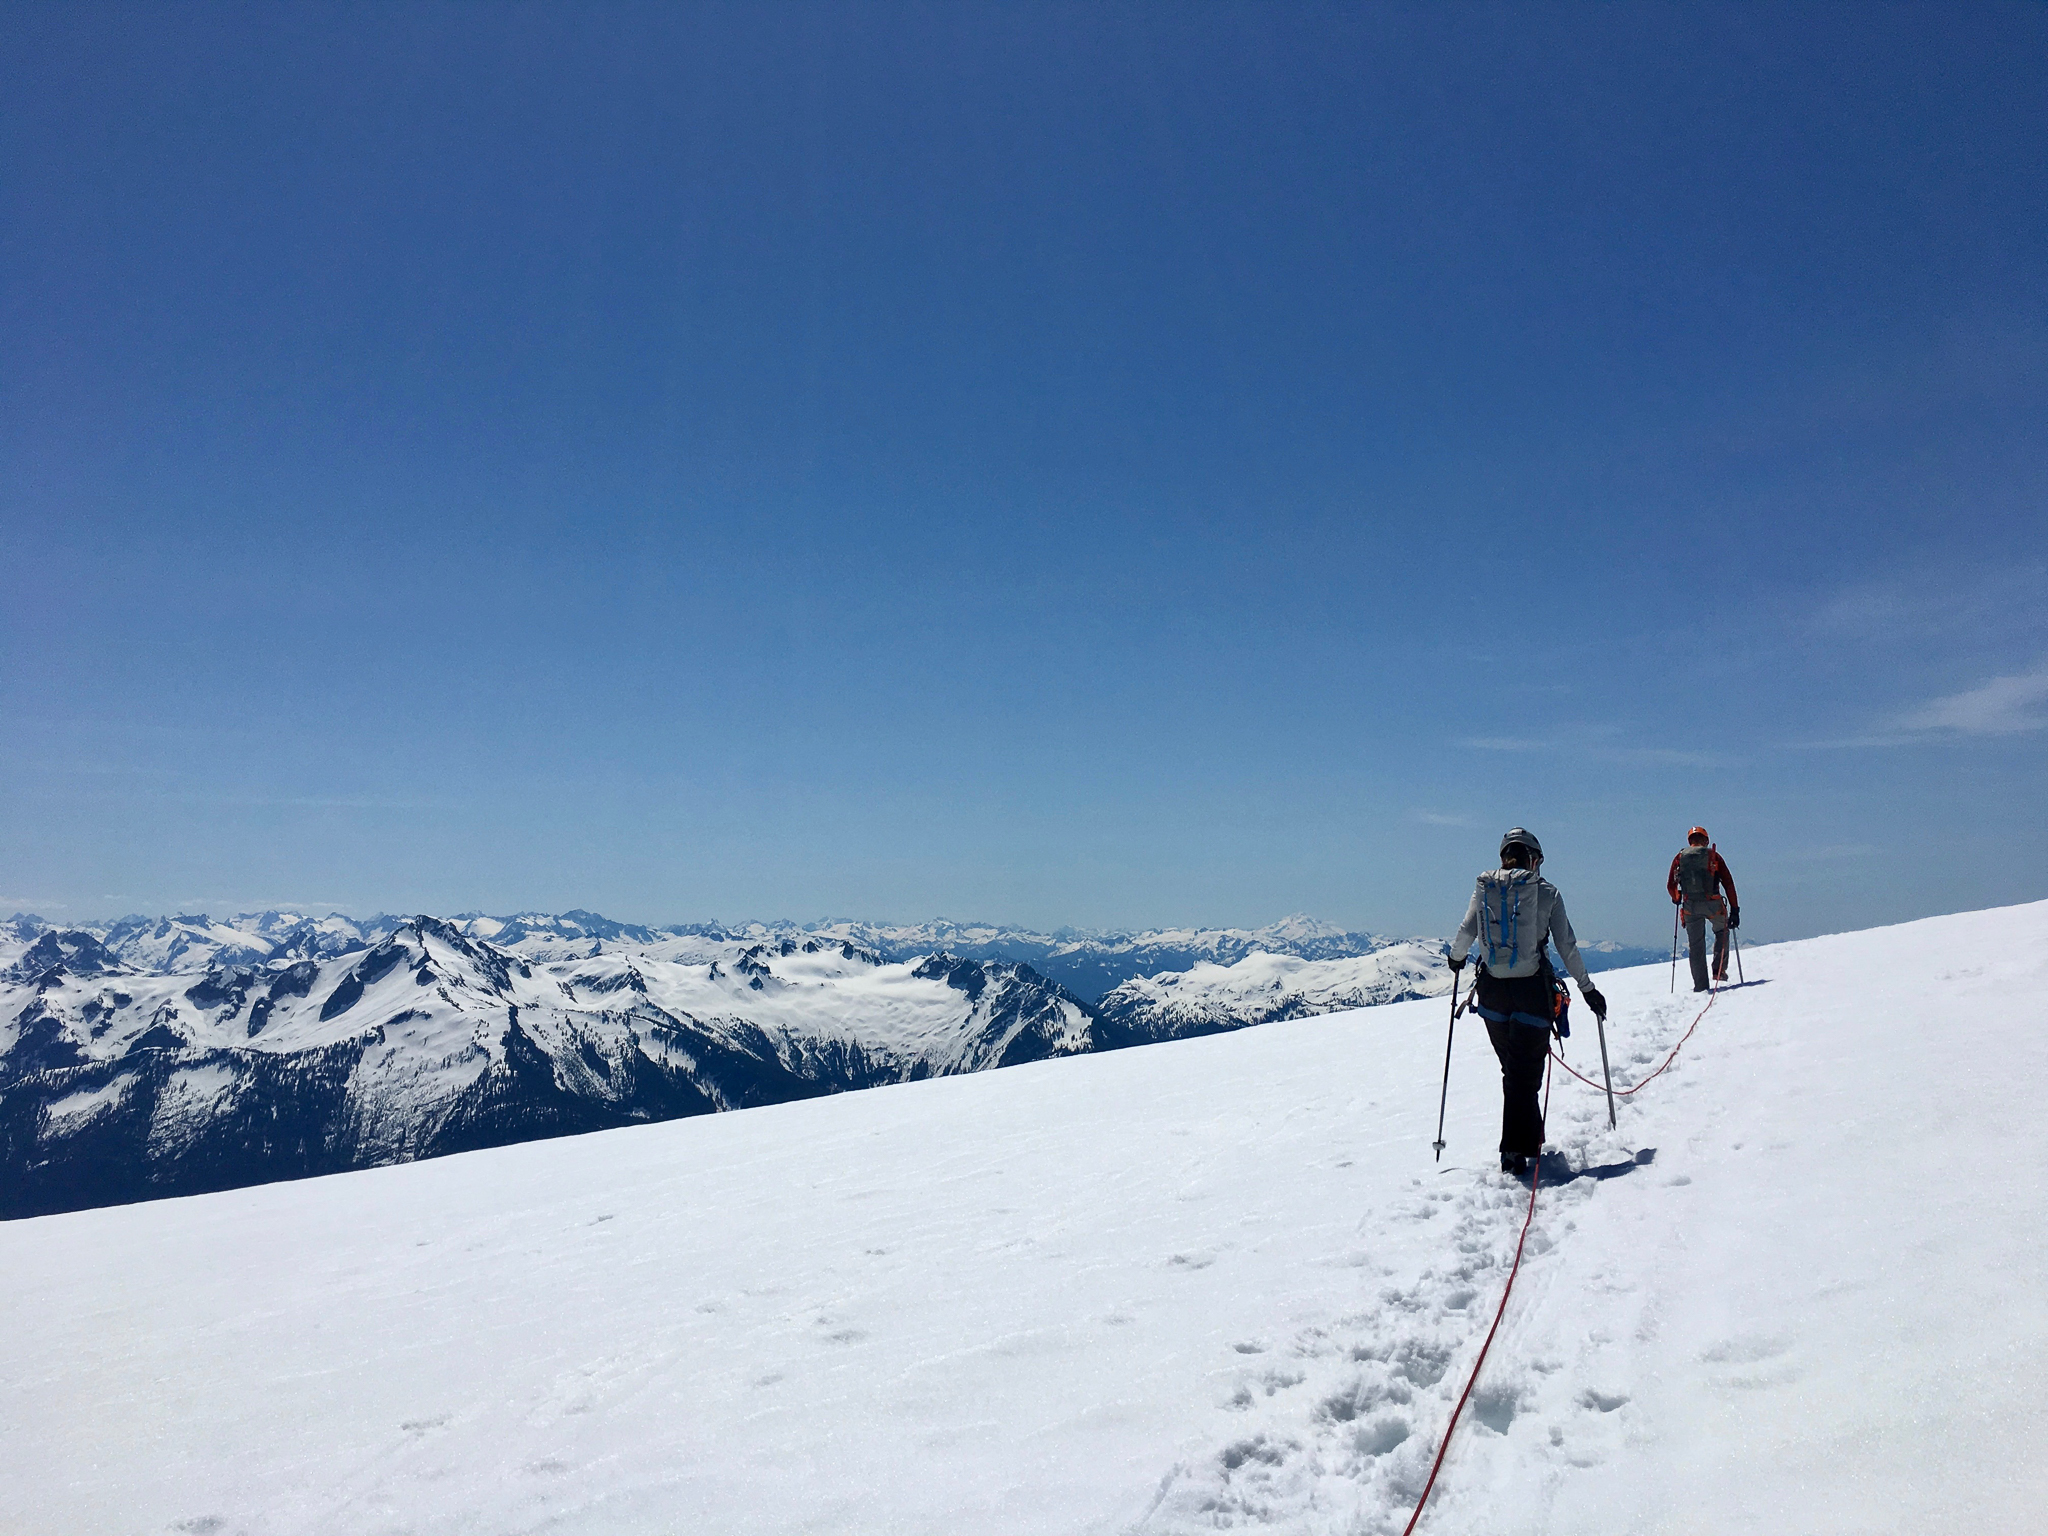
Heading back to camp after a successful Shuksan summit. Niels Meyer photo
~MM Guide Niels Meyer
Alpine Climbing "Doing your Homework" 14 Mar 2025, 6:00 pm
With the summer rock and alpine climbing season coming up fast now is the time to gather info for your planning. Here’s some helpful tips and tools from MM guide Stephen Heath. Start planning now!
Doing your homework for an alpine objective can make the difference between success and failure. What does that preparation look like? It’ll be a little different for everyone but here are some key things that help me in my homework for a climb. If you have an objective you dream of it may mean preparation will include taking a course before heading out to the climb. Or if you’re ready to go from an technical or experience standpoint the next step may be pulling out the maps and guidebooks. I highly recommend downloading Gaia or Caltopo for use as a gps on your phone in the moment and for planning your route before you leave the house.


Just like in backcountry skiing, trip planning before you leave the house is a very important part of climbing and mountaineering. So what does that look like? First I’ll google my proposed peak and route and look through Google images for route overlay photos (especially photos that were taken during the same time of year as my trip). I also look for pictures of specific places on the route that are important for route finding (i.e. route crux, entrance, exits, problem bergschrunds, hidden work arounds that are consistent annually). I’ll create a file in Google Drive and download the photos into this file. Then I’ll start looking for trip reports on a google search, or sites like Summit Post, stephabegg.com, Mountain Project, Cascade Climbers, and facebook climbing groups. I’ll take key aspects of their route descriptions (always with a grain of salt) and I’ll copy and paste them into the google drive file along with the photos. Make sure you have the beta on your descent options and bail options if they exist. Then I’ll make this drive available “offline” so I can access my “beta cache” in the mountains.
P.S. Unless you actually know the person giving info on the route always take their beta with a grain of salt. Especially the Mountainproject comments


The descent; an often underestimated part of a climbing objective. If you haven’t done your homework and aren’t dialed on rappel systems a great day of climbing in the alpine can quickly turn into an epic descent in the dark or spending the night in an unplanned bivy. Knowing the descent route, being efficient with setting up your rappels and handling the rope to avoid getting it stuck or causing rockfall are important skills.
For alpine routes I always carry a small knife, a couple quick links and extra 6 mil cord for cleaning and beefing up rappel stations that are questionable. If you add new cord or webbing make sure you cut out and pack out the old questionable cord. Don’t add to the rats nest and always inspect the quality of the rappel station.
And if you want to get more instruction in the field, check out MM courses HERE
Glacier, Alpine, and Waterfall Ice Climbing defined 12 Mar 2025, 11:30 am
What does the North Ridge of Mount Baker, mountaineering on the Easton Glacier of Mount Baker, and Ouray ice climbing have in common? First, all involve some form of frozen water. Second, you need sharp pointy things, like your ice axe and crampons. The differences diverge quite a bit from there.
Getting out on a glacier climb is the entry level experience, from there you can find a wide range of both the difficulties and the medium you are climbing; it could be easy going glacier climbing on seasonal snow or a steeper alpine ice route that involves frozen snow (neve) to give you the proper conditions. And then there’s frozen waterfall ice, the more technical climbing done in winter.
Let’s get started.


Glacier climbing- what the heck is that? Am I climbing ice on a glacier climb, or what?
Glacier Mountaineering: By definition, glaciers are frozen, moving bodies of ice- so yes, a glacier climb like Mount Baker’s Easton Glacier could be called an ice climb. But, glacier climbs are all about terrain. What you’ll find are low angled slopes of glacier that allow for walking, but may occasionally require the use of an ice axe and crampons. It’s here that beginners can find their way without too much, if any, technical difficulties. Requirements for this type of climb are simple enough:
- A sense of adventure and ready to learn- all skills on climbs like the Easton Glacier can be gained while on the trip
- Good physical fitness
- The necessary equipment

What is the difference between the frozen waterfalls of Ouray, Colorado and for example, the North Ridge of Mount Baker?
Alpine Ice: Instead of short steep routes on waterfall ice that sometimes are only 100 feet high or less, alpine ice climbing takes place on the airy alpine ridges and big snow/ice faces; so we’re talking up to 2,000-feet+ routes on Cascade ice routes, to the monster faces in the Himalayas and Andes. Here its not all about just swinging your ice tools overhead to get your placement, its just going to require different different techniques- take a course to get it started with the Alpine Ice Course or the Mount Baker Ice Climbing Essentials.
- On the Cascades classic ice routes such as the North Ridge of Mount Baker rarely are there waterfall ice conditions encountered. Routes like the North Face of Mount Shuksan, or the North Face of Mount Buckner or Maude, take place on terrain the 40 – 60 degree angle, with usually frozen snow the medium. As a result, different techniques are used and only occasionally will you be using your ice tools overhead in piolet traction.
- Cramponing techniques also vary from French technique, which provides multiple or all points on the ice, or an American hybrid technique using one crampon in French and the other front pointing.
- While there is some cross-over in techniques used, it can be said that alpine ice and waterfall ice techniques are different.
On the North Ridge of Mount Baker you will transition from alpine ice climbing techniques on about 40 degree slope to a 1 – 3 pitch section that you will use waterfall ice techniques as you work your way up the ice cliff section mid-route. On a route like the North Face of Mount Buckner you’ll use pure alpine ice techniques as you ascend a consistent grade of steepness over the 1,000−2,000 foot route. While a ice climber may enjoy the variety of moves, the alpine ice climber enjoys the rhythm, the predictability of each move and an increased ability to move efficiently as a result.
Alpine Ice is Nice!


Waterfall Ice: The sounds of ice climbing frozen waterfalls – the pleasurable thwank of your pick going in with one swing, plates of ice cascading down from brittle ice breaking away, the screams of agony as your numb fingers warm up, your crampons crunching and your front points thunking, are as unique to ice climbing as the sport itself. One of the best places to experience it is in Ouray, Colorado where you can get guided climbs of the area’s classic, or you can take a curse if its your first time.
- It is generally colder, sometimes A LOT colder, determining not only your enjoyment, but also the type of ice you will encounter. With temps in the 20s-30s Fahrenheit you may encounter “hero ice,” which is the kind of ice provides easy to get, solid placements for your tools and ice screws. But, with temperatures in the let us say the 10 degrees above to minus 20 Fahrenheit this can change dramatically to hard, brittle, or chandeliered ice, all which can make getting good placements that much more difficult.
- Waterfall ice on the more technical sections always requires two ice tools and setting them overhead with aggressive swings, what as the French call piolet traction. Cramponing is generally using front points only, although occasional rest steps you are able to get more points in.
- In summary, the techniques used on frozen waterfalls is somewhat distinct to this medium when the ice is at a 50 – 90 degree angle.


Trekking to Everest Base Camp: Adventure Awaits 17 Jan 2025, 10:27 pm
Some updated features to our Nepal program — including a lower price, new and improved itineraries, and more
Mountain Madness has always taken pride in developing new programs across the globe and often improving time-tested classic itineraries, like the Everest Base Camp Trek. Following this blog we’ll feature some of the new elements of our Nepal and Bhutan program in a series of blogs- stay-tuned! For now, take a look at the Everest Base Camp trek below.
What’s New
Loop Itinerary: No more backtracking for MM trekkers. Typical itineraries go from Lukla to Namche Bazaar where trekkers rest before continuing on. From there trekkers pass through various villages, visit the monastery at Thyangboche and continue on to the village of Dingboche. Then its three more days of walking to reach base camp. Standard itineraries then return the same route. So, here’s what’s new- from Namche we hang a left and go to the village of Kyangyjum, passing the small towm of Khunde, where the hospital founded by Sir Edmund Hillary can be found. From here its another two days walking to Dingboche where we meet up with the standard trekking route. After the visit and overnight at basecamp (spring only), we head back to Namche on the standard trekking route mentioned above; retracing only two days of walking.
Equipment included: sleeping bag, down jacket, map, and duffel bag provided at no cost in addition, to all other services; notably all restaurant meals in Kathmandu unless otherwise noted.
Helicopter out from Lukla: with more consistent service, helicopters flying out from Lukla offer a reliable way to get back to Kathmandu (flight based on full occupancy)
A Walk Among Giants
Few adventures compare to the thrill of trekking through the heart of the Himalayas to Everest Base Camp. This trek is a place where the mighty Himalayan peaks merge with culture, history, and nature. Whether you’re a seasoned adventurer or new to high-altitude trekking, this journey offers an unforgettable experience.
From the moment you touch down in the vibrant city of Kathmandu to the first exhilarating step onto the mountain trail, every moment feels like stepping into a postcard. Imagine crossing swaying suspension bridges draped with colorful prayer flags, walking alongside yaks loaded with supplies, and gazing at towering peaks like Ama Dablam, Nuptse, and, of course, Everest itself.
The sense of scale is humbling. As you ascend through lush rhododendron forests into the stark, rocky landscapes of the Khumbu region, the immensity of the mountains makes you feel both small and connected to something far greater than yourself. Adding to the magic, this trek offers the rare opportunity to spend a night at Everest Base Camp itself, soaking in the ambiance of this iconic site.


A Journey Through Culture
The Everest Base Camp trek goes far beyond the views; it’s also a deep dive into the lives and traditions of the Sherpa people. From the bustling market streets of Namche Bazaar to the serene Thyangboche Monastery, you’ll encounter a culture that thrives in one of the world’s most challenging environments. The Sherpas’ resilience, hospitality, and spiritual connection to the mountains add a rich layer to the experience.
Tea houses along the trail give you a glimpse into the daily lives of the locals. Owned by Nepali families, these cozy accommodations provide a chance to connect with the culture on a personal level. Over steaming cups of lemon ginger tea, you’ll share stories with fellow trekkers and gain insights from guides who know the region like the back of their hand. Mountain Madness’s guides, led by the legendary Dawa Sherpa who climbed with our Founder Scott Fischer, are local to the Khumbu Valley, and bring deep knowledge of the area while prioritizing both safety and cultural immersion.


A Challenge Worth the Reward
Make no mistake — this is a trek that demands both physical and mental stamina. Long days of hiking, thin air, and the unpredictable nature of the mountains test you in ways that are as rewarding as they are challenging. But the sense of accomplishment is unmatched. Standing at Base Camp, with the Khumbu Icefall and Everest’s soaring summit in view, is a moment you’ll carry with you forever.
And then there’s Kala Pattar, a gentle, hike-able peak. For many, this optional hike is the highlight of the trek. Reaching its summit at 18,450 feet (5,624 meters) for sunrise, with the golden light painting Everest and its surrounding peaks, feels like a reward for every step taken.
The pace of the trek is deliberately slow to allow for acclimatization, ensuring that everyone has the best chance of enjoying the experience safely and comfortably. This measured approach helps you fully take in the grandeur of the Himalayas without feeling rushed

The Trek of a Lifetime
The Everest Base Camp trek is unique because it blends adventure with introspection. The physical effort required to reach Base Camp mirrors the mental clarity and sense of perspective that the mountains inspire. Along the way, you’ll forge connections — with the landscape, with the culture, the Sherpa people, and with your fellow Mountain Madness trekkers. It’s a journey that changes you in ways that are hard to put into words.
So if you’ve ever dreamed of standing at the base of the world’s tallest mountain, this is your chance. Everest Base Camp is much more than a destination; it’s an experience that stays with you long after the trail dust has settled and your bags unpacked..
Climbing Monte Rosa and the Alps famous Spaghetti Traverse 31 Dec 2024, 1:00 am
No Spaghetti on spaghetti traverse… just tortellini, ziti, penne and espresso! And a whole lot of climbing.
From previous trip. Written by Alan Rousseau. Start planning your summer dream trip now. Check out trip here
The spaghetti traverse, is a five day horseshoe shaped traverse that begins and ends in Zermatt. Although it begins and terminates in Switzerland almost all of the climbing occurs in Italy. Each hut is located on Italian soil (or rock in most cases).
The trek begins from one of the highest lift service points in Europe the Klien Matterhorn (3883 m). There is very little ‘fluff’ on this traverse as two hours after leaving the tram you are on top of the first of many 4000 meter peaks, the western Breithorn.

Each of the first three days of the traverse makes a U‑shape. You leave a hut climb up to the ridge tag one or several 4000+ meter summits then drop back down to the hut. The climbs are primarily snow with many sharp knife edge ridges. Several options include rocky scrambles and/or fixed lines like Pollux, and The Naso.


These summits are optional and most of the time is spent traveling across large glacial systems.

Although the climbing, and glacier traverses are incredible the thing that really makes this trip is the Italian huts. With inexpensive house wines, beer on tap, WiFi, gregarious Italian Hut keepers, and most important generous portions of Italian food on hand; the huts really make this outing something to remember.

Pie and espresso for an afternoon snack

Or maybe a freshly made pizza, with beer?
Dinner is generally served around 7 pm. It begins with your first plate of either a soup or a pasta. Given the name of our traverse we always opted for the pasta!

Although the first course is generally more than you would expect to eat in the mountains, a second course soon arrives.

In this case chicken, French fries, bread and mixed green salad at 4500 meters!
Eventually after four huts and seven 4000 meter peaks reached it was time to descend back to zermatt, down the grenz glacier.

And several tricky sections of the low glacial snouts, up ladders, and 8 hours of travel, we made it back to the cog rail of the Gornergrat railway that would take us back to Zermatt.

- Alan Rousseau
A way to bring the women of Nepal opportunity 4 Dec 2024, 7:13 pm
In the shadow of Makalu, the 5th highest mountain in the world, is a remote area of the Himalayas where Mountain Madness has been supporting the development of a Women’s Safe House in Nepal in partnership with the nonprofit Changing Lives Nepal . We’d like to share Mina’s success story with you and a progress report from the “House of Prosperity.”
Mountain Madness, and our generous climbers and trekkers, have been raising funds to support the Changing Lives Nepal (CLN) Women’s Safe House since 2021. The Safe House is providing safe shelter, counseling, access to legal resources, and economic skills training to women victims of violence in a region where no such services existed before. With educational outreach to educate men and women about women’s rights and to begin to shift societal perspectives on violence against women, the Safe House stands as a model of community development.
The continued success of the project has brought reason for hope — such is Mina’s story below.
The project is near completion, but a few more goals need to be reached. We also encourage you to read the update below from Changing Lives Nepal and consider donating so other young women like *Mina get the resources they need to become the strong and independent women they have the right to be.


Mina’s Journey from Victim to Self-Reliance: Empowering Women, Restoring Hope
In May 2022, the Safe House opened its doors to women in rural Nepal who needed a lifeline — a refuge from violence, societal stigma, and isolation. Among the many women who have found support within its walls is Mina*, whose story is both heartbreaking and inspiring.
A Life Shattered by Violence
At just 15 years old, Mina became a victim of rape. For six months, she carried the trauma — and the resulting pregnancy — alone, hiding the truth from her family. But as her pregnancy became visible, so too did the weight of societal judgment. Shamed by her family and ostracized by her neighbors, Mina had no choice but to leave her village.
It was then that she found her way to the Safe House.
Finding Safety and Support
At the Safe House, Mina received the care and counseling she desperately needed. During her year-long stay, she gave birth to her baby in a supportive environment. The Safe House not only provided shelter but also pursued justice by filing a case against her perpetrator, though he ultimately fled to India.
This year, the Safe House took a significant step toward empowerment by introducing vocational training. With the support of the local government, four sewing machines and a trainer were provided to help the women develop income-generating skills. Mina, along with another resident, embraced this opportunity and learned to sew with skill and confidence.
A New Beginning
When it was time for Mina to leave the Safe House, she was given her own sewing machine — a tool that would change her life. With her newfound skills, she began working as a seamstress, earning over $100 a month — an average income in Nepal.
Perhaps most remarkably, the Safe House’s efforts extended beyond Mina, offering counseling to her family. These sessions helped repair their fractured relationship. Her father, once distant, decided to support her by helping her establish her business.
Today, Mina is not just surviving but thriving.
The Safe House is making a profound difference in women’s lives — such as Mina’s story below. The project is near completion, and you can help the new Safe House to open on schedule in March 2025
To make your tax-deductible donation Click Here


Why the Safe House Matters
Mina’s story underscores the vital role the Safe House plays in rural Nepal. For many women who face violence, societal stigma compounds their suffering, leaving them isolated and without resources. The Safe House provides a haven where they can heal, rebuild, and learn to stand on their own.
But there is still so much work to be done and we welcome you to help us finish the work.
Teamwork is at the core of the success of the Safe House project. CLN’s partnership with Mountain Madness and the generous donations from our guests, All the Sky Foundation , and Another Brick in Nepal have all paved the way for the Safe House to go from vision to reality, with the completion of a 16-room permanent home in 3 years. Started in a rented house, women of this region began to have a safe place in their community and better access to legal resources. The construction of a permanent Safe House, and the signed agreements with local government for future management, mean that this project will continue to grow and support women across the district for decades to come.
Looking Ahead: A Vision for 2025
Future goals for the Safe House include:
- Fully furnishing the building to create a comfortable and dignified living space.
- Completing the compound fencing to enhance security for the women and their children.
- Expanding skills-training programs to empower more women with tools for independence.
- Dedication in March 2025 and the local community taking over both funding and operations
With your support, we can continue transforming stories like Mina’s from tales of tragedy to triumph. Together, we can build a future where every woman has the opportunity to reclaim her life and her dignity.
*Name changed to protect privacy.
If it can ride, it can slide 13 Nov 2024, 12:00 am
Early season snow is here- get your avalanche awareness game started now with skills training before heading out on a backcountry tour or on a snow cat
With winter here in the Cascades and across the northern latitudes there are things to do besides just dream of pow. Exercise. And nothing wrong with waxing up your boards. But, equally important is getting yourself mentally ready to confront the hazards winter also brings.
There are lots of resources for getting yourself educated on the dangers of avalanches and how to manage the risks, including some of our courses listed below. But, one of the best for Northwest skiers and snowboarders is the Northwest Avalanche Center. They’re gearing up for the season and below you’ll find some great resource links and some things to think about before the snowpack gets big.


Written by Dallas Glass
When dealing with early-season avalanche hazards the bottom-line is simple: If there’s enough snow to ride, there’s enough snow to slide. Whether you’re out in the mountains hiking, hunting, skiing, climbing, snowboarding, or riding, approach steep smooth snow-covered slopes with caution and bring your avalanche rescue gear. Don’t let the date on the calendar fool you when you encounter winter-like conditions; early season avalanche fatalities have occurred.
You are most likely to encounter early season avalanche hazards in higher elevation terrain, on permanent snowfields, and in wind-loaded pockets. This can pose a dilemma since these are frequently the same locations where early-season recreational opportunities exist. Pay attention to how much snow is on the ground and where the wind may pile the snow deeper. This can help you recognize when you transition into areas of deeper snow. Limited information this time of year can make assessing avalanche hazard more difficult. When you find a steep smooth snowy slope assume it could avalanche, take time to make observations, and consider lower angle terrain. Early season conditions harbor numerous obstacles and can make even small avalanches deadly by carrying you through rocks, into trees, or over cliffs.
If you’re out in the mountains let us know what you find. You can share information with your avalanche community by submitting an observation.
NWAC is actively preparing for winter. Avalanche and mountain weather forecasts typically begin in mid to late November as the winter snowpack starts to build. In the meantime, take a moment to check over your gear, refresh on your snow and avalanche training, and get excited about the winter to come.
NWAC Staff


Thanks to NWAC for this great primer from a few years back, info applicable for every winter. If you’re inspired to get some more training for your winter adventures, below are some links to get your planning started with Mountain Madness.
Avalanche Education Courses (all follow the Avalanche Institute of Research and Education guidelines):
Rescue Course – one day
Level One – course work includes one evening lecture and two field days
Level Two – professional level certification
Backcountry skiing and snowboarding courses:
Backcountry Skiing Fundamentals Course — gets the basics covered and then some; scheduled trips available or custom courses
Splitboard Backcountry Basics — for first-time backcountry splitboarders, or those with some experience; lots of topics covered for both
Guided Trips:
Cascades Backcountry Ski Tours — choose your route, or let the guides find the secret stashes of pow for you
Backcountry Ski Touring - Making a Plan 17 Oct 2024, 6:30 pm
MM ski guide Stephen Heath gives some basic, but important advice on planning your backcountry adventure, in addition to taking an AIARE Level 1 Course
Getting to places like this doesn’t just happen. It takes some work, physical work of hauling yourself up the mountain. But even before that you have to put in the work of doing your homework.
It’s the quiet time at home, in a backcountry hut, or on the drive to your destination. It’s a necessary pre-tour routine, before you even put your gear on, when you set yourself up to make good decisions before you’re out in it.


My goal at this time is to pre-bias myself to make good choices for that day’s conditions. If I don’t do this beforehand and I’m faced with a beautiful line with blower pow then I’m probably going to build a narrative that allows me to ski that line because powder is so compelling and I WANT TO GO TO THERE.
This is why we pre-bias ourselves by ruling out terrain based on the day’s conditions before we’re staring at it longingly. It’s often a difficult decision, one that palces good judgement over desire. The terrain we choose then to interact with is one of the few things we have complete control over and it’s the primary way we can mitigate our exposure to avalanches.


Your local avalanche center has all the information you need to make these terrain choices for the day. Choosing where you’re going to go but also, and perhaps more importantly, where you’re not going to go.
Put in the time to dig into the avy forecast for your zone, not just reading the primary problems, but also the forecast discussion and any observations that were submitted.
Set yourself up for success, have a plan and be observant of what’s happening out there.
A scary story and time to starting thinking about how to make it safer in the backcountry this winter 30 Sep 2024, 6:30 pm
La Niña snowpack predicted for the 24 – 25 ski season- are you ready if you’re going into the backcountry?
Guide Jake Skeen’s qualifications speak for themselves- he knows snow, avalanches and how to get around in the mountains with the best of them. But, sometimes even the most experienced get taken down. His story from a few years back is a reminder of how things can go wrong when you least expect them; even if you’ve taken a AIARE Level 1 Course.
In 2020, I was caught in an avalanche that carried me 1,500’ through complex terrain (WS-AS-R1-D2‑O). It was in the middle of the COVID lockdown and I argued the case to myself that I could still ski tour responsibly, make good decisions and avoid any incidents that would require rescue and medical personnel to come into contact with each other unnecessarily. I clearly stretched that assumption too far. Some of my friends thought backcountry skiing during the pandemic was irresponsible, and others thought it was a reasonable socially distanced activity.
Three friends and I had a fun link up planned on Snoqualmie Pass — we were going to ski the east face of Mt Thomson and the south face of Alaska Mountain. Both involved a bit of top-down route finding and up to 45 degree skiing with some exposure. We had been in a spring diurnal cycle for weeks, and although the previous couple days had been especially warm, the forecast indicated we would get a solid freeze for our ski day.

The overnight freeze was not as good as we had hoped for. Booting up Thomson was punchy, however it was supportable to skis and we enjoyed corn snow on a nice E facing run down to Edds Lake. We then skinned up a frozen N/NW aspect to the top of Alaska mountain with the hopes of timing similar corn conditions on our S face descent (typically E facing slopes get cooked quicker than S facing due to the sun angle in the morning).
We were greeted to ripe corn snow at the top of Alaska. Without wasting much time, I dropped in first elated by the prime surface conditions on a beautiful mountain. After a couple hundred feet of fall line skiing we began traversing skier’s left to avoid cliff bands below us. The face is convex and it was hard to tell exactly which exit couloirs went clean so we hedged our bets and traversed a bit further to get to an obvious weakness that went clean without a doubt. We kept our distance and I was in front.
There were a couple of spine/rib features that we had to traverse across and I could feel a huge difference in the SW facing side of these spines vs the SE side. I skied across the SE side of the first spine quickly and was easily able to push a small wet loose slide off my downhill ski. One more spine to cross, same tactic — I thought. This one was a little bigger and I felt the wet snow entraining more than the previous spine. Feeling spooked, I skied fast to get off of this sun-cooked aspect but my skis were getting pulled downslope. I looked uphill and saw a slab fail above me and I was a part of this moving mass before I knew it.

I was moving very fast, there were moments of complete darkness and glimpses of daylight. I tried to keep my head uphill to avoid impact as the slope I was careening down was littered with rocks and cliff bands. I felt one ski pop off and the other snapped in half instead of releasing because my toe pieces were locked. After what felt like an eternity in the washing machine I started slowing down. The debris fanned out on the lower apron of the face and I came out just fine. I pulled myself out of the path and sat on an exposed dirt outcropping, shaking with adrenaline.
I yelled up to my friends a couple times but they were out of sight. They didn’t see me get swept away as I was hidden by the terrain feature that initiated the slide. A few minutes went by and I saw them skiing down spaced out with beacons out. After getting their attention, they grabbed my other ski and two poles and we grouped up. Getting out with a broken ski was no easy task but we were able to splint it together well enough to make it work with hose clamps and a probe.
I can pinpoint numerous heuristic traps/mental shortcuts that ultimately resulted in a lack of deliberation and communication regarding snow stability that day. There were no glaring red flags, we were in a group of 4 experienced guides and avalanche professionals, and we were moving quickly. We had our sites set on a tour plan and we didn’t take enough time to discuss the nuances of the terrain and the changing conditions.
Wet avalanches are statistically less dangerous to people than dry avalanches for a number of reasons. The instability is less likely to persist as long, it usually coincides with bad skiing conditions, and the majority of wet avalanches don’t involve a slab. I’ve always respected the destructive potential of wet slabs in particular, but mostly in the context of historical events. For forecasters, wet slabs are a total headache to accurately predict. However, for recreational skiers, avoiding skiing either after extended periods of warm weather without overnight freezes or big rain events seems like a winning strategy. There’s always a middle ground though — it’s not just either easy to manage wet loose or big scary wet slab hazard. Going back to the basics and choosing simpler terrain for a marginal overnight freeze is my biggest take away. Also, while outdoor recreation seems widely encouraged now during this pandemic — avoiding risky activities will certainly help curb the spread of the virus.
— — — — — — — — — — — — — — —
Join Jake this winter on a Level 1 avalanche course and you’ll undoubtedly hear some more stories and be able to take home some valuable lessons learned by Jake in real time.

Backcountry Ski Repair kit 13 Sep 2024, 5:00 pm
It may barely even be fall, but now is a good time to start getting organized before the snow flys. One place to start, repair kits for those unexpected breaks.
Written by Stephen Heath
In the backcountry we rely on our skis, bindings, skins, and boots to take us long distances into remote corners of the backcountry. We stress them and test their limits without thinking much about it and take it for granted that they’ll bring us back to the trailhead without any hiccups. But gear breaks, especially lightweight gear with lots of moving parts. Are we prepared if the equipment that we’re relying on suddenly is no longer functioning? If you can’t click into your skis how will you get back to the car? These and other questions are addressed in our Backcountry Ski Fundamentals Course, but you can get started preparing with some things listed below.
It’s vital that everyone carries some sort of repair kit in the backcountry so you can fix your gear or rig up a way to get home. In the photos you’ll find pictures of my repair kit that lives in my pack. I’ve used it many times to fix mine and other peoples gear. The tools I’ve used the most are the ski straps. These can fix so many problems. Make sure you carry the long ones and not the shorties, the short ones are pretty useless in my experience. The other is the Black Diamond binding buddy, along with various bits to fit any screw you may encounter.

My Repair Kit Includes: Leatherman Skeletool, binding buddy with bits, 5 long ski straps, scraper, skin wax, skin tail piece and clip, powder basket, 3 zip ties, large-small pipe clamps, 20ft of cord, hex wrench tool.
This all nestles into a small pouch and comes with me on every tour.